
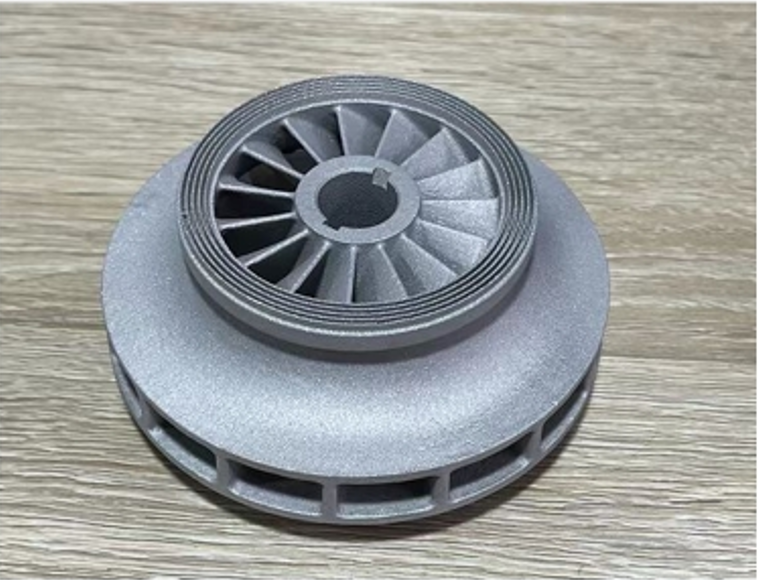
3D-printed molds for injection molding can reduce the time and upfront investment needed to produce a small number of molded plastic parts. Instead of machining an entire mold from aluminum or steel, engineers can print the cavity, core, or mold inserts and use them for short molding trials.
That sounds attractive, especially when a product is still being tested.
But a 3D-printed mold is not simply a cheaper version of a steel mold.
Heat resistance, injection pressure, cooling, surface quality, part geometry, resin selection, and expected quantity all affect whether the approach will actually work.
For some prototype projects, it can be a practical shortcut. For others, a simple aluminum or soft-steel mold may deliver better results with fewer restrictions.
The important question is not whether 3D-printed tooling is possible.
It is whether it makes sense for your part, material, quantity, and validation goal.
What Are 3D-Printed Molds for Injection Molding?
Traditional injection molds are normally machined from metals such as aluminum, P20, 718H, S136, H13, or other mold steels depending on the application.
With 3D-printed molds for injection molding, the cavity and core surfaces are instead produced through an additive manufacturing process.
Depending on the system, the printed material may be a high-temperature photopolymer, reinforced polymer, or another material designed to withstand limited molding temperatures and pressures.
The printed components may be:
- A complete small mold
- Cavity and core inserts
- Replaceable prototype inserts
- Inserts mounted inside a metal mold base
The insert approach is often more practical because the steel or aluminum mold base can provide structural support while only the molding geometry is printed.
The goal is usually not long-term production.
It is normally to produce enough injection molded parts to answer an engineering or commercial question.
Why Use 3D-Printed Molds for Injection Molding?
The main attraction is speed.
Conventional mold manufacturing may require material preparation, CNC machining, EDM, grinding, fitting, polishing, assembly, and trial molding.
A printed insert can remove some of those steps.
That can be useful when the project needs only a small number of actual molded parts.
Typical applications include:
- Early product validation
- Design comparison
- Assembly testing
- Material testing
- Functional prototypes
- Customer samples
- Small pilot batches
- Early market evaluation
This is especially relevant when the customer does not yet want to invest in full production tooling.
However, buyers should distinguish between needing a prototype part and needing a prototype produced by injection molding.
If only shape and assembly need to be checked, directly 3D printing the plastic part may be faster.
A mold becomes more useful when the test requires the actual injection molding process or a production resin that cannot be represented well by a directly printed prototype.
Can 3D-Printed Molds Really Reduce Tooling Cost?
They can, but only under the right conditions.
A printed insert generally requires less conventional machining than a complete steel production mold. For a simple prototype part, that can reduce the initial tooling investment.
But tooling price alone does not tell the whole story.
You also need to consider:
- Mold design time
- Printed insert cost
- Mold base or insert holder
- Finishing work
- Trial time
- Failed inserts
- Longer molding cycles
- Replacement inserts
- Limited production quantity
Suppose a printed insert is inexpensive but needs to be replaced several times during a pilot run.
A simple aluminum mold may then be more economical overall.
This is why 3D-printed molds for injection molding are most attractive when the required quantity is small and the main objective is learning quickly rather than minimizing the long-term cost per part.
For projects requiring hundreds or thousands of molded parts, our guide to low-volume injection molding explains how aluminum, soft steel, and prototype tooling can be used for small-batch production.
How Long Do 3D-Printed Injection Molds Last?
There is no useful universal answer such as “a 3D-printed mold lasts 100 shots.”
Tool life depends too heavily on the application.
A printed mold used for a small, simple PP component is operating under very different conditions from one molding a glass-filled engineering resin with deep ribs and difficult ejection.
Important factors include:
- Printed mold material
- Plastic resin
- Melt temperature
- Mold temperature
- Injection pressure
- Part geometry
- Wall thickness
- Gate design
- Surface area
- Ejection force
- Cooling time
Tool wear can also occur in different ways.
The insert may crack, deform, wear around the gate, lose dimensional accuracy, or become damaged during ejection.
For this reason, tool life should normally be treated as a project-specific estimate, not a guaranteed number taken from another mold.
Material Choice Is a Major Limitation
The plastic resin has a big influence on whether printed tooling is practical.
Materials with relatively forgiving processing conditions are generally easier on the mold.
Higher-temperature engineering plastics are more demanding.
Filled materials can create additional problems because reinforcing fibers or mineral fillers may increase abrasion.
The molding temperature also affects how much heat is transferred into the printed insert.
Compared with metal tooling, polymer-based molds typically have much lower thermal conductivity.
That changes the way the part cools.
The result may be:
- Longer cooling time
- Longer overall cycle time
- Different shrinkage behavior
- Greater dimensional variation
- Local hot spots
- More difficult process optimization
If the objective is to simulate eventual mass production as closely as possible, these differences need to be understood before selecting printed tooling.
Injection Pressure Cannot Be Ignored
Injection molding generates substantial cavity pressure.
A production steel mold can withstand repeated molding cycles because the cavity, core, support plates, and mold structure are designed around those loads.
Printed tooling has much less margin for error.
Long flow lengths, thin walls, small gates, or difficult-to-fill materials can require higher pressure.
That may increase the risk of:
- Insert deformation
- Cracking
- Flash
- Parting-line movement
- Gate damage
- Dimensional instability
For 3D-printed molds for injection molding, the part should therefore be reviewed specifically for low-stress filling.
Simply taking a mold design intended for steel and printing it in polymer is not always a workable approach.
Gate size, gate position, wall thickness, flow length, and injection speed may need to be reconsidered.
Part Geometry Matters More Than Expected
Simple parts are much easier candidates for printed tooling.
A small cover with moderate wall thickness and straightforward ejection is very different from a part containing:
- Deep ribs
- Thin walls
- Large projected area
- Long flow distances
- Fine textures
- Tight tolerances
- Deep bosses
- Side actions
- Large undercuts
Each additional feature can increase mold stress or make ejection more difficult.
A deep rib, for example, can increase the surface area gripping the core.
That means more ejection force is required.
With a steel insert, this may be routine.
With a printed core, the same force may create premature damage.
This is one reason a DFM review should still be performed even when the tooling is intended only for prototypes.
Our Injection Mold Design Guide covers gate location, cooling, ejection, parting lines, and other mold-design factors that also affect prototype tooling.
Surface Finish and Accuracy Have Limits
Buyers sometimes assume that because a printed mold is produced directly from CAD, the molded component will automatically match the CAD model accurately.
The real process is more complicated.
Accuracy may be affected by:
- Printer resolution
- Print orientation
- Post-curing
- Surface finishing
- Thermal expansion
- Injection pressure
- Insert deformation
- Plastic shrinkage
Printed mold surfaces may also require sanding, polishing, coating, or other finishing depending on the required appearance.
For early functional samples, this may be completely acceptable.
For high-gloss cosmetic parts, optical components, or products with tight surface requirements, it can become a limitation.
The correct tooling choice therefore depends on what the sample is intended to prove.
Cooling Is Different From a Metal Mold
Cooling is easy to underestimate.
Steel and aluminum conduct heat much more effectively than polymer-based printed tooling.
That means the process window used with a production mold may not transfer directly to a printed mold.
Cooling may need to be slower.
The mold may also require time between shots to prevent excessive heat buildup.
For ten prototype parts, that may not matter very much.
For several hundred parts, it can become a serious production issue.
A low tooling price loses some of its advantage if the molding cycle becomes extremely long or production needs to stop repeatedly so the insert can cool.
This is another reason to evaluate total project cost, not just mold manufacturing cost.
When Do 3D-Printed Molds Make Sense?
There are several situations where printed tooling can be a useful option.
Very Low Quantities
If only a limited number of injection molded samples are needed, investing in a conventional production mold may not make economic sense.
Design Is Still Changing
Printed inserts can allow engineers to test a geometry before committing to more expensive tooling.
Actual Resin Testing Is Required
Sometimes a directly printed prototype cannot reproduce the material behavior required for testing.
Injection molding the intended resin may provide more useful information.
Fast Engineering Feedback Is More Important Than Cycle Time
A prototype mold does not need to run at mass-production speed if the objective is simply to obtain parts for testing.
Geometry Is Relatively Simple
Simple parts with reasonable wall thickness, moderate flow length, and straightforward ejection are generally better candidates.
For projects where production-quality parts are required before investing in hardened tooling, Prototype Injection Molding using aluminum or soft-steel molds is another option worth comparing.
When Should You Avoid 3D-Printed Molds for Injection Molding?
Printed tooling becomes less attractive when the project starts to behave like a real production program.
Be cautious when you need:
- Large quantities
- Fast cycle times
- High-temperature materials
- Abrasive filled materials
- Very tight tolerances
- High-gloss surfaces
- Large parts
- Long flow lengths
- High injection pressure
- Complex sliders or lifters
- Long-term repeatability
In these situations, conventional tooling generally provides better process stability and tool life.
There is also a point where repeatedly replacing prototype inserts simply stops making economic sense.
If the product design is already stable and demand is reasonably certain, it may be better to invest directly in an appropriate metal mold.
3D-Printed Mold vs Aluminum Mold
Buyers comparing prototype tooling often overlook aluminum molds.
Aluminum sits between printed tooling and production steel tooling.
Compared with a printed polymer insert, an aluminum mold generally offers:
- Better heat transfer
- Better dimensional stability
- Higher pressure resistance
- Longer usable life
- More consistent molding cycles
- Better suitability for larger quantities
The trade-off is higher initial tooling cost and additional machining time.
If you need only a handful of parts, printed tooling may still make sense.
If you need hundreds or thousands of parts, aluminum becomes much more interesting.
The expected quantity should therefore be discussed early, not after the prototype mold has already been selected.
3D-Printed Mold vs Steel Mold
A steel mold is intended for a different job.
Production tooling is designed around:
- Repeated cycles
- Process stability
- Cooling efficiency
- Dimensional repeatability
- Maintenance
- Mold life
- Production economics
The upfront investment is higher because the tool requires more material, machining, fitting, and finishing.
But once production volume increases, the tooling cost is distributed across many more parts.
If your product is already validated and mass production is planned, conventional injection mold manufacturing will normally provide a more appropriate long-term solution than trying to extend printed tooling beyond its intended purpose.
Questions Buyers Should Ask Before Choosing Printed Tooling
Before approving 3D-printed molds for injection molding, ask the supplier a few practical questions.
What Are We Trying to Validate?
Is the purpose:
- Fit?
- Assembly?
- Appearance?
- Mechanical performance?
- Material behavior?
- Market testing?
- Production process?
The answer can completely change the recommended prototype method.
How Many Parts Are Actually Required?
Do you need 10 parts, 100 parts, or several thousand?
Do not choose tooling until this is reasonably clear.
Which Resin Will Be Molded?
Material processing temperature and abrasiveness may determine whether printed tooling is practical at all.
What Happens If the Insert Fails?
Ask whether a replacement insert can be printed quickly and whether replacement cost is already considered.
Do These Parts Represent Production Quality?
This is especially important when samples will be used for dimensional approval or functional testing.
The limitations of the prototype process should be documented so that buyers do not mistake prototype-tool behavior for final production-tool performance.
Are 3D-Printed Molds Really a Replacement for Traditional Tooling?
Usually, that is the wrong way to look at them.
3D-printed molds for injection molding are better viewed as another tool in the product-development process.
They can fill a gap between directly 3D printing a prototype part and investing in conventional injection mold tooling.
For the right application, that gap is useful.
You can test real molded material, produce a small group of functional samples, and learn something about the design before committing to a larger tooling investment.
But once quantities increase, cycle time matters, tolerances become tighter, or long-term process stability is required, the advantages of metal tooling become much stronger.
The decision should therefore be based on what the project needs right now, while also considering what will happen after the prototype stage.
Final Thoughts
3D-printed molds for injection molding can be useful when speed, low initial investment, and a small number of molded samples matter more than long mold life or production efficiency.
Their value is strongest during early product development.
They are much less convincing when treated as a low-cost substitute for a production mold.
Before selecting the process, compare the expected quantity, resin, geometry, tolerance, surface requirements, cycle time, and future production plan.
For a few early validation parts, printed tooling may be enough.
For a larger pilot batch, aluminum or soft-steel tooling may make more sense.
And once the product is ready for stable repeat production, a properly designed production mold normally becomes the more economical choice.
The best tooling option is not necessarily the cheapest mold to build. It is the one that provides the information or production capability the project actually needs at that stage.