
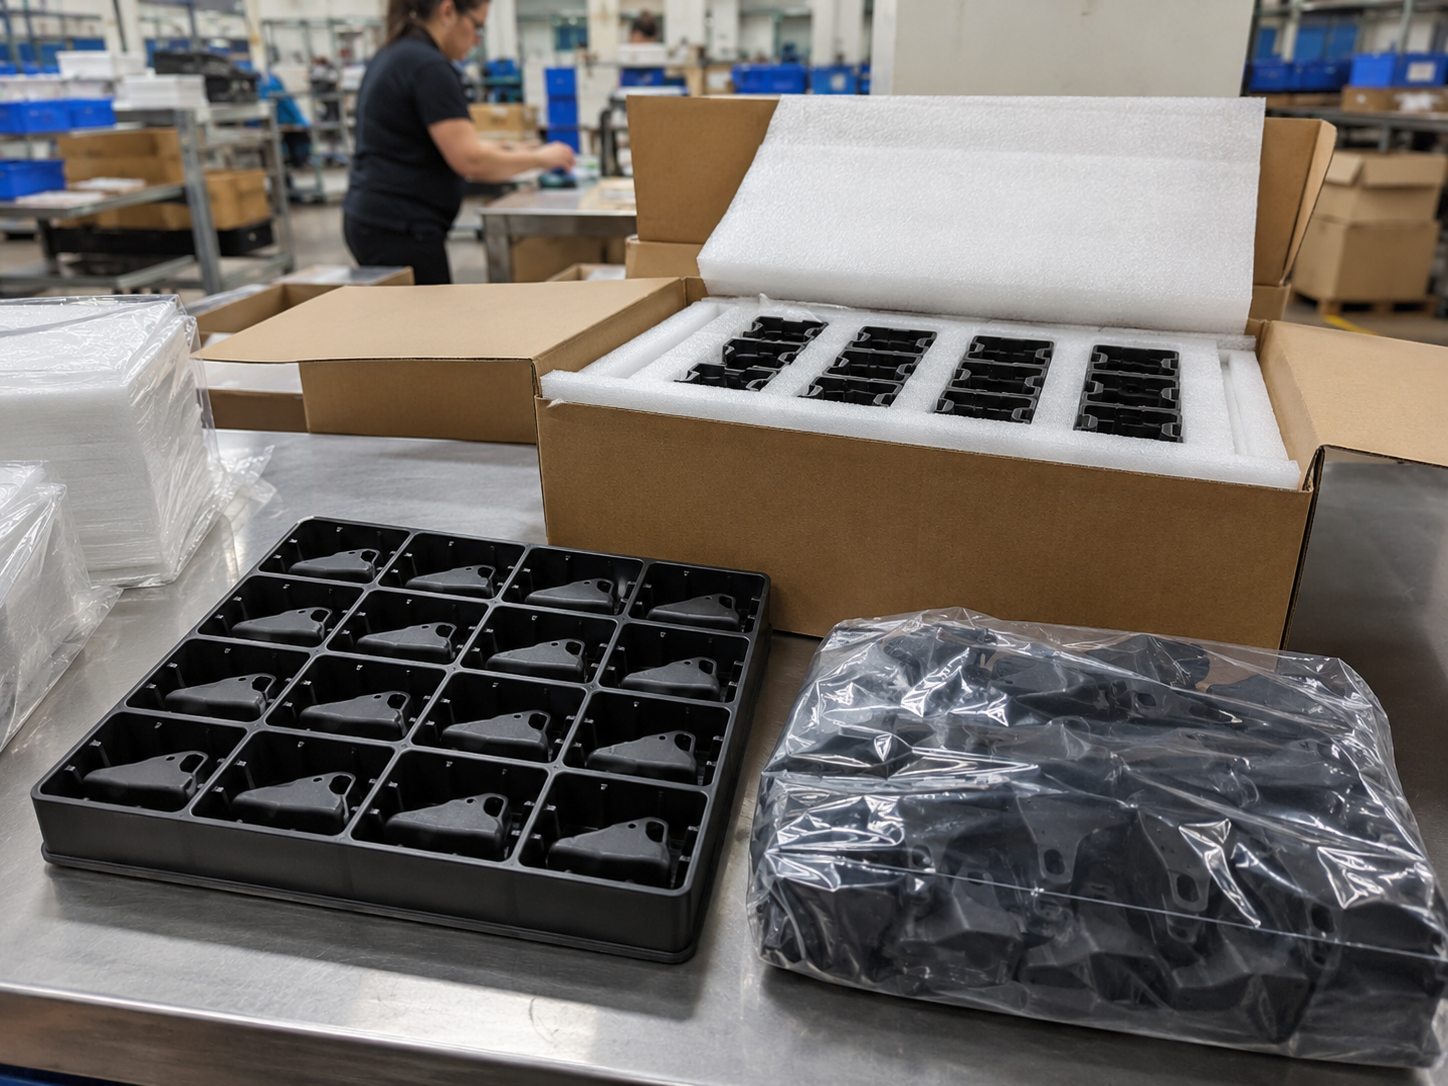
An injection molding packaging standard helps protect plastic parts during storage and shipping. Good packaging should prevent scratches, deformation, dust, moisture, and impact damage before the parts reach the customer.
Packaging should not be treated as the last simple step after production. The correct method depends on the part size, surface finish, shape, weight, and shipping distance.
At Fentor Mold, we usually decide the packaging method based on the actual part and the customer’s delivery requirements.
Why an Injection Molding Packaging Standard Matters
Plastic parts can be damaged even when the molding quality is good.
Common shipping problems include:
- Scratches
- Surface rubbing
- Broken clips
- Bent thin walls
- Deformed large parts
- Dust contamination
- Oil stains
- Pressure marks
- Parts hitting each other inside the box
Some damage appears immediately.
However, other problems are only found when the customer opens the boxes or starts assembly.
For this reason, an injection molding packaging standard should protect the part from the time it leaves the molding machine until final delivery.
Injection Molding Packaging Standard for Cosmetic Parts
Appearance parts need more protection than normal internal parts.
This is common for:
- Consumer housings
- Automotive trim
- Appliance covers
- Display bezels
- Glossy plastic parts
- Textured surfaces
- Painted parts
- Transparent parts
These parts can easily show scratches or rub marks.
Therefore, parts should not move freely inside the carton.
A soft PE bag, foam sheet, tray, or separator can help prevent direct contact between parts.
For high-gloss surfaces, even light rubbing can leave visible marks.
In this case, separate packaging for each part may be necessary.
Protect Transparent Parts From Scratches
Transparent parts need special care.
Small scratches may make the part look dirty or defective.
For PC, PMMA, or clear covers, the packaging should prevent surface-to-surface contact.
A practical method may include:
- One part per PE bag
- Soft protective film
- Individual tray position
- Foam separation
- Clean outer carton
Do not use rough paper directly against polished surfaces.
Also keep the packaging area clean.
Dust trapped between two parts can create scratches during transportation.
Injection Molding Packaging Standard for Large Plastic Parts
Large plastic parts have different risks.
They may not scratch easily, but they can deform.
For example, large housings, panels, and covers may bend if boxes are stacked too high.
Thin edges can also change shape under pressure.
Therefore, the packaging should support the part in strong areas.
Avoid placing load on:
- Thin walls
- Long edges
- Snap features
- Decorative surfaces
- Unsupported flat areas
Foam blocks or custom inserts can support the correct points.
For very large parts, the carton may also need extra internal support.
Injection Molding Packaging Standard for Thin-Wall Parts
Thin-wall parts can change shape during long storage or transport.
This becomes more serious when many parts are packed tightly together.
If the parts are stacked, the weight of the upper parts can press on the lower parts.
So, the injection molding packaging standard should define:
- Maximum parts per stack
- Stack direction
- Layer height
- Separator position
- Box loading limit
The correct direction is very important.
Some parts are strong in one direction but weak in another.
A simple packaging trial before mass production can prevent many problems later.
Injection Molding Packaging Standard for Clips and Small Features
Small clips and hooks are easy to break.
This is common on housings, brackets, covers, and connectors.
The main risk comes from contact with other parts.
If one clip sits against a hard surface, vibration during shipping may break it.
Therefore, clips should not carry the weight of other parts.
Use trays, separators, or part orientation to keep these features free from pressure.
For parts with many clips, custom trays are often safer than loose bulk packing.
Use Trays for Precision Parts
Trays are useful when the part needs fixed positioning.
They can help protect:
- Small precision parts
- Connectors
- Medical components
- Electronic housings
- Painted parts
- Parts with fragile clips
Each part stays in its own position.
As a result, parts do not rub against each other.
Trays also make counting easier.
However, tray design should still be checked carefully.
The tray should not press on cosmetic or critical areas.
PE Bags, Foam, and Separators
Different packaging materials solve different problems.
PE bags help protect against dust and surface contact.
Foam can absorb impact.
Separators stop parts from touching each other.
Paperboard can divide rows or layers.
However, using more packaging is not always better.
Too much pressure from foam can deform soft or thin parts.
A tight bag may also leave marks on a high-gloss surface.
Therefore, packaging material should match the part.
Keep Parts Clean Before Packing
Good packaging cannot fix dirty parts.
Before packing, check for:
- Oil
- Dust
- Loose plastic chips
- Water
- Grease
- Finger marks
Appearance parts should enter the bag clean.
For some projects, workers may need gloves.
The packing table should also stay clean.
This is especially important for white, transparent, or glossy products.
Injection Molding Packaging Standard for Multi-Cavity Parts
Multi-cavity molds may produce parts from several cavities at the same time.
In some projects, buyers need cavity traceability.
If so, do not mix all parts without control.
The packaging may need:
- Cavity number
- Production batch
- Date
- Quantity
- Material lot
This information helps if a quality problem appears later.
For long-term Injection Molding Production, clear batch records also make production traceability easier.
Control the Quantity in Each Box
Each carton should have a fixed quantity.
Do not let packing quantity change from box to box without reason.
A fixed quantity helps with:
- Inventory
- Receiving
- Counting
- Shipping documents
- Production planning
It also helps control box weight.
If a carton becomes too heavy, the risk of part damage can increase.
Heavy boxes are also harder to handle safely.
Do Not Overfill the Carton
Overfilled cartons often create hidden damage.
The top layer may be pressed when the box closes.
This pressure can cause:
- Warpage
- Surface marks
- Broken clips
- Bent edges
The box should close without pressing hard on the parts.
If needed, reduce the quantity per carton.
A slightly larger box is not always the answer.
Too much empty space can also let parts move.
The goal is controlled space, not maximum space.
Control Part Movement During Transit
Transportation creates vibration.
Even if the box is not dropped, parts can move thousands of times during a long trip.
This is why internal movement matters.
Shake the packed box gently.
If parts move freely, the packaging may need improvement.
The inner packaging should keep parts stable without creating too much pressure.
For sensitive products, a simple drop or vibration test can be useful before final approval.
Injection Molding Packaging Standard for Sea and Air Freight
The shipping method also affects packaging.
Air freight is usually faster.
However, cartons still pass through several handling steps.
Sea freight takes longer and may expose goods to more humidity.
Therefore, sea shipments may need more attention to moisture protection.
For long overseas transport, consider:
- Strong export cartons
- Moisture protection
- Inner plastic bags
- Desiccant when needed
- Pallet wrapping
- Strong corner protection
Fentor Mold also applies detailed protection to tooling shipments. Our guide on How We Prepare an Injection Mold for Overseas Shipping explains how inspection, protection, and export packaging reduce transport risk for injection molds.
Use Pallets When Needed
Pallets can protect cartons from direct floor contact.
They also make loading and unloading easier.
A good pallet setup should keep cartons stable.
Use:
- Stretch film
- Straps
- Corner protectors
- Stable stacking
Do not let cartons hang outside the pallet edge.
Also avoid stacking heavy boxes on light cartons.
The pallet should remain stable during forklift handling.
Injection Molding Packaging Standard for Labels and Traceability
Labels are part of the injection molding packaging standard.
A good label may include:
- Part number
- Part name
- Quantity
- PO number
- Batch number
- Production date
- Material
- Cavity number if needed
- Box number
- Customer name
For example:
Box 3 of 12
This helps the buyer confirm whether the shipment is complete.
For export orders, the label format should be agreed before shipment.
Packaging Should Match the Customer’s Assembly Process
Packaging is not only about protection.
It can also affect assembly efficiency.
For example, if parts arrive in the correct direction inside trays, workers may place them directly into the next process.
However, if all parts are mixed in a large bag, operators must sort and turn each part.
Therefore, buyers should tell the supplier about any special assembly needs.
A better packaging method may reduce handling time at the customer’s factory.
Test the Injection Molding Packaging Standard Before Large Orders
For a new part, do not wait until the full order is finished to check packaging.
Pack a small batch first.
Then check:
- Part fit
- Box weight
- Stack pressure
- Surface contact
- Part movement
- Label position
If the part is sensitive, simulate normal handling.
A small packaging test is much cheaper than replacing damaged parts after overseas delivery.
Record the Approved Packaging Method
Once the buyer approves the packaging, record it.
Useful records include:
- Packaging photos
- Box size
- Parts per box
- Tray type
- Bag type
- Separator method
- Pallet method
- Label example
This becomes the standard for later batches.
It also helps prevent changes when different workers pack the same product.
At Fentor Mold, we prefer to keep approved packing details with the production requirements for repeat orders.
Injection Molding Packaging Standard Checklist
Before shipment, use a simple checklist:
| Check Item | What to Confirm |
|---|---|
| Part surface | No scratches or dirt |
| Part orientation | Correct direction |
| Clips and hooks | No pressure on fragile areas |
| PE bag | Correct type and size |
| Foam | Enough protection without deformation |
| Tray | Part fits correctly |
| Separators | Parts do not touch |
| Box quantity | Fixed quantity |
| Box weight | Easy and safe to handle |
| Empty space | Parts cannot move freely |
| Labels | Correct and readable |
| Batch info | Traceable when needed |
| Pallet | Stable and protected |
| Final check | No damage after packing |
Final Thoughts
An injection molding packaging standard should protect the part, not just hold it inside a box.
The correct method depends on the product.
Glossy parts need scratch protection. Thin-wall parts need support. Large parts need deformation control. Clips and small features need space around them.
In addition, buyers should control carton quantity, labels, batch records, and pallet loading.
At Fentor Mold, we treat packaging as part of the production process because the part is not truly finished until it reaches the customer in good condition.
A good molded part that arrives damaged is still a rejected part.