
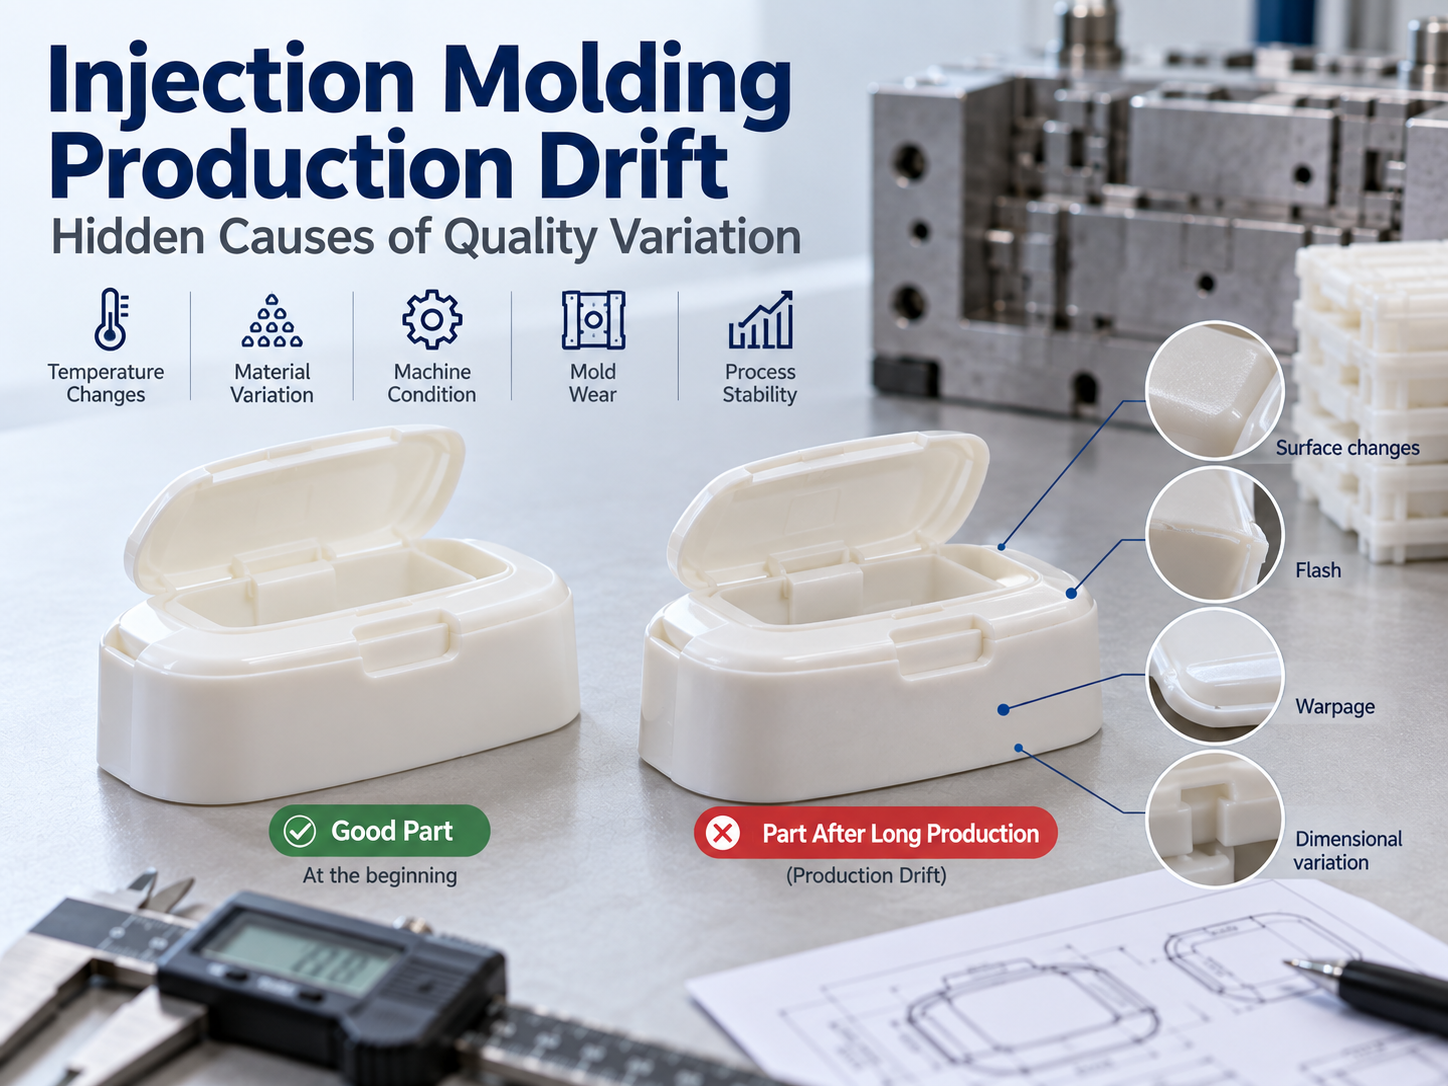
Injection Molding Production Drift happens when a molding process slowly changes during production.
At first, the parts may look good. The dimensions may also pass inspection.
However, after several hours or thousands of cycles, problems may appear.
A dimension may move toward its tolerance limit. Flash may become worse. Warpage may increase. Also, assembly may become tighter or looser.
This can happen even when no one changes the machine settings.
So, buyers often ask an important question:
Why did a stable process start making different parts?
Usually, there is no single cause.
Instead, material, mold temperature, cooling, machine condition, and mold wear may all play a part.
What Is Injection Molding Production Drift?
Injection Molding Production Drift means the molding result changes over time.
The machine may still be running normally. The settings may also look the same.
However, the molded parts are no longer exactly the same.
Common changes include:
- Dimensions moving
- Part weight changing
- More flash
- More warpage
- Different gloss
- Gate marks changing
- More visible weld lines
- Harder ejection
- Tighter assembly
- Larger cavity differences
At first, these changes may be small.
However, if production continues, they may become serious enough to cause rejects.
Why Injection Molding Production Drift Matters
A mold trial is usually short.
During the trial, engineers watch the machine closely. The mold is also clean. In addition, the material is prepared carefully.
Mass production is different.
The mold may run for many hours without stopping.
During this time, many conditions can change.
For example:
- Mold temperature rises
- Cooling water changes
- Resin moisture changes
- Material lots change
- Machine parts become hotter
- Vents become dirty
- Mold parts wear
- Operators change shifts
Therefore, a process that looks stable during a short trial may change during long production.
For this reason, making a few good samples is not enough.
The process must stay stable over time.
Before long production begins, both the mold and the process should be ready for stable running. Our Injection Molding Production service focuses on process control, consistent part quality, and stable production conditions.
Injection Molding Production Drift Can Start With Mold Temperature
Mold temperature is one of the first things to check.
At the start, the mold may still be cool.
However, after hundreds of cycles, the mold steel becomes hotter.
As a result, part dimensions can change.
Mold temperature can affect:
- Shrinkage
- Warpage
- Part weight
- Surface appearance
- Cooling time
Large molds are often more sensitive.
Also, parts with both thick and thin areas may change more.
Therefore, critical dimensions should not be approved from only the first few shots.
Instead, the mold should first reach a stable working temperature.
Cooling Water Changes Can Affect Part Quality
Cooling does not always stay the same during production.
For example, water temperature may rise.
Flow may also become weaker. In addition, a cooling channel can slowly become blocked.
When cooling changes, the part may change too.
Possible results include:
- More warpage
- Longer cooling time
- Uneven shrinkage
- Dimensional changes
- Hot spots
- Ejection problems
Also, one side of the mold may become hotter than the other.
As a result, the part may slowly change shape.
Therefore, cooling should be treated as part of process control.
It is not only a mold design issue.
Injection Molding Production Drift Can Come From Material Changes
Plastic material is another common source of variation.
Even when the material grade stays the same, its condition can change.
For example:
- Moisture level changes
- Material lot changes
- Regrind percentage changes
- Drying time changes
- Drying temperature changes
- Masterbatch ratio changes
Some materials are more sensitive than others.
For example, PA, PC, PBT, and PET need good moisture control.
If drying changes, the molding result may also change.
Also, glass-filled materials may show changes in flow and shrinkage.
Therefore, material conditions should stay stable during production.
Resin Moisture Can Create Hidden Quality Variation
Moisture does not always cause an obvious defect at once.
At first, you may only see a small change in appearance or dimensions.
Later, the problem may become worse.
Possible effects include:
- Silver streaks
- Lower strength
- Surface defects
- Dimensional changes
- Unstable filling
Therefore, drying conditions should be recorded for moisture-sensitive materials.
Also, dried material should not stay exposed for too long.
Otherwise, it may absorb moisture again.
Machine Temperature Can Change During Long Production
The injection molding machine also changes as it runs.
For example, hydraulic oil becomes warmer.
The barrel and screw also reach a more stable temperature.
As a result, the real molding condition may slowly change.
This can happen even when the machine settings stay the same.
Possible changes include:
- Injection speed
- Injection pressure
- Cushion
- Shot size
- Plasticizing
- Part weight
Therefore, production data should be checked over time.
The values on the machine screen are useful.
However, the real molded parts are more important.
Injection Molding Production Drift Can Come From the Check Ring
The check ring helps control the amount of plastic pushed into the mold.
If it does not seal well, the shot size may change.
As a result, several problems may appear:
- Part weight variation
- Short shots
- Sink marks
- Dimensional variation
- Unstable packing
The problem may only happen from time to time.
Therefore, it can be hard to find.
Operators may keep changing pressure or shot size.
However, the real cause may be machine wear.
So, if part weight becomes unstable, the check ring is worth checking.
Mold Wear Can Slowly Change Good Parts
Mold wear is another major cause of Injection Molding Production Drift.
Wear does not usually happen in one cycle.
Instead, it develops slowly.
Common wear areas include:
- Parting surfaces
- Shut-offs
- Sliders
- Lifters
- Ejector holes
- Inserts
- Guide parts
- Gates
For example, a shut-off may fit well when the mold is new.
After many cycles, the gap can become larger.
As a result, small flash may appear.
At first, the operator may reduce pressure.
The flash may disappear.
However, lower pressure may later cause filling problems.
So, a mold problem can slowly become a process problem.
If the problem comes from worn shut-offs, sliders, vents, or cooling areas, process changes may only hide it. Our Injection Mold service covers mold design, manufacturing, trial, modification, and tooling support.
Flash That Slowly Gets Worse Should Not Be Ignored
Flash is a common sign of production drift.
If flash appears suddenly, process settings may be the cause.
However, if flash becomes worse slowly, the mold should also be checked.
Possible causes include:
- Shut-off wear
- Parting surface damage
- Slider wear
- Mold movement
- Higher mold temperature
- Guide component wear
Reducing injection pressure may help for a short time.
However, it may only hide the real problem.
Therefore, if the cause is mechanical wear, the mold should be repaired.
Dirty Vents Can Cause Injection Molding Production Drift
Venting can also change during production.
At the start, the vents may be clean.
Later, deposits can build up.
As a result, air becomes harder to remove.
This can cause:
- Burn marks
- Short shots
- Weak weld lines
- Higher filling pressure
- Unstable filling
The operator may then increase pressure.
However, this may create flash somewhere else.
Therefore, vent cleaning should be checked before making large process changes.
Sometimes, a simple cleaning solves the problem.
Gate Wear Can Change Filling Over Time
The gate sees high-speed plastic flow during every cycle.
Over time, it may wear.
This is especially common with glass-filled materials.
As the gate becomes larger, it can change:
- Filling speed
- Packing
- Gate freeze time
- Part weight
- Dimensions
Also, one gate may wear faster than another in a multi-cavity mold.
As a result, cavity balance may become worse.
Therefore, a mold that was balanced at the beginning may become unbalanced later.
Injection Molding Production Drift in Multi-Cavity Molds
Multi-cavity molds need extra attention.
This is because each cavity can change in a different way.
For example, cavity 1 may stay stable.
However, cavity 4 may start to show flash.
At the same time, cavity 6 may become harder to fill.
Possible causes include:
- Gate wear
- Cooling differences
- Dirty vents
- Insert wear
- Cavity damage
- Local temperature changes
Therefore, parts should stay linked to their cavity number.
If all parts are mixed together, the source of the problem may be hidden.
Our article on Multi-Cavity Injection Molding explains why cavity tracking is important during production.
Dimensions Can Drift Even When Every Part Still Passes
Production drift does not always create bad parts at once.
For example, imagine the drawing tolerance is:
40.00 ±0.15 mm
At the start, parts measure around:
40.01 mm
Several hours later, they measure:
40.08 mm
Later, they reach:
40.13 mm
All parts still pass.
However, the trend is clear.
The process is moving toward the upper limit.
Therefore, buyers should not look only at PASS or FAIL.
Instead, they should also watch the direction of the data.
Injection Molding Production Drift Can Reduce Cpk
Cpk can help show whether the process is becoming less stable.
For example, the process may start with good capability.
Later, variation may increase.
Alternatively, the average dimension may move toward one tolerance limit.
Both changes can reduce Cpk.
Therefore, Cpk can give an early warning.
This can happen before many bad parts are made.
For critical dimensions, regular capability checks can be useful.
Process Settings Should Not Be Changed Too Quickly
When a problem appears, operators often start changing the machine.
For example, they may adjust:
- Injection speed
- Injection pressure
- Holding pressure
- Holding time
- Mold temperature
- Cooling time
Sometimes, this is correct.
However, changing many settings at once can hide the real cause.
For example, flash may come from mold wear.
Lower pressure may remove the flash.
However, the part may then receive less packing.
As a result, a critical dimension may become smaller.
Then the operator may increase holding time.
Soon, several settings have changed because of one mold problem.
Therefore, changes should be made step by step.
Injection Molding Production Drift Should Be Checked Step by Step
A clear checking order makes troubleshooting easier.
First, confirm the problem.
Then compare the current parts with approved parts.
Next, check:
- Part dimensions
- Part weight
- Appearance
- Material condition
- Mold temperature
- Cooling water
- Machine stability
- Mold condition
- Cavity differences
Do not assume the machine is always the cause.
Also, do not assume the mold is always the cause.
Instead, use data to find the real source.
Compare New Parts With Approved Samples
Approved samples are useful during long production runs.
For example, compare current parts with the original approved parts.
Look for changes in:
- Dimensions
- Flash
- Parting lines
- Gloss
- Gate appearance
- Warpage
- Ejector marks
- Assembly
These changes can show when the process started to drift.
Also, they can help separate a new problem from an old one.
Therefore, approved samples should be kept as a real production reference.
Part Weight Is a Simple Warning Signal
Part weight is easy to check.
Also, it can show process changes before they become visible.
If weight starts to move, possible causes include:
- Filling changes
- Packing changes
- Material feeding
- Check ring wear
- Cushion variation
- Gate changes
Part weight cannot replace dimensional checks.
However, it is a useful warning signal.
Therefore, stable parts should normally stay within a reasonable weight range.
Assembly Problems Can Be the First Sign of Drift
Some parts show no clear visual change.
However, assembly may start to feel different.
For example:
- Snap fits become tighter
- Screws become harder to install
- Connectors need more force
- Gaps become larger
- Sealing becomes worse
These problems may come from small dimensional changes.
Each dimension may still pass.
However, several small changes can combine during assembly.
Therefore, assembly checks are useful during long production runs.
A Narrow Process Window Makes Drift More Dangerous
Some molds can only make good parts within a very narrow process range.
These molds are more sensitive to normal production changes.
For example, a small change in material, temperature, pressure, or cooling can quickly create defects.
A wider process window gives production more room.
Therefore, process stability should be checked before mass production begins.
A good mold should not need constant adjustment.
Instead, it should run well within a practical range.
How to Reduce Injection Molding Production Drift
Production drift cannot be removed completely.
However, it can be reduced.
Useful actions include:
- Keep material drying stable
- Record key machine settings
- Monitor mold temperature
- Keep cooling water stable
- Clean vents regularly
- Check part weight
- Track critical dimensions
- Keep cavity numbers traceable
- Inspect wear areas
- Maintain the mold
- Compare current parts with approved samples
Most importantly, changes should be found early.
Small changes are usually easier to correct.
They are also cheaper to fix.
When Should the Mold Be Inspected?
The mold should be checked when the same problem keeps returning.
Warning signs include:
- Flash keeps increasing
- Dimensions keep moving
- Ejection becomes harder
- One cavity behaves differently
- Settings need frequent adjustment
- Cycle time must be increased
- Cooling becomes less effective
At this point, machine adjustment may not be enough.
Therefore, the mold condition should be checked.
Our Injection Mold Wear Inspection guide explains which mold areas deserve attention when quality starts to change.
What Should Buyers Ask Their Supplier?
Buyers do not need to watch the machine every day.
However, when production becomes unstable, they should ask simple questions.
For example:
- When did the problem start?
- Is every cavity affected?
- Has the material lot changed?
- Has drying changed?
- Is part weight changing?
- Has mold temperature changed?
- Is cooling flow normal?
- Are the vents clean?
- Is the mold showing wear?
- Which settings were changed?
- Does the current part still match the approved sample?
These questions help show whether the supplier is finding the real cause.
They also help avoid random machine adjustment.
Final Thoughts
Injection Molding Production Drift explains why good parts can slowly become unstable during long production.
The cause may come from:
- Material
- Mold temperature
- Cooling
- Machine condition
- Venting
- Gate wear
- Mold wear
- Cavity imbalance
Often, several small changes happen together.
Therefore, stable production needs more than fixed machine settings.
At Fentor Mold, we believe the real cause should be found before large changes are made.
Sometimes, a small process adjustment is enough.
However, if the real cause is mold wear, dirty vents, poor cooling, or unstable material, machine changes will only hide the problem.
Finding the cause early helps keep production stable.
As a result, scrap, rework, and delivery risk can also be reduced.