
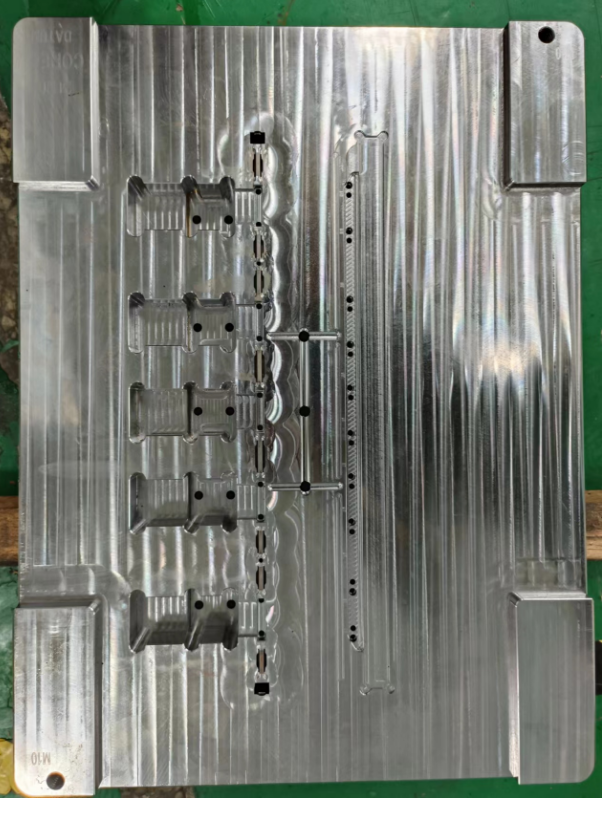
An injection mold wear inspection should not start with one question: “How many shots has the mold run?”
Shot count matters, but it does not tell the whole story.
We have seen molds with relatively high shot counts still running well because the steel, fitting, maintenance, and molding conditions were good. We have also seen molds with much lower production quantities already showing serious wear around sliders, shut-offs, ejector holes, and inserts.
For buyers, the real question is simpler:
Can this mold still produce stable parts without frequent repair and constant process adjustment?
That is what an injection mold wear inspection should help you decide.
Why Shot Count Alone Does Not Tell You Mold Condition
It is common to hear a mold described as a 300,000-shot mold, 500,000-shot mold, or one-million-shot mold.
Those numbers are useful when the mold is first designed. However, actual mold life depends on much more than the original target.
Important factors include:
- Mold steel
- Steel hardness
- Plastic material
- Glass fiber content
- Injection pressure
- Mold temperature
- Slider and lifter design
- Lubrication
- Cooling condition
- Maintenance frequency
- Previous repairs
For example, glass-filled nylon can wear gates, inserts, and moving components much faster than standard ABS.
A simple mold producing PP parts may still be in good condition after a large number of cycles.
This is why buyers should look at actual mold condition rather than relying only on a number recorded in the maintenance log.
If you are evaluating tool cost against expected production volume, our guide on Injection Mold Cost vs Tool Life explains this relationship in more detail.
Injection Mold Wear Inspection Should Start With the Plastic Parts
Before opening the mold and measuring components, look at the parts being produced.
Plastic parts often show mold wear before the problem becomes obvious inside the mold.
Compare recent production parts with approved samples from earlier production.
Look for changes such as:
- Flash that was not present before
- More visible parting lines
- Increasing mismatch
- Dimensions slowly moving
- Local scratches
- More obvious ejector pin marks
- Gate appearance changing
- Slider or lifter lines becoming more visible
- Parts becoming harder to eject
One bad part does not prove that the mold is worn.
However, when the same problem keeps returning after process adjustments, the mold deserves closer inspection.
This is especially important when dimensions have been stable for a long time and then slowly begin to move. Mold wear is one possible cause of this type of change.
We discuss this problem further in How to Maintain Injection Molding Dimensional Stability in Mass Production.
Flash Is Often One of the First Warning Signs
Flash is one of the easiest symptoms for buyers to see.
However, the reason behind it needs to be checked carefully.
Flash can come from:
- Excessive injection pressure
- Poor clamping
- Incorrect process settings
- Damaged parting surfaces
- Worn shut-offs
- Loose sliders
- Worn inserts
If flash suddenly appears, changing the molding conditions may solve it.
The problem starts when operators have to keep reducing pressure, changing holding pressure, or increasing clamping force just to keep flash under control.
At that point, an injection mold wear inspection should include the actual shut-off surfaces.
Typical areas to inspect are:
- Slider shut-offs
- Lifters
- Inserts
- Core pins
- Parting lines
- Small sealing surfaces
A worn shut-off normally does not repair itself through process adjustment.
The process can only hide the problem for a while.
Check Whether Slides Are Becoming Loose
Slides are one of the most common wear areas in an older mold.
They move every cycle and work under side load. Therefore, wear gradually develops around guide surfaces, wear plates, angle pins, locking blocks, and shut-offs.
During an injection mold wear inspection, move the slide manually after the mold is opened.
Check whether the movement feels very different from when the mold was new.
Look for:
- Excessive side clearance
- Worn wear plates
- Scratches
- Galling
- Loose angle pins
- Worn locking surfaces
- Uneven contact
- Abnormal movement
A slightly loose slider may still work.
But as the clearance increases, it can begin affecting the product.
You may start seeing flash, steps, mismatch, or changing dimensions around the slider area.
If a slider has already started sticking or jamming, do not simply grind more clearance into it. The cause should be identified first.
Our Injection Mold Slide Jamming Troubleshooting Guide covers the most common causes in more detail.
Lifters Can Wear Without Being Obvious From Outside
Lifters are another area that deserves close attention.
A lifter is usually narrower than a slider and often works at an angle. Poor lubrication, incorrect fitting, side pressure, or long-term operation can gradually wear the guide surfaces.
Check:
- Lifter head condition
- Guide surfaces
- Clearance
- Position when fully returned
- Scratching
- Whether the lifter moves smoothly
- Whether the molded part shows drag marks
One problem we pay particular attention to is whether the lifter still returns to the same position every cycle.
If the lifter position starts changing slightly, the product may still look acceptable at first.
Later, however, the parting line or local dimension can become unstable.
Inspect the Parting Surface Instead of Only Cleaning It
Older molds often look much better after cleaning.
That does not mean the mold condition is good.
Clean the parting surface, then inspect it under good lighting.
You are looking for actual steel condition rather than oil, plastic residue, or dirt.
Pay attention to:
- Dents
- Local damage
- Polished shiny areas caused by rubbing
- Rust
- Weld repairs
- Edges that have become rounded
- Areas repeatedly repaired for flash
Small marks are normal on a production mold.
The important question is whether the damage affects sealing or mold positioning.
If the mold has been repaired many times in the same area, this should also be recorded during the injection mold wear inspection.
Check Guide Pins, Bushings and Mold Alignment
Sometimes the cavity and core themselves are still good, but the mold no longer closes as accurately as before.
Guide pins, bushings, interlocks, and locating components wear over time.
When these components become loose, the two mold halves may shift slightly during closing.
This can cause:
- Parting line mismatch
- Flash
- Insert misalignment
- Slider interference
- Uneven wear
This is an important point because buyers may assume the cavity itself has worn out.
In reality, replacing the guide and locating components may bring the mold back into good condition.
That is why injection mold wear inspection should cover the entire mold structure rather than only the cavity surface.
Injection Mold Wear Inspection Should Include the Ejector System
Ejector pins move every molding cycle.
In high-volume production, that means hundreds of thousands of repeated movements.
Normal wear can occur between the ejector pin and ejector hole.
Signs include:
- Flash around ejector pins
- Ejector pins becoming loose
- Pin surfaces becoming badly scratched
- Ejector pins bending
- Ejection becoming uneven
- Parts sticking more than before
The ejector plate itself should also be checked.
Make sure the plate moves evenly and does not show abnormal wear around the guide system.
Replacing an ejector pin is inexpensive.
Repairing a badly damaged ejector hole is more difficult.
Therefore, early inspection is useful.
Gate Wear Is Easy to Miss
Gate condition is often ignored during a basic mold inspection.
But the gate sees molten plastic at high speed every cycle.
Abrasive plastics can gradually enlarge or damage the gate.
When this happens, the molding process may begin to change even though no one intentionally changed the tooling.
Possible symptoms include:
- Different filling speed
- Part weight variation
- Gate vestige changing
- Different packing behavior
- More flash
- Filling imbalance
For a multi-cavity mold, check whether all gates still look similar.
If one cavity behaves differently from the others, gate wear is one item worth checking.
Watch the Trend of Critical Dimensions
This is one of the most useful checks for buyers.
Do not only ask:
“Are the parts still within tolerance?”
Ask:
“Are the dimensions moving toward one side of the tolerance?”
For example:
| Production Stage | Measured Dimension |
|---|---|
| Initial production | 25.01 mm |
| 100,000 shots | 25.03 mm |
| 250,000 shots | 25.06 mm |
| 400,000 shots | 25.09 mm |
Suppose the drawing requirement is:
25.00 ±0.10 mm
At 400,000 shots, the part still passes.
But the trend is already clear.
The dimension has been moving in the same direction over a long period.
That does not automatically prove mold wear, because material, process, machine, and measurement conditions also need to be checked.
However, it is a good reason to inspect the corresponding mold area before the dimension moves out of tolerance.
Cooling Condition Matters on an Old Mold
Mold wear is not only about steel surfaces.
Cooling systems also become less reliable as molds age.
Possible problems include:
- Scale inside water channels
- Rust
- Restricted water flow
- Leaking O-rings
- Water leakage around inserts
- Blocked cooling circuits
Poor cooling can cause longer cycles and unstable dimensions.
It can also create warpage that looks like a tooling problem.
Before deciding that an old mold needs replacement, the cooling circuits should be checked and cleaned.
A mold may still have good cavity steel but poor production performance because cooling efficiency has dropped.
Look at How Often the Mold Needs Repair
Repair frequency tells you a lot about remaining mold life.
A production mold will always need maintenance.
Replacing:
- Springs
- Ejector pins
- Wear plates
- Seals
- Guide components
does not mean the mold is finished.
These are normal wear parts.
The situation becomes different when repairs start happening more and more often.
For example:
A slider is repaired this month.
Two months later, the same slider develops flash again.
Then a lifter becomes loose.
Next, an insert requires welding.
After that, the parting line needs fitting.
At this point, the issue is no longer one isolated component.
The complete mold condition should be evaluated.
Previous Welding Can Affect the Decision
Welding is common during mold modification and repair.
A welded mold is not automatically a bad mold.
However, repeated welding in the same critical area deserves attention.
During an injection mold wear inspection, check the repair history if available.
Ask:
- Which areas were welded?
- Why were they welded?
- How many times have they been repaired?
- Was the steel heat-treated again if required?
- Is cracking visible around the weld?
- Is the repaired area still dimensionally stable?
Some local repairs can extend mold life for a long time.
But if a critical sealing surface has already been welded and re-machined several times, another repair may no longer be the best choice.
This is one reason buyers should keep proper mold records. Our Injection Mold Documentation: What Should You Receive? explains which records are useful throughout a mold’s service life.
When Is Repair Still the Better Choice?
Do not replace a mold simply because it is old.
Many old molds are worth repairing.
Repair usually makes sense when:
- The cavity and core are still in good condition
- Mold plates remain accurate
- Only wear parts need replacement
- Slides can be rebuilt
- Local shut-offs can be repaired
- Production quantity remaining is limited
- The product may soon be discontinued
For example, if a product only needs another 30,000 parts, replacing several wear plates and an ejector system may be much more sensible than building a completely new mold.
The decision should be based on the remaining production requirement.
When Should Buyers Consider a New Mold?
A new mold becomes worth serious consideration when several problems appear at the same time.
Typical warning signs include:
- Flash keeps returning after repair.
- Critical dimensions continue drifting.
- Several sliders or lifters have serious wear.
- Parting surfaces require frequent repair.
- The mold has many welded areas.
- Repair intervals are becoming shorter.
- Production requires a very narrow molding window.
- Downtime is increasing.
- Parts no longer remain stable over long production runs.
- Major core or cavity areas are already damaged.
One of these problems alone may not justify a new mold.
Five or six of them together are a very different situation.
Do Not Compare Only Repair Cost With New Mold Cost
This is where buyers sometimes make the wrong decision.
Suppose:
- Major mold repair: $7,000
- New mold: $22,000
The repair looks much cheaper.
But that does not automatically mean it is cheaper.
You also need to know:
- How much production remains?
- How long will the repair last?
- Which parts may fail next?
- How much does unplanned downtime cost?
- Is the product still expected to run for several years?
If the repair gives the mold another 20,000 shots but the project needs 400,000 more parts, the $7,000 repair may only delay the real investment.
On the other hand, if only another 15,000 parts are needed, building a new tool may make no commercial sense.
That is why injection mold wear inspection should support a business decision, not only an engineering decision.
A Simple Injection Mold Wear Inspection Checklist
When inspecting an old mold, buyers can focus on these areas:
| Area | What to Look For |
|---|---|
| Molded parts | Flash, mismatch, scratches, dimensional drift |
| Parting surface | Damage, dents, repeated repairs |
| Cavity/core | Wear, scratches, erosion, corrosion |
| Slides | Clearance, locking, wear plates |
| Lifters | Clearance, movement, positioning |
| Ejector system | Loose pins, scratches, uneven movement |
| Guide system | Worn pins, bushings, interlocks |
| Gate | Wear, erosion, filling changes |
| Cooling | Leakage, blockage, poor flow |
| Repair history | Frequent welding or repeated repair |
| Production | Downtime and unstable processing |
You do not need every item to look like a new mold.
A production mold will always show normal wear.
The purpose is to identify whether the wear is local and repairable or whether it has spread across several important systems.
The Best Time to Inspect Is Before Production Becomes Urgent
Do not wait until the mold fails completely.
If the mold supports an important product, perform an injection mold wear inspection while it is still running.
That gives you time to decide whether to:
- Replace wear parts
- Manufacture spare inserts
- Rebuild sliders
- Repair shut-offs
- Clean cooling channels
- Prepare a backup mold
- Start a completely new mold
Once the mold fails during an urgent order, your options become much more limited.
Final Thoughts
An injection mold wear inspection is not about deciding whether an old mold still looks good.
The real purpose is to determine whether it can continue producing stable parts at an acceptable maintenance cost.
Start with the parts.
Then inspect the areas that actually move, seal, guide, and wear: sliders, lifters, ejector components, shut-offs, guides, gates, and cooling circuits.
Finally, look at the repair history and dimensional trends.
If wear is limited to replaceable components, repair may give the mold many more useful cycles.
If flash, dimensional drift, loose moving components, repeated welding, frequent repair, and unstable production are all appearing together, it may be time to stop repairing the old mold and prepare a new one.