
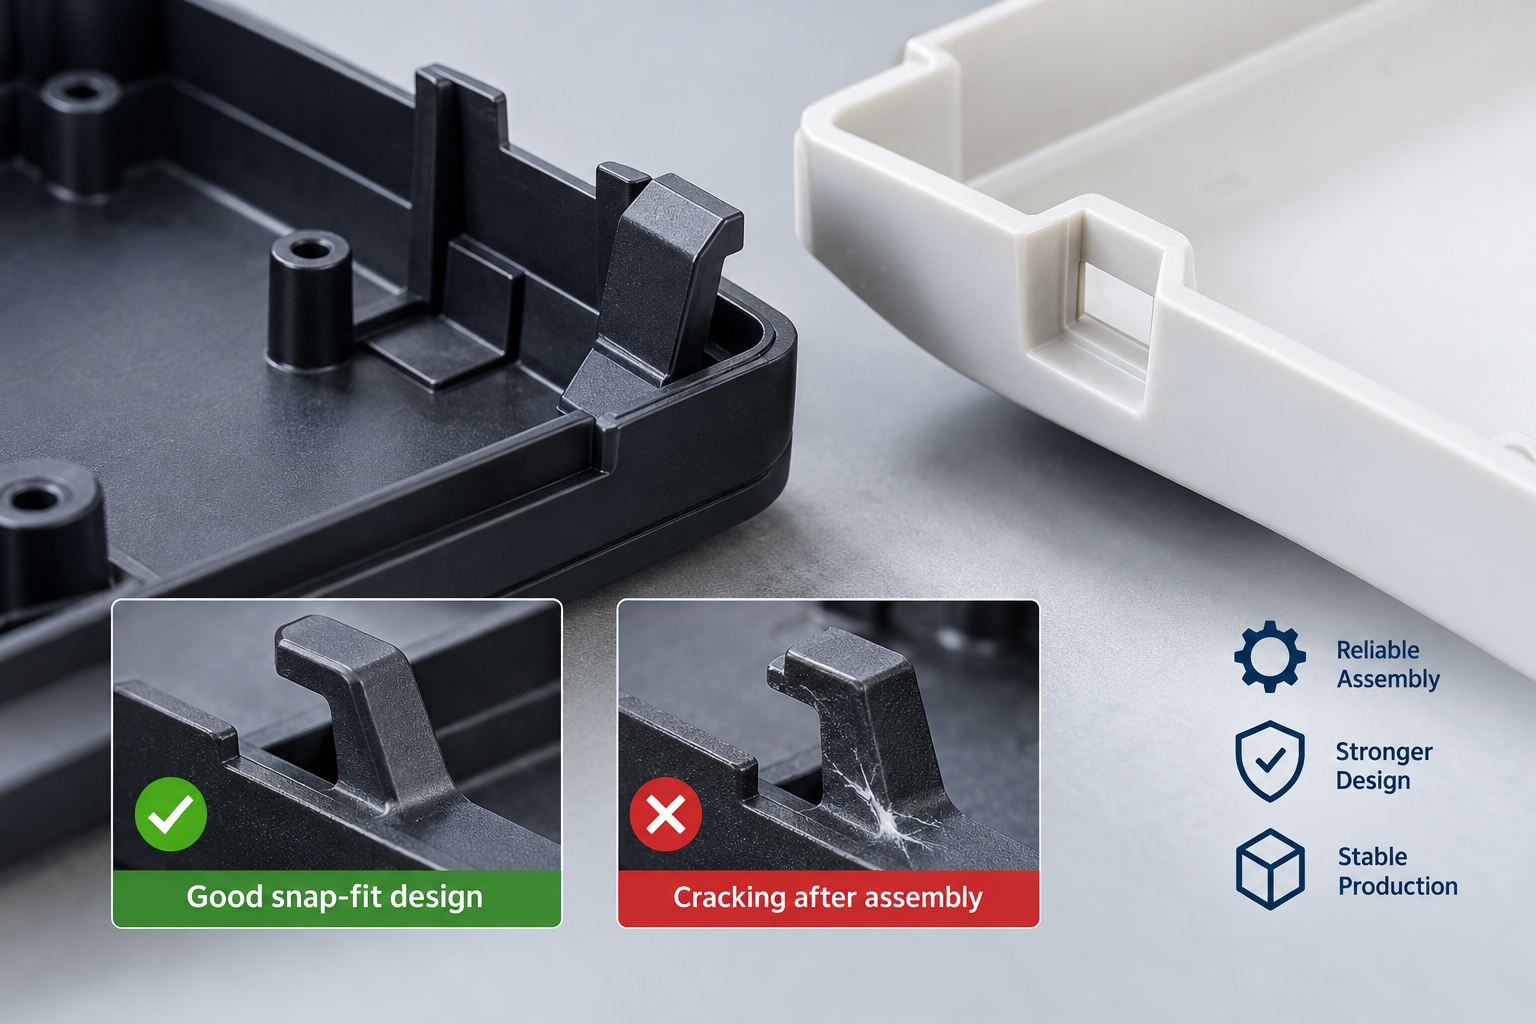
Snap-fit injection molding is widely used for plastic housings, covers, clips, electronic parts, and many other products that need fast assembly without screws.
The structure looks simple. However, snap-fits often create problems during molding and assembly.
Common failures include cracking, whitening, loose fit, difficult assembly, weak retention, and broken hooks.
In most cases, the problem does not come from one single factor. Instead, part design, material, mold structure, molding conditions, and assembly force all affect the final result.
For this reason, engineers should review snap-fit parts carefully before they build the mold.
Why Snap-Fit Injection Molding Can Be Difficult
A snap-fit works by bending during assembly and then returning close to its original shape.
Therefore, the plastic must deform without breaking.
If the stress is too high, the part may crack during assembly. On the other hand, if the structure is too soft, it may not hold securely.
Typical problems include:
- Snap hook cracking
- Stress whitening
- Broken root area
- Loose assembly
- Excessive insertion force
- Poor retention force
- Permanent deformation
- Difficult mold release
A good snap-fit design needs to balance flexibility and strength.
Snap-Fit Injection Molding Starts With the Root Design
The root of the snap arm is often the highest-stress area.
A sharp corner creates stress concentration. As a result, cracking becomes much more likely.
Therefore, the root should normally have a smooth radius instead of a sharp 90-degree corner.
A larger transition radius helps spread the stress over a wider area.
This is especially important when the snap arm is short or thick.
At Fentor Mold, the snap root is one of the first areas we check during DFM because this small detail can strongly affect assembly reliability.
Avoid Making the Snap Arm Too Thick
A thicker snap arm may look stronger. However, this is not always true.
If the arm is too thick, it becomes difficult to bend. As a result, assembly force increases and the stress at the root becomes much higher.
A thinner and longer snap arm can often bend more safely.
The exact thickness depends on:
- Material
- Snap length
- Required retention force
- Assembly distance
- Product size
In addition, the wall thickness should connect smoothly with the main part.
Sudden thickness changes can create sink marks and uneven shrinkage.
Material Choice Matters in Snap-Fit Injection Molding
Not every plastic is suitable for repeated bending.
Some materials are naturally tougher and more flexible than others.
Common materials for snap-fit parts include:
- PP
- PE
- POM
- PA
- PC
- PC+ABS
- ABS
PP and PE usually offer good flexibility. In addition, POM and PA can work well when the part needs higher strength or wear resistance.
ABS is widely used. However, thin snap hooks can crack if the design is too stiff.
Glass-filled materials need more care because they are usually less flexible.
For parts with important mechanical requirements, material selection should be considered together with the injection molding material requirements of the whole product.
Stress Whitening Is an Early Warning Sign
A snap-fit may not break immediately.
Instead, the plastic may turn white around the root after assembly.
This is called stress whitening.
Usually, it means the local strain is already high.
The part may still work at first. However, repeated assembly or long-term load can lead to cracking later.
Common causes include:
- Snap arm too short
- Root radius too small
- Excessive interference
- Material too brittle
- Low mold temperature
- High internal stress
Therefore, buyers should not ignore stress whitening during sample approval.
Snap-Fit Injection Molding Needs the Right Undercut
The snap hook must have enough engagement to hold the mating part.
However, too much undercut creates excessive assembly force.
As a result, the part may crack, deform, or become difficult to assemble.
The hook angle also matters.
A good snap usually has:
- A smooth lead-in angle
- Enough locking surface
- Controlled undercut
- Enough clearance after assembly
The goal is not to make the snap as tight as possible. Instead, the design should provide stable retention with reasonable assembly force.
Draft Angle Helps Mold Release
Snap-fit parts often contain undercuts, hooks, and narrow side walls.
Poor draft can create drag during ejection.
This may cause:
- Scratches
- White marks
- Deformation
- Broken hooks
- Ejection stress
Therefore, designers should add draft wherever possible.
The exact value depends on surface texture, material, and part depth.
For textured surfaces, more draft is normally needed.
At the same time, the mold design should make sure the snap feature can leave the cavity without being forced or damaged.
When Lifters or Sliders Are Needed
Some snap hooks cannot be molded with a simple straight open-and-close mold.
If the hook creates an undercut, the mold may need:
- Lifters
- Sliders
- Collapsible cores
- Special inserts
The right solution depends on the snap direction and product geometry.
In addition, the moving component must have enough strength.
If the lifter is too thin or too long, it can wear, bend, or move during production.
As a result, the snap size may slowly change and cause assembly problems later.
You can read more about tooling structure on our Injection Mold page.
Gate Position Can Affect Snap-Fit Strength
Gate position is often overlooked. However, poor melt flow around the snap feature may create a weld line near the root.
That is a risky location.
The snap root already carries high assembly stress. Therefore, a weak weld line can make cracking much easier.
Gate design should try to keep major weld lines away from critical snap areas.
For complex parts, Moldflow can help predict:
- Flow direction
- Weld line location
- Pressure distribution
- Filling balance
- Air traps
However, the final result still needs to be checked during mold trials.
Cooling Affects Snap-Fit Injection Molding Accuracy
Uneven cooling can change the final position of the snap. As a result, even a small amount of warpage may affect assembly.
For example, a hook may be designed with the correct undercut, but part warpage can move it inward or outward.
This changes the actual interference.
Therefore, the result may be:
- Assembly too tight
- Assembly too loose
- Uneven locking
- One side cracking first
Cooling around snap features should be as balanced as possible.
This is especially important when the snap is close to ribs, bosses, or thick areas.
Sink Marks Can Change Snap Geometry
Thick roots, heavy ribs, and large bosses can create sink marks.
If this happens near a snap feature, the local shape may change.
As a result, the following may also change:
- Hook position
- Assembly gap
- Insertion force
- Retention force
This is one reason why the snap structure should not be designed separately from the surrounding wall thickness.
Therefore, engineers need to consider the whole area together.
Ejection Can Damage Snap Features
A good snap can still fail if the ejection system is poor.
If the part sticks to the core, the snap may be pulled or bent during ejection.
Common causes include:
- Too little draft
- Poor polishing
- Ejector position too far away
- Uneven ejection force
- Deep ribs around the snap
When needed, ejector pins should support the part near the snap area.
At the same time, they should not create visible marks or local deformation.
Assembly Force Should Be Checked During Mold Trials
Visual inspection is not enough.
Whenever possible, the supplier should assemble the snap with the real mating part.
Important points include:
- Insertion force
- Removal force
- Retention force
- Stress whitening
- Cracking
- Gap after assembly
- Alignment
If the snap feels too tight, the team should not immediately polish the mold.
Instead, they should first check the actual cause.
It may come from:
- Warpage
- Wrong undercut
- Material shrinkage
- Hook position
- Assembly angle
At Fentor Mold, we normally check snap function together with dimensional results during mold trials.
Do Not Approve Snap-Fits Based on One Sample
One good sample does not prove the design is stable. Therefore, the supplier should test several parts.
In addition, the supplier should check each cavity separately for multi-cavity molds.
This helps identify cavity-to-cavity differences.
A useful check can include:
- Multiple assembly cycles
- Different cavities
- Different trial stages
- Stress whitening
- Crack inspection
- Retention consistency
This is especially important before mass production.
For final validation, you can also refer to our Injection Mold Acceptance Checklist.
What Buyers Should Check Before Approval
Before approving snap-fit injection molding parts, buyers should check:
- Snap root radius
- Snap arm thickness
- Undercut size
- Hook angle
- Draft angle
- Stress whitening
- Cracking
- Assembly force
- Retention force
- Warpage
- Weld line location
- Part consistency
The most important point is simple:
The snap must work reliably in the real assembly, not only look correct on the drawing.
Final Thoughts
Snap-fit injection molding requires a balance between flexibility, strength, moldability, and assembly force.
Most cracking problems start from excessive local stress.
Meanwhile, most assembly problems come from poor control of geometry, material behavior, or warpage.
Therefore, the best results usually come from checking these issues early:
- Use a smooth root radius
- Avoid an overly thick snap arm
- Choose a suitable material
- Control undercut and interference
- Keep weld lines away from critical areas
- Balance cooling
- Check ejection
- Test the real assembly
At Fentor Mold, snap-fit features are reviewed during DFM, mold design, trial, and sample approval.
As a result, problems can be found earlier and corrected before they become repeated failures in production.