
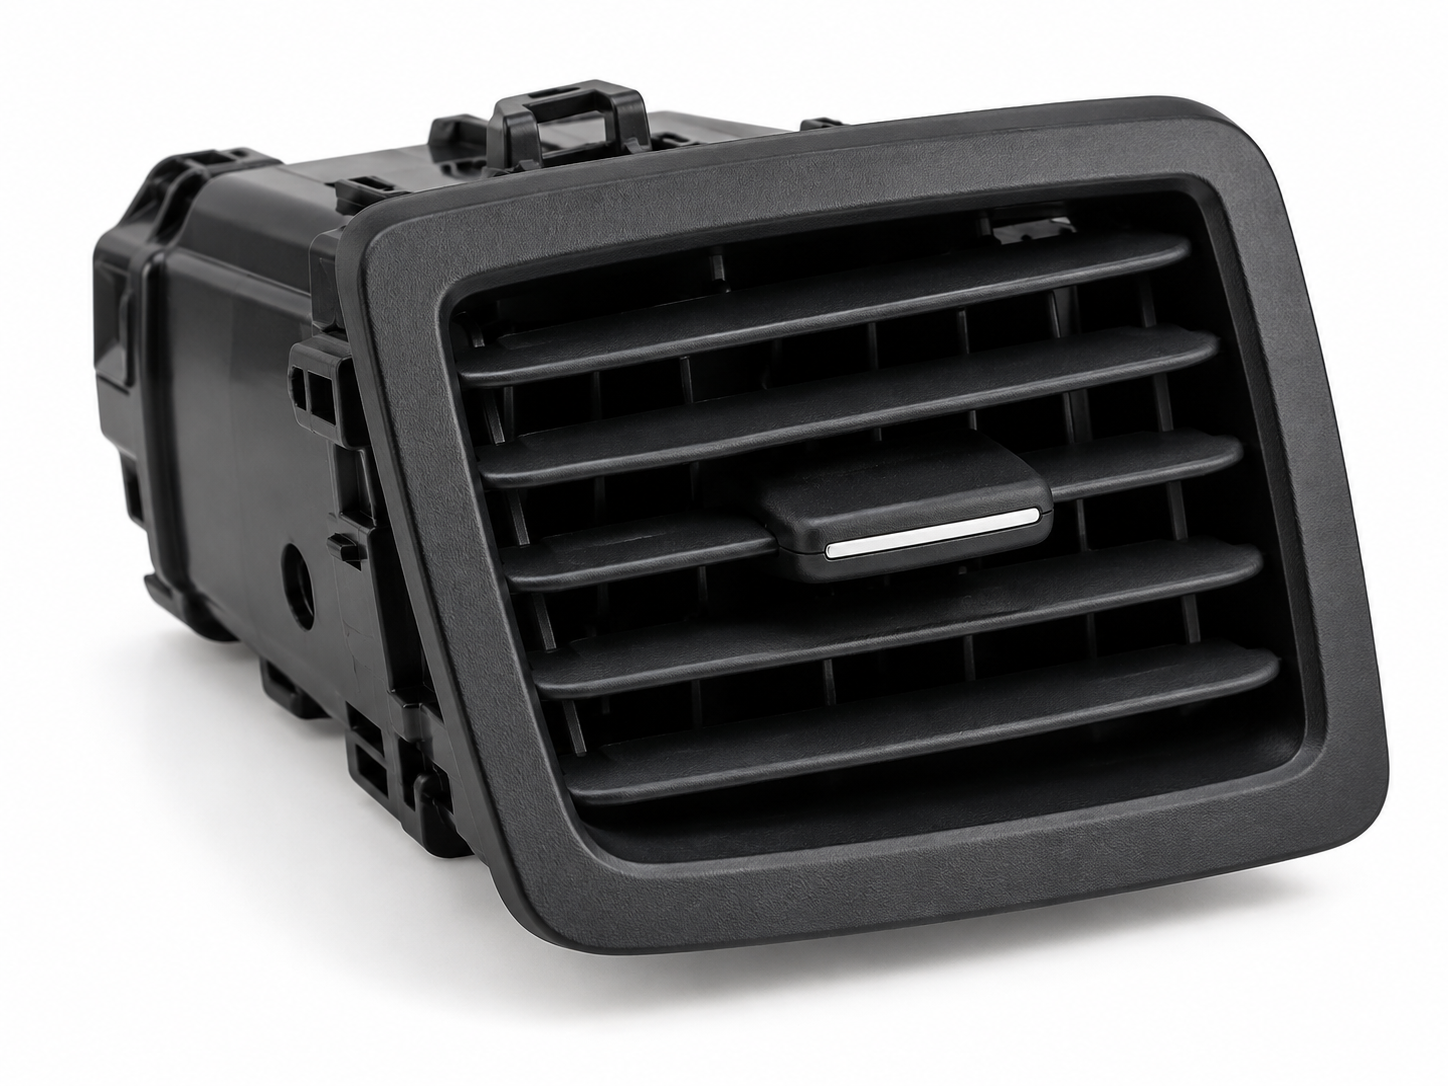
Automotive air vent injection molding requires careful mold design and stable process control. Air vents must look good, fit well, and move smoothly. Yet thin blades, small shafts, and complex clips can make these parts hard to produce.
Poor design may cause warpage, flash, sink marks, or assembly problems. As a result, the air vent may feel too tight, become loose, or make noise during use.
At Fentor Mold, we help customers develop custom plastic molds for automotive parts. This guide explains how to choose materials, improve mold design, and control part quality.
What Is Automotive Air Vent Injection Molding?
Automotive air vent injection molding is a process that makes plastic air vents for vehicle interiors. These parts are often used in dashboards, center consoles, and rear air outlets.
A typical air vent assembly has several parts:
- Outer frame: Holds the air vent in the dashboard.
- Louvers: Direct airflow up, down, left, or right.
- Adjustment knob: Lets users change airflow direction.
- Linkage parts: Help several louvers move together.
- Mounting clips: Secure the vent during assembly.
Each part must meet its design size and fit the other parts.
For example, a small change in a louver shaft may affect how easily it turns. Therefore, mold design must consider both part shape and assembly fit.
Best Materials for Automotive Air Vent Injection Molding
Material choice affects strength, surface quality, heat resistance, and cost. ABS, PC/ABS, PP, and POM are common options for different air vent parts.
| Material | Main Benefits | Typical Uses |
|---|---|---|
| ABS | Good surface finish and easy processing | Frames and louvers |
| PC/ABS | Good impact strength and heat resistance | Interior trim and frames |
| PP | Lightweight and cost-effective | Selected support parts |
| POM | Low friction and good wear resistance | Moving parts |
ABS for Automotive Air Vent Injection Molding
ABS is often used for visible automotive plastic parts. It provides a smooth surface and good stiffness.
Also, ABS can support textured finishes. This makes it suitable for air vent frames and louvers.
However, standard ABS may not meet every vehicle heat requirement. Therefore, engineers should check the grade before production.
PC/ABS for Automotive Air Vent Injection Molding
PC/ABS is another option for air vent parts. It offers good impact strength and heat performance.
In addition, suitable grades can provide a clean surface finish. This makes PC/ABS useful for visible interior parts.
To learn more, read our guide on PC/ABS injection molding.
PP and POM for Moving Parts
PP is light and can help reduce material cost. Therefore, it may suit some hidden frames and support parts.
POM has low friction and good wear resistance. As a result, it can work well in selected moving parts.
Still, engineers must check strength, fit, and heat needs before choosing either material.
Key Mold Design Rules for Automotive Air Vent Injection Molding
Automotive air vents often have thin walls, small holes, snap-fits, and visible surfaces. Each feature creates a mold design challenge.
Good design can reduce defects and improve assembly. More importantly, it can prevent costly mold changes later.
1. Keep Wall Thickness Consistent
Uneven wall thickness can cause sink marks and warpage.
For example, a thick rib behind a thin outer wall may cool too slowly. As a result, a sink mark may appear on the visible surface.
To reduce this risk:
- Keep the main wall thickness as even as possible.
- Avoid sudden changes in wall thickness.
- Use ribs instead of thick solid sections.
- Review boss and rib locations.
- Follow the material supplier’s design advice.
However, wall thickness also depends on part size, material, and flow length.
2. Control Louver Shaft Dimensions
Louvers use small shafts to rotate inside the frame.
If a shaft is too large, the blade may feel tight. In contrast, too much clearance may cause loose movement or noise.
Therefore, engineers should check:
- Shaft diameter
- Hole diameter
- Shaft roundness
- Assembly clearance
- Material shrinkage
- Friction and wear
In addition, both mating parts should be checked together. A good single part does not always create a good assembly.
3. Improve Snap-Fit and Clip Design
Air vents often use clips to attach to the dashboard.
These clips need enough strength to hold the assembly. However, they must also bend during installation.
A sharp corner at the clip root may create stress. As a result, the clip can crack during assembly.
To improve the design, add suitable radii and avoid sharp corners. Also, choose a material that can meet the required bending strain.
The mold must release these clips without damage.
4. Choose a Suitable Gate Location
Gate location affects material flow, pressure, and surface quality.
For visible air vent parts, gate marks should be kept away from key appearance areas when possible.
However, the melt must still fill long, thin louvers.
Therefore, engineers should review gate location, runner balance, and flow length before mold making.
Moldflow analysis can help find weak filling areas.
5. Improve Cooling and Ejection
Uneven cooling may cause thin louvers or frames to bend.
Also, poor ejection can create marks or damage small features.
A good mold should provide balanced cooling near key areas. In addition, ejector pins should avoid weak or visible surfaces.
Some parts may need sliders or lifters to release undercuts.
For more details, read our automotive injection mold design guide.
Common Defects in Automotive Air Vent Injection Molding
Automotive air vent injection molding can produce several defects if the mold or process is not stable.
Some defects affect appearance. Others may affect how the air vent fits or moves.
| Defect | Main Causes | How to Improve |
|---|---|---|
| Warpage | Uneven cooling or shrinkage | Balance cooling and review packing |
| Sink marks | Thick ribs or bosses | Improve wall thickness and packing |
| Flash | High pressure or poor mold fit | Check mold shut-off and settings |
| Weld lines | Melt fronts meeting | Improve gate design and venting |
| Flow marks | Uneven melt flow | Adjust speed and temperature |
| Scratches | Ejection or handling problems | Improve ejection and handling |
How to Prevent Louver Warpage
Thin louvers can bend during cooling. Even small changes may affect air vent movement.
First, review wall thickness and gate location. Next, improve the cooling balance.
Also, adjust packing pressure and cooling time based on trial results.
Finally, measure the parts after they cool under set conditions. This gives a better view of final part size.
How to Reduce Surface Defects
Air vents are easy to see inside a vehicle. Therefore, even small marks may reduce visual quality.
Common problems include flow marks, scratches, gate marks, and uneven gloss.
To improve the surface, select a suitable mold finish and gate location.
Also, give textured parts enough draft angle to avoid scraping during ejection.
How to Improve Automotive Air Vent Injection Molding Assembly Quality
Part quality is only one part of the job. The full air vent must also move and fit correctly.
For this reason, engineers should check the assembly during mold trials.
Control Louver Rotation Force
Louvers must turn smoothly.
If rotation force is too high, users may find the vent hard to adjust. However, if it is too low, the blades may move on their own.
Therefore, engineers should control shaft size, hole size, clearance, and friction.
A simple test fixture can help measure rotation force when the customer defines a target range.
Prevent Noise and Vibration
Loose parts may create rattling noise while the vehicle is moving.
To reduce this risk, engineers should control assembly gaps and linkage fit.
In addition, some designs use friction features to keep louvers in place.
However, part size checks alone cannot prove noise performance. Assembly tests are also needed.
Improve Assembly Fit
Small size changes can cause major assembly problems.
Therefore, key features should be checked during mold trials and mass production.
Important features include:
- Louver pivot holes
- Shaft diameters
- Frame mounting points
- Linkage connections
- Clip positions
- Overall part alignment
For complex assemblies, checking fixtures can help confirm fit and movement.
Quality Control for Automotive Air Vent Injection Molding
Stable quality starts before mold production.
Therefore, engineers should check the part design, mold structure, and test plan at an early stage.
DFM Review Before Mold Making
DFM helps find design risks before steel cutting.
For air vents, engineers should check:
- Wall thickness
- Draft angles
- Gate locations
- Cooling layout
- Undercuts
- Ejection positions
- Louver shaft details
Early review can reduce later mold changes.
T0 and T1 Mold Trials
During T0, engineers should check filling, appearance, dimensions, and ejection.
Next, they should record defects and review possible causes.
If mold changes are needed, the team should confirm the results during later trials.
T1 samples can then help verify the updated mold and process. However, final approval should follow the customer’s agreed test requirements.
Dimensional and Functional Inspection
Air vent parts need both size checks and movement tests.
Suitable gauges, optical tools, and CMM equipment can measure key features.
However, some small or flexible areas need special fixtures.
In addition, engineers should check louver movement, clip retention, and assembly fit.
Mass Production Process Control
After sample approval, stable process settings help keep quality consistent.
Key process settings include:
- Melt temperature
- Mold temperature
- Injection speed
- Packing pressure
- Packing time
- Cooling time
- Material drying, when needed
Moreover, the production team should check part appearance and critical dimensions at set intervals.
How Fentor Mold Supports Automotive Air Vent Injection Molding
Automotive air vent injection molding needs good cooperation between product design, mold making, and production.
At Fentor Mold, we support custom automotive plastic mold projects.
Our injection mold manufacturing services include DFM review, mold design, precision machining, mold assembly, and mold trials.
We also provide injection molding production for customers who need plastic parts after mold development.
For air vent projects, we can review part drawings, mold structure, gate location, surface needs, and assembly features.
As a result, customers can identify production risks before starting tooling.
Conclusion
Automotive air vent injection molding requires accurate mold design, suitable materials, and stable production.
Thin louvers, moving shafts, and visible surfaces can create quality problems. However, good DFM review and mold trials can reduce these risks.
In addition, proper inspection helps keep assembly fit and movement consistent.
If you are developing custom automotive air vent components, Fentor Mold can review your drawings and provide mold manufacturing recommendations and a quotation.
Frequently Asked Questions
What Materials Are Best for Automotive Air Vent Injection Molding?
ABS and PC/ABS are common materials for air vent frames and louvers. PP and POM may suit selected support or moving parts. However, the best grade depends on the part’s heat, strength, and appearance requirements.
What Causes Warpage in Automotive Air Vent Injection Molding?
Uneven cooling, part geometry, shrinkage, and packing conditions can cause warpage. Therefore, engineers should review mold cooling, gate location, and wall thickness.
Why Do Automotive Air Vent Louvers Become Difficult to Rotate?
Tight clearances, poor roundness, part deformation, and high friction may cause this problem. In addition, linkage design can affect how the blades move.
Do Automotive Air Vent Molds Need Sliders?
Some air vent parts need sliders or lifters for side holes and undercuts. However, simple parts may use straight-pull molds. The best mold structure depends on part design.
How Can Automotive Air Vent Injection Molding Quality Be Improved?
Start with DFM analysis and the right material grade. Then improve mold cooling, gate design, and ejection. Finally, use dimensional checks and assembly tests to confirm part quality.