
Sink marks and flash are two common problems in injection molding, come and see how Fentormold to resolve this problems.
When a part has sink marks, increasing injection and holding pressure usually helps. Higher pressure pushes more plastic into the cavity. This increases part weight and improves packing, so sink marks become smaller.
However, higher pressure also puts more force on the mold.
If some areas of the mold are not strong enough, they may deform slightly under high pressure. The deformation may be very small, but it can still open a tiny gap at the parting line. Molten plastic can then enter the gap and create flash.
This is why reducing the required injection pressure should start at the mold design stage.
Why Higher Pressure Reduces Sink Marks
Plastic shrinks as it cools.
If the cavity does not receive enough material during packing, the part may develop sink marks. Increasing injection or holding pressure can push more plastic into the cavity.
The basic relationship is:
Higher pressure → better packing → higher part weight → less shrinkage
So, increasing pressure can be an effective way to reduce sink marks.
But the mold must also handle the higher pressure.
Why Higher Pressure Can Increase Flash
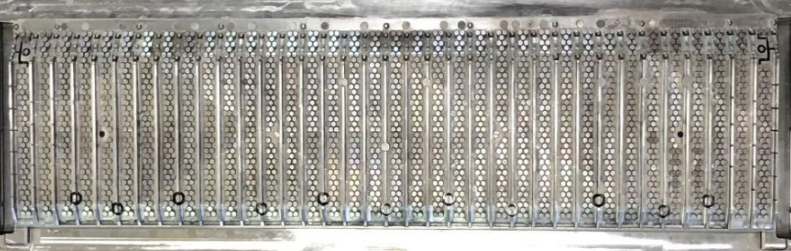
Injection pressure creates a strong force inside the mold.
The mold cavity, core, inserts, parting surfaces, and shut-off areas must resist this force.
Some areas are naturally weaker, such as:
- Thin steel sections
- Small inserts
- Small shut-off holes
- Deep cavity areas
- Parting lines
- Insert joints
- Areas with poor support
When injection pressure becomes too high, these areas may have a small amount of elastic deformation.
You may not see the deformation with your eyes. But even a tiny gap can allow molten plastic to enter.
The result is flash.
So we can see a clear trade-off:
Higher pressure → less sink marks → more mold stress → higher risk of flash
Small Deformation Can Cause a Lot of Flash
This problem becomes more serious when a part has many parting lines, shut-offs, and small inserts.
For example, a mold may have many small shut-off areas around the product. If one area has weak support, high injection pressure can cause slight deformation.
This can create flash in several locations at the same time.
The process looks like this:
Weak support → high mold pressure → slight deformation → small gap → flash
The mold may only deform by a very small amount, but the flash can be quite obvious.
Do Not Solve Everything With Injection Pressure
Some products cannot be redesigned.
The customer may already have fixed:
- Part thickness
- Product structure
- Material
- Appearance
- Part weight
- Dimensional requirements
In this situation, increasing pressure may reduce sink marks, but it can also make flash worse.
You may then face this problem:
Lower pressure → less flash but more sink marks
Higher pressure → less sink marks but more flash
If you keep adjusting the machine parameters, you may never find a good balance.
The problem may actually come from the mold structure.
Analyze the Mold Before Manufacturing
The best time to solve this problem is before mold manufacturing.
For large parts or materials with poor flowability, early Moldflow analysis is very important.
The analysis can help engineers understand:
- Required filling pressure
- Pressure distribution
- Flow length
- Gate locations
- Filling balance
- High-pressure areas
This information helps the mold designer reduce the pressure required to fill the part.
You can learn more about injection mold manufacturing at Fentor Mold.
Use Multiple Gates to Reduce Pressure
For a large part, one gate may create a very long flow path. The machine may then need very high pressure to fill the cavity.
Adding multiple gates can divide the filling process.
Multiple gates can:
- Shorten the flow distance
- Reduce filling pressure
- Improve filling balance
- Reduce pressure concentration
- Make the mold easier to fill
The goal is not to use as many gates as possible.
Gate locations still need careful analysis because poor gate placement can create weld lines, air traps, flow marks, or other problems.
The right goal is to use a reasonable gate layout that allows the part to fill with lower pressure.
Every Mold Has Weak Areas
No mold has exactly the same strength everywhere.
Some areas will always be weaker than others.
For this reason, mold designers should identify these areas during the design stage and strengthen them where necessary.
Use Thicker Steel
If a critical area must handle high injection pressure, increasing steel thickness can improve rigidity.
This may include:
- Thicker mold inserts
- More support behind inserts
- Stronger shut-off areas
- Better support around parting lines
Not every area needs extra steel. Focus the investment on critical areas.
Choose Stronger Mold Steel
Steel selection also matters.
If a critical insert must handle high pressure and long production cycles, do not choose steel based only on price.
A harder or stronger material may provide better long-term stability.
A small increase in steel cost can be much cheaper than repeated mold repair and flash problems during mass production.
The Goal Is Lower Injection Pressure
This does not mean that injection pressure should always be as low as possible.
Pressure that is too low can cause:
- Short shots
- Poor packing
- Low part weight
- Unstable production
The real goal is:
Use the lowest reasonable injection pressure that can fill and pack the part correctly.
To achieve this, we should improve the mold before production starts.
The main methods include:
- Perform Moldflow analysis early.
- Optimize gate locations.
- Use multiple gates when necessary.
- Reduce flow distance.
- Identify weak mold areas.
- Increase steel thickness in critical areas.
- Use stronger mold materials where needed.
- Add enough support behind critical inserts.
Design for Long-Term Production
A mold may produce good parts during the first trial but develop flash later.
This often happens when the mold runs under high pressure for a long time. Weak areas can gradually show their problems during mass production.
Therefore, mold design should not only answer one question:
Can the mold make a good part?
It should also answer:
Can the mold make good parts consistently for a long time?
For long-term production, mold structure, gate design, steel selection, and support all matter. Fentor Mold provides injection molding production together with mold manufacturing solutions.
Conclusion
Higher injection pressure can reduce sink marks. It improves packing, increases part weight, and reduces shrinkage.
But higher pressure also increases the force on the mold. If a critical area lacks enough support, even a very small elastic deformation can create a gap and cause flash.
When the product cannot be redesigned, the better solution is not simply to keep changing the injection pressure.
The better approach is to reduce the required pressure from the beginning.
Use early Moldflow analysis, optimize gate locations, add multiple gates when needed, and shorten the flow distance. At the same time, strengthen weak mold areas with thicker steel, suitable mold materials, and better support.
A good injection mold should not only handle high pressure. It should be designed so the part can be produced with reasonable pressure in the first place.