
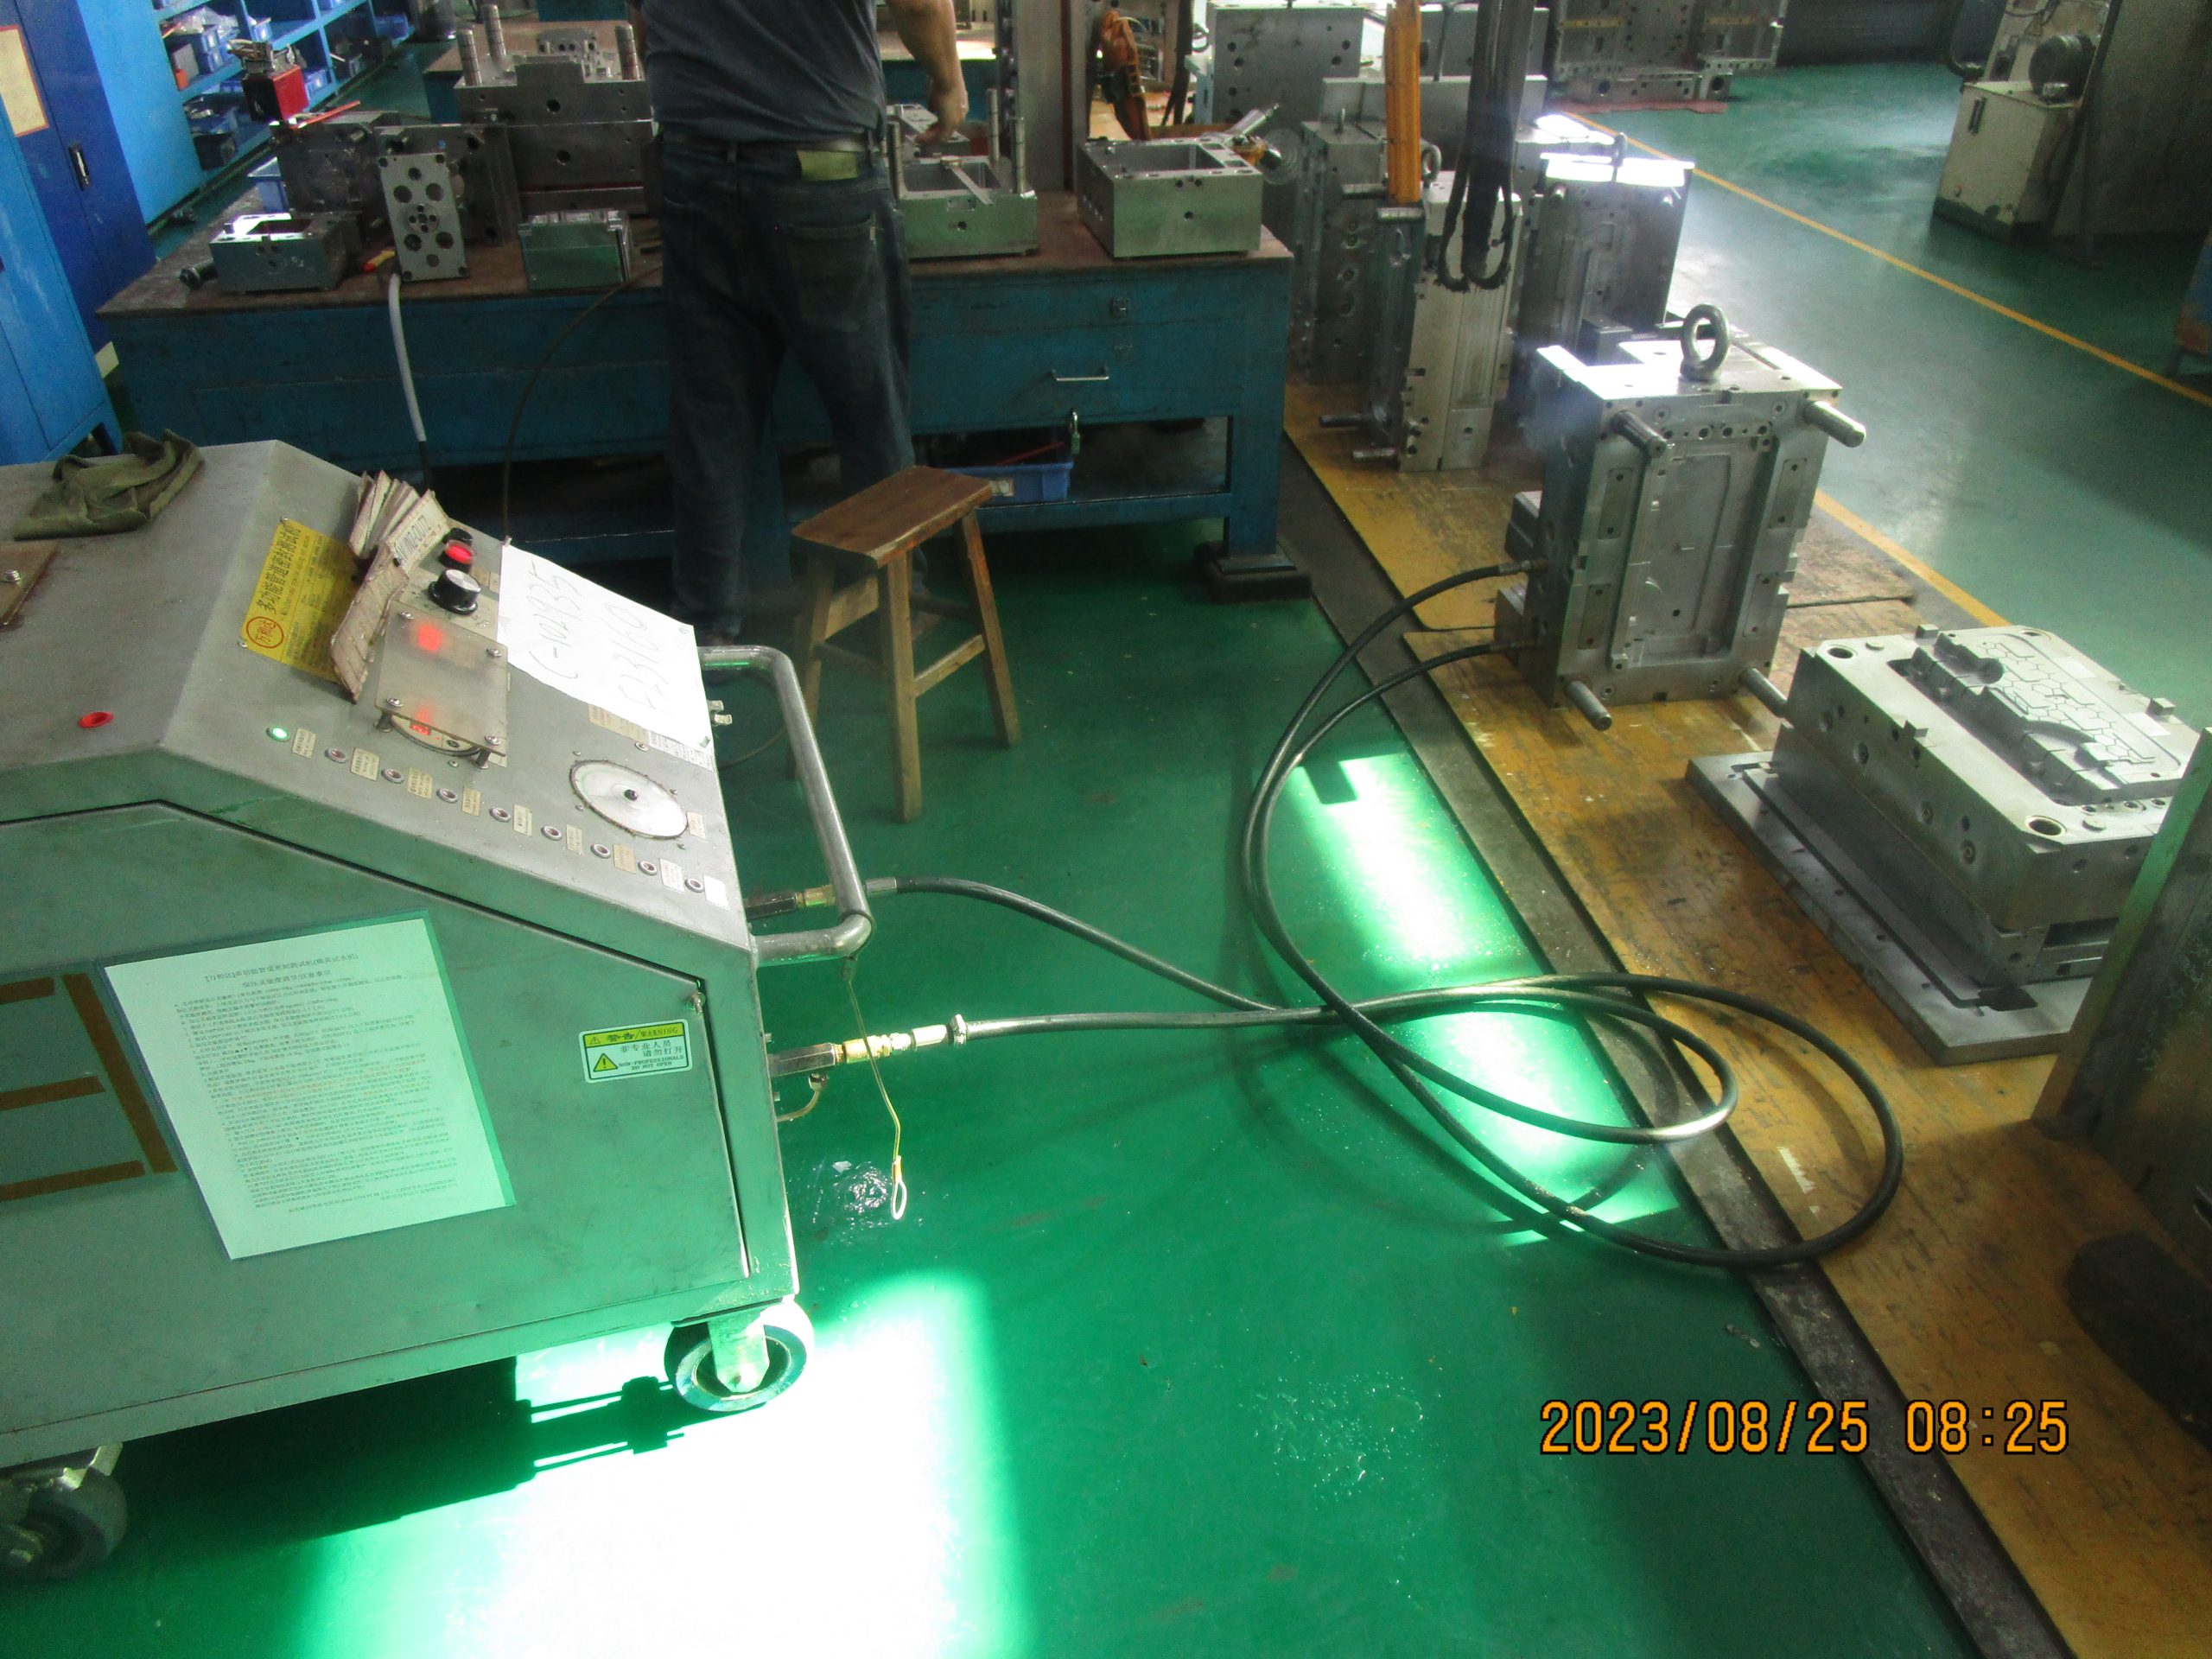
An injection mold cooling test helps find water leaks before a mold is approved for delivery. The injection mold cooling test checks cooling lines, plugs, fittings, O-rings, inserts, water flow, and pressure. It can find small problems before they delay mold setup or production.
A good cooling check should confirm two things. First, water must flow through every circuit. Second, each circuit should hold pressure without leaking.
At Fentor Mold, we include these checks before final mold delivery.
Why Is an Injection Mold Cooling Test Important?
Most cooling channels sit inside the mold steel. Therefore, many problems cannot be seen from outside.
A mold may run well during a short trial but still have a small leak.
Common leak points include:
- Loose water plugs
- Damaged O-rings
- Cooling inserts
- Threaded fittings
- Drilled water channels
- Connections between mold plates
- Slider or lifter cooling lines
A small leak can become worse during long production.
In addition, water may enter areas where it should not go. This can cause rust, wash away grease, or affect moving mold parts.
For this reason, an injection mold cooling test should be completed before final mold approval.
Injection Mold Cooling Test Before the Final Trial
The final mold trial gives a good chance to check every cooling circuit.
First, connect all water lines.
Then run water through each circuit.
Do not check only the cavity and core plates. Other parts may also have cooling, such as:
- Sliders
- Lifters
- Inserts
- Beryllium copper inserts
- Hot runner areas
- Hydraulic cores
- Large moving cores
Test each circuit one by one.
During the injection mold cooling test, check each water circuit separately.
If a leak appears, this makes the source easier to find.
Our Injection Mold service includes mold trials, mold checks, and final tooling inspection before delivery.
How to Check Each Circuit During an Injection Mold Cooling Test
Large molds may have many water circuits.
Because of this, one circuit can easily be missed.
Each inlet and outlet should have a clear mark.
For example:
- IN 1 / OUT 1
- IN 2 / OUT 2
- IN 3 / OUT 3
Next, test each circuit on its own.
The correct inlet should feed the correct outlet.
Clear marks also make mold setup easier for the buyer.
Later, the maintenance team can understand the cooling layout quickly without guessing.
Water Pressure During an Injection Mold Cooling Test
Water flow alone may not find every leak.
A very small leak may stay hidden during a short flow test.
Therefore, the cooling circuit should also hold pressure for a period of time.
The test pressure should match the mold design and the buyer’s cooling system.
During the injection mold cooling test, watch both the mold surface and the pressure.
Look for:
- Water drops
- Wet areas
- Moisture around plugs
- Moisture around fittings
- Water between mold plates
A pressure drop may point to a leak, even when no water is visible.
A good injection mold cooling test should check both water flow and pressure.
If the pressure drops, the mold maker should find the cause and fix it before delivery.
Injection Mold Cooling Test for O-Rings and Fittings
O-rings are a common source of leaks.
They often seal cooling inserts or connections between mold parts.
Problems may occur when:
- The groove is too deep
- The groove is too shallow
- The O-ring has damage
- The O-ring twists during assembly
- The sealing surface is rough
- The insert does not sit correctly
So, a new O-ring does not always mean a good seal.
After assembly, run the injection mold cooling test again.
If the area still leaks, inspect both the O-ring and the surrounding steel.
Replacing the O-ring alone may not solve the real problem.
Water fittings also need a careful check.
Confirm that:
- Threads are correct
- Fittings are tight
- Fittings have no damage
- The fitting type is correct
- Sizes match the buyer’s standard
The injection mold cooling test should also cover O-rings, plugs, and fittings.
Check Water Plugs Carefully
Mold makers often use plugs to seal drilled cooling holes.
These plugs must stay tight.
Poor threads or poor sealing can cause a leak later.
Pay extra attention to plugs deep inside the mold.
After shipment, these areas may be much harder to repair.
Small details can save a lot of time when the buyer installs the mold.
For a broader delivery check, see our guide on How We Prepare an Injection Mold for Overseas Shipping.
Injection Mold Cooling Test for Sliders and Lifters
Slider and lifter cooling often needs more attention.
These parts move during mold operation.
As a result, their cooling may use longer holes, special pipes, plugs, or seals.
First, test the cooling circuit while the mold is open.
Then move the slider or lifter through its normal stroke.
After that, inspect the area again.
Some leaks only appear after the moving part changes position.
For moving mold parts, the injection mold cooling test should include slider and lifter cooling.
A static water test may not be enough.
Injection Mold Cooling Test for Internal Water Leaks
Not every leak appears outside the mold.
Sometimes water can move into another drilled hole inside the steel.
Two cooling channels may connect by mistake.
A bad plug can cause the same problem.
To check this, apply pressure to one circuit while the other circuits stay open.
Water should not come from an unrelated line.
If it does, the internal cooling circuits may connect.
An injection mold cooling test can help find this type of internal leak before shipment.
The mold maker should correct the problem before delivery.
Check Water Flow During an Injection Mold Cooling Test
A mold can have no leaks and still cool poorly.
Therefore, check water flow as well.
Make sure no circuit has a blockage.
A weak or blocked line may cause:
- Warpage
- Hot spots
- Uneven shrinkage
- Longer cycle time
- Unstable part size
For complex circuits, compare the flow from different outlets.
A very weak flow may point to dirt, blockage, or poor cooling design.
This check becomes more important on large molds and deep cores.
The injection mold cooling test should confirm both leak-free sealing and normal water flow.
Repeat the Injection Mold Cooling Test After Mold Changes
One test is not enough if the mold later needs changes.
For example, the mold maker may:
- Add an insert
- Modify a slider
- Rework a core
- Add cooling
- Repair steel
- Remove and reinstall mold parts
After this work, test the cooling system again.
This is especially important when the repair area sits close to a water line.
A mold may pass the first test but develop a new leak after rework.
After major mold changes, run the injection mold cooling test again.
For this reason, Fentor Mold repeats key cooling checks after major mold changes and before final delivery.
Injection Mold Cooling Test During the Final Trial
A pressure test checks the cooling system before production.
However, the final trial adds another important check.
Inspect the mold while it is running.
Look around:
- Water fittings
- Mold plates
- Sliders
- Lifters
- Inserts
- Mold base
- Machine platen
These areas should remain dry.
Also check the mold after it becomes hot.
Heat changes the size of steel parts slightly. Because of this, a seal that works when cold may behave differently at working temperature.
The final injection mold cooling test should be completed under real trial conditions.
For molds that stay with us for Injection Molding Production, the cooling system can also be checked during a longer production run.
Drain All Water Before Shipment
After the final test, remove all water from the mold.
This step matters a lot for overseas shipping.
Water left inside the cooling channels can cause rust.
Use compressed air to blow through each circuit.
Continue until almost no water comes out.
Check:
- Water inlets
- Water outlets
- Deep cooling holes
- Slider cooling
- Lifter cooling
- Cooling inserts
Then apply rust protection where needed.
Finally, protect the fittings so dirt cannot enter during transport.
Record the Cooling Circuit Information
The buyer should not need to guess how the cooling system works.
Before shipment, provide clear cooling information.
This may include:
- Cooling layout
- Inlet and outlet numbers
- Fitting sizes
- Circuit marks
- Special cooling notes
Photos can also help.
For example, take a clear photo after marking all water lines.
This makes installation easier after the mold arrives.
Cooling information should also form part of the final tooling package.
Injection Mold Cooling Test Checklist
Use this simple checklist before shipment:
| Check Item | What to Confirm |
|---|---|
| Main cooling circuits | No leaks and normal flow |
| Water plugs | Tight and dry |
| Water fittings | Correct type and size |
| O-rings | No water leakage |
| Cooling inserts | Good sealing |
| Sliders | Cooling works through movement |
| Lifters | Cooling works through movement |
| Internal circuits | No wrong connections |
| Water flow | No blockage |
| Final trial | No leaks when mold is hot |
| Water drainage | Cooling lines are dry |
| Circuit marking | IN and OUT are clear |
| Cooling records | Layout and notes are ready |
Final Thoughts
An injection mold cooling test is an important part of final mold approval.
It should check every cooling circuit, not only the main water lines.
Flow and pressure both matter.
Plugs, fittings, O-rings, sliders, lifters, and cooling inserts also need attention.
After major mold changes, repeat the injection mold cooling test.
The final injection mold cooling test should be completed before mold delivery.
At Fentor Mold, we use the injection mold cooling test to find small cooling problems before they become larger production issues.
A water leak found in the mold shop is easy to fix. The same leak after overseas delivery can cause days of delay.