
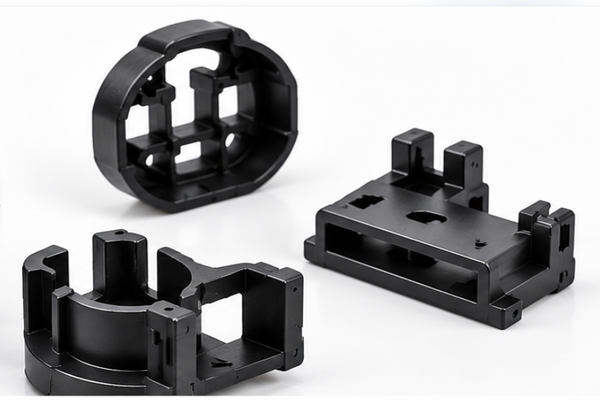
An injection mold parting surface must seal well to prevent plastic from leaking between mold halves. If the surfaces do not fit well, molten plastic can enter small gaps and form flash. As a result, parts may need extra trimming or fail quality checks.
Poor sealing can also cause mold wear, longer cycle times, and higher repair costs. However, good mold design and proper fitting can prevent many of these problems.
In this guide, we explain how parting surfaces work, what causes sealing problems, and how to improve mold quality.
What Is an Injection Mold Parting Surface?
The injection mold parting surface is the area where the two mold halves meet when the mold closes.
This surface helps seal the mold cavity during injection. It also allows the mold to open so the finished plastic part can be removed.
A good parting surface should:
- Close with proper contact
- Keep molten plastic inside the cavity
- Support stable mold operation
- Reduce flash on molded parts
- Allow safe mold opening
- Resist wear during production
However, the parting surface is not always flat. Some plastic parts need stepped or curved surfaces.
Therefore, engineers must design the surface to match the part shape and mold structure.
Why Is Injection Mold Parting Surface Sealing Important?
Good sealing helps the mold produce clean and stable plastic parts.
If the parting surface has gaps, molten plastic may flow into them during injection.
As a result, several problems can occur.
Prevent Plastic Flash
Flash is thin plastic that forms outside the intended part shape.
It often appears along the parting line or around moving mold parts.
A well-fitted parting surface helps reduce this problem.
Improve Part Appearance
A poor parting surface may leave rough edges or visible flash.
This is a common concern for automotive trim, consumer products, and other visible plastic parts.
Good sealing helps keep part edges clean.
Reduce Mold Wear
Poor contact can create uneven pressure between mold halves.
Over time, this may cause local wear or damage.
Therefore, correct fitting and mold support are important for long mold life.
Lower Production Costs
Flash often requires extra trimming or rework.
In severe cases, parts may need to be scrapped.
Better sealing can reduce these costs and improve production output.
What Causes Poor Injection Mold Parting Surface Sealing?
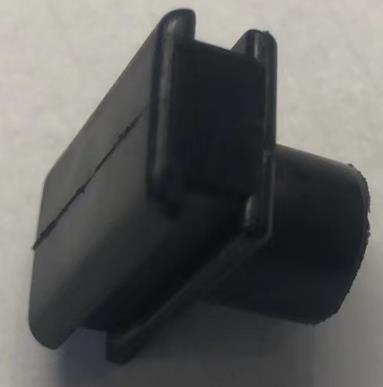
Several factors can cause gaps between mold halves.
Finding the real cause is important before making mold changes.
1. Poor Mold Surface Fitting
If the two mold halves do not fit well, small gaps may remain after closing.
These gaps can allow molten plastic to escape.
Common causes include:
- Poor machining accuracy
- Uneven surface contact
- Incorrect mold assembly
- Local high spots
- Poor insert fitting
Therefore, mold makers should check contact areas before the first trial.
2. Low Mold Clamping Force
The injection machine must provide enough force to keep the mold closed during filling and packing.
If the force is too low, the mold may open slightly.
As a result, flash can form along the parting line.
However, increasing clamp force is not always the right solution. Too much force may damage the mold or machine.
3. High Injection Pressure
High cavity pressure can push the mold halves apart.
This is more likely when the mold has weak support or limited clamping force.
Therefore, engineers should review the filling process and mold structure together.
4. Mold Wear
Parting surfaces face repeated contact during production.
Over time, wear may create small gaps.
This can be more serious near shutoff edges and moving inserts.
Regular checks help find wear before it causes major flash.
5. Poor Mold Support
A mold may bend slightly under high pressure.
For example, a large mold plate may need more support near the cavity.
Without enough support, the parting surface may open during injection.
Therefore, mold stiffness is an important part of sealing design.
How to Improve Injection Mold Parting Surface Sealing
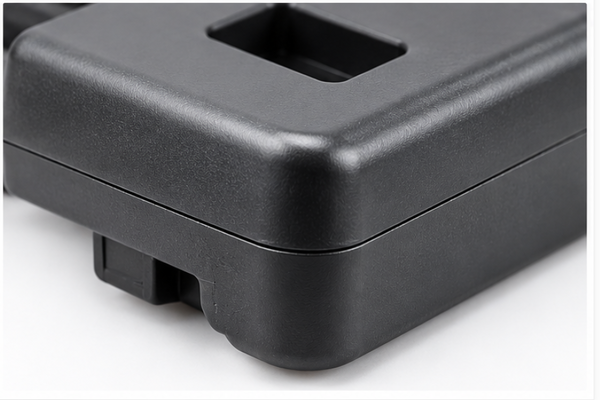
Good sealing starts with mold design. However, machining, fitting, and process control are also important.
Choose the Right Parting Surface Design
First, select a parting surface that matches the plastic part.
A simple, flat surface is often easier to machine and fit.
However, complex parts may need stepped or curved parting surfaces.
When possible, avoid very thin shutoff edges and weak steel sections.
These areas may wear or deform during production.
Improve Machining Accuracy
Accurate machining helps the two mold halves fit together.
CNC milling, EDM, and grinding can help produce the required surfaces.
However, surface finish alone does not ensure good sealing.
The mold maker must also control flatness, alignment, and contact.
Check Mold Fitting
Mold fitting is a key step before trials.
Engineers can use spotting compound to check contact between mold halves.
The compound helps show high spots and areas with poor contact.
Then, the mold maker can correct local fitting problems.
However, too much hand polishing may remove important steel and create new gaps.
Improve Mold Support
Mold plates and inserts must stay stable under injection pressure.
Therefore, engineers should check plate thickness, support pillars, and cavity layout.
Large molds may need extra support to reduce bending.
Good support helps maintain contact during filling and packing.
Control Injection Pressure
High injection pressure may cause flash if the mold cannot resist cavity pressure.
Therefore, engineers should check:
- Injection speed
- Holding pressure
- Melt temperature
- Gate size
- Flow length
- Material viscosity
The goal is to fill the part without creating more pressure than needed.
However, pressure should not be reduced so much that short shots or sink marks appear.
Use the Right Mold Steel
Parting surfaces need enough strength and wear resistance.
The best steel depends on production volume, plastic material, and mold structure.
For example, glass-filled plastics may increase wear near gates and shutoff areas.
Therefore, steel grade and heat treatment should match the application.
Injection Mold Parting Surface Design Tips
A good injection mold parting surface should be easy to make, fit, and maintain.
The following tips can help improve sealing.
Avoid Sharp Shutoff Edges
Very sharp steel edges can chip or wear during production.
Where the part design allows, use stronger shutoff shapes.
This can help reduce damage and improve mold life.
Provide Enough Shutoff Area
Shutoff surfaces need enough contact area to seal the cavity.
If the contact area is too small, local pressure may become too high.
As a result, wear or deformation may occur.
However, the correct shutoff width depends on the mold design and working load.
Check Insert Fitting
Many molds use inserts to form complex features.
Poor insert fitting can create flash around the insert edges.
Therefore, engineers should check insert position, support, and contact surfaces.
Keep the Parting Surface Clean
Small plastic pieces, dust, or metal chips can stop the mold from closing fully.
As a result, flash may appear even when the mold design is correct.
Regular cleaning helps maintain proper contact.
Plan for Mold Maintenance
Parting surfaces should be easy to inspect and repair.
For long-term production, replaceable inserts may help reduce repair costs in areas with high wear.
Common Injection Mold Parting Surface Problems
Parting surface problems often appear during T0 and T1 mold trials.
However, the same issues can also develop after long production runs.
| Problem | Possible Cause | Recommended Solution |
|---|---|---|
| Flash along parting line | Poor fitting or low clamp force | Check contact and clamp force |
| Flash near inserts | Insert gap or poor support | Improve insert fitting |
| Local surface damage | High contact stress | Check alignment and steel support |
| Uneven parting line | Poor mold alignment | Check guide and locating parts |
| Flash after long production | Surface wear | Repair or replace worn steel |
| Flash during packing | High cavity pressure | Review holding pressure and mold stiffness |
The key is to find the cause before changing the mold.
For example, flash caused by mold bending cannot always be fixed by polishing the parting surface.
How to Check Injection Mold Parting Surface Contact
Contact checks help confirm whether the mold closes as planned.
A common method is mold spotting.
Step 1: Clean the Mold
First, remove plastic residue, oil, and dirt from the contact surfaces.
This helps prevent false contact marks.
Step 2: Apply Spotting Compound
Apply a thin layer of spotting compound to the selected surface.
Avoid using too much compound because it may hide small fitting problems.
Step 3: Close the Mold
Close the mold under controlled conditions.
The goal is to check where the surfaces touch.
Step 4: Inspect Contact Marks
Open the mold and check the contact pattern.
High spots may show stronger marks, while areas with poor contact may show little or no transfer.
Step 5: Correct the Fitting
If needed, adjust the local high spots.
Then, repeat the check until the required contact pattern is reached.
However, engineers should follow the planned mold contact strategy. Not every parting surface area needs the same contact pressure.
How to Prevent Flash During Injection Molding
Good parting surface sealing is important, but process settings also affect flash.
Therefore, mold makers and molding engineers should work together.
Check Clamp Force
Make sure the machine provides enough clamp force for the projected area and expected cavity pressure.
However, avoid using excessive force to hide mold fitting problems.
Optimize Injection Speed
Very high injection speed may create high pressure in some parts.
Therefore, adjust the filling profile based on the material and part shape.
Control Holding Pressure
Excessive holding pressure can increase cavity pressure and cause flash.
However, too little holding pressure may lead to sink marks or poor dimensions.
The correct setting should balance part quality and mold sealing.
Maintain Stable Mold Temperature
Uneven mold temperature can affect part shrinkage and process stability.
It can also change the thermal expansion of mold components.
Therefore, stable cooling helps maintain repeatable production.
Injection Mold Parting Surface Requirements for Automotive Parts
Automotive plastic parts often need clean edges, stable dimensions, and good appearance.
For example, interior trim parts may have visible parting lines.
Meanwhile, connectors and brackets may contain small shutoff areas.
Therefore, the mold design must consider both sealing and part function.
For automotive molds, engineers should focus on:
- Clean parting lines
- Stable shutoff contact
- Strong mold support
- Accurate insert fitting
- Wear-resistant steel
- Easy maintenance
At Fentor Mold, our engineering team reviews parting surfaces, shutoff areas, and mold structure during the design stage.
Our injection mold manufacturing services support custom tooling for automotive, electronic, and industrial plastic parts.
How to Test Parting Surface Sealing Before Production
Mold trials help confirm whether the parting surface seals well under real working conditions.
During T0 and T1 trials, engineers should check:
- Flash along the parting line
- Flash around inserts and shutoff areas
- Mold contact marks
- Part dimensions
- Injection and holding pressure
- Clamp force
- Mold opening and closing movement
In addition, repeated molding cycles help show whether the contact remains stable.
A mold may produce clean parts during the first few shots but develop flash as temperatures and working conditions change.
For customers who need finished plastic parts, Fentor Mold also provides injection molding production services.
This helps support the move from mold trials to stable production.
FAQ About Injection Mold Parting Surfaces
What Is the Purpose of an Injection Mold Parting Surface?
The parting surface is where the mold halves meet.
It helps seal the cavity and allows the mold to open after molding.
What Causes Flash on the Parting Surface?
Common causes include poor fitting, low clamp force, high cavity pressure, mold wear, and weak mold support.
How Can You Improve Mold Parting Surface Sealing?
Improve machining accuracy, check contact, support the mold structure, and use suitable molding settings.
Regular cleaning and maintenance also help.
Does a Smooth Parting Surface Prevent Flash?
Not always.
A smooth surface may still have poor contact if the mold halves are not flat or aligned.
Therefore, correct fitting is more important than surface finish alone.
Can High Clamp Force Fix Parting Surface Flash?
Sometimes, low clamp force is the cause.
However, excessive force can damage the mold and may not solve poor fitting or weak support.
Conclusion
A well-designed injection mold parting surface helps prevent flash, reduce mold wear, and improve plastic part quality.
Good sealing depends on more than surface finish. Mold design, machining accuracy, fitting, support, and injection settings all play important roles.
Therefore, engineers should check these factors together before making mold changes.
If your plastic parts have flash or parting line problems, Fentor Mold can help review the mold design and suggest practical solutions.
Contact our engineering team to discuss your injection mold project and request a quotation.