Medical Device Prototyping: Comparing the Best Manufacturing Options
Medical Device Prototyping is an important step between product design and final production. A prototype helps engineers check size, assembly, appearance, material performance, and function before production tooling starts.
However, not every medical prototype should use the same process. CNC machining, 3D printing, and prototype injection molding each have different strengths. Therefore, the best option depends on part design, material, accuracy, quantity, and testing needs.
At Fentor Mold, we support customers from early prototype review to mold development and plastic part production. By choosing the right process early, a project can reduce design changes, save time, and lower tooling risk.
Why Is Medical Device Prototyping Important?
Medical products often have stricter requirements than common consumer parts. For example, a component may need accurate dimensions, smooth surfaces, stable assembly, or good heat resistance.
Because of this, Medical Device Prototyping is not only about making a part that looks correct. It should also help engineers find possible problems before production begins.
A useful prototype can help answer questions such as:
- Does the part fit correctly?
- Are the key dimensions correct?
- Is the wall thickness suitable?
- Are ribs, bosses, and snap fits strong enough?
- Does the material meet the design needs?
- Can the part be made in a stable way?
- Will the final mold need major changes?
As a result, early prototype testing can reduce expensive changes later.
Main Medical Device Prototyping Methods
Several methods can be used for medical prototypes. However, three are especially common:
| Process | Best For | Typical Quantity | Main Advantage |
|---|---|---|---|
| 3D Printing | Concept and early design testing | 1–20 pcs | Fast and flexible |
| CNC Machining | Functional and precision testing | 1–100 pcs | High accuracy |
| Prototype Injection Molding | Functional testing and low-volume production | 50–5,000+ pcs | Production-like parts |
Each method serves a different purpose. In fact, many projects use more than one process during development.
Medical Device Prototyping With 3D Printing
3D printing is often the fastest choice during the early design stage. Engineers can turn CAD data into a physical part without building a mold.
Therefore, design changes are easy to test.
Advantages of 3D Printing
3D printing works well when:
- Only a few parts are needed.
- The design may change several times.
- Complex shapes need to be checked.
- The team needs a sample quickly.
- Basic assembly needs to be tested.
For example, engineers can print several housing designs and compare them before choosing one.
This saves time and reduces early development cost.
Limitations of 3D Printing
However, printed parts may not behave like injection molded parts.
The surface finish can be different. Material strength may also change because of the printing process. In addition, the print direction can affect part strength.
For this reason, 3D printing is usually better for:
- Concept checks
- Shape review
- Ergonomic testing
- Early assembly testing
On the other hand, it may be less suitable when the prototype must closely match final molded parts.
CNC Machining for Medical Device Prototyping
CNC machining is another common option for Medical Device Prototyping. It is especially useful when accuracy and material performance are important.
Instead of adding material layer by layer, CNC machining removes material from a solid block. Because of this, it can produce accurate parts with a good surface finish.
When CNC Machining Is a Good Choice
CNC machining is useful for:
- Tight-tolerance parts
- Functional testing
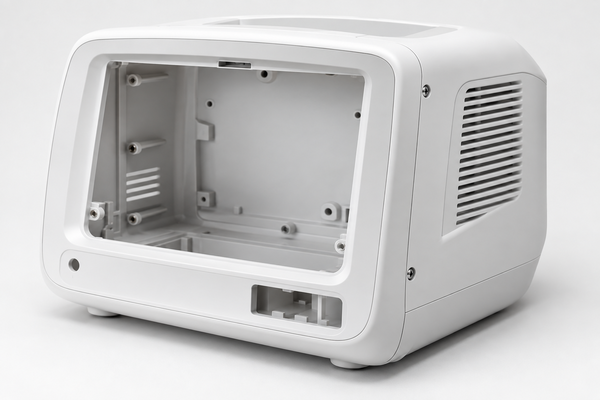
- Medical equipment housings
- Structural components
- Transparent parts
- Low-volume prototypes
- Engineering plastics
Common materials include:
- ABS
- PC
- POM
- PMMA
- PA
- PEEK
- Aluminum
- Stainless steel
Since CNC machining uses solid materials, the prototype can often give more realistic test results than some printed parts.
For precision plastic or metal parts, our components manufacturing service can support prototype development.
Limits of CNC Medical Device Prototyping
Although CNC machining offers high accuracy, it also has some limits.
For example, deep ribs, narrow pockets, undercuts, and closed internal shapes can be difficult to machine. As a result, machining time may increase.
Material waste can also be higher because material is removed from a solid block.
Therefore, CNC machining is often a good choice for small quantities. However, once the quantity becomes larger, injection molding may offer better value.
Medical Device Prototyping With Injection Molding
Prototype injection molding is useful when a project needs parts that are close to final production parts.
The process uses a real injection mold and production-grade thermoplastic material. Therefore, engineers can test the part under more realistic conditions.
This method can help evaluate:
- Shrinkage
- Warpage
- Surface finish
- Weld lines
- Gate marks
- Ejection
- Material flow
- Assembly
- Mechanical performance
Because of this, prototype molding is useful before full production tooling.
Fentor Mold provides prototype injection molding for projects that need molded samples before higher-volume production.
When Should You Choose Prototype Injection Molding?
Prototype injection molding is usually a good choice when the design is already quite stable.
It is especially useful when:
- Production-grade plastic is required.
- Dozens or hundreds of parts are needed.
- Parts will be used for functional testing.
- Surface quality must match production parts.
- Shrinkage needs to be checked.
- Molding defects need to be found early.
- Consistent parts are needed for testing.
For example, a 3D printed connector may look correct. However, the molded version may show different shrinkage or sealing performance.
Therefore, testing molded parts can reveal issues before production tooling starts.
CNC vs 3D Printing vs Injection Molding
The best Medical Device Prototyping process depends on what the prototype needs to prove.
| Factor | 3D Printing | CNC Machining | Prototype Injection Molding |
|---|---|---|---|
| Initial cost | Low | Low to Medium | Medium |
| Lead time | Very Fast | Fast | Medium |
| Quantity | Very Low | Low | Low to Medium |
| Accuracy | Medium to High | High | High |
| Material options | Limited | Very Wide | Production thermoplastics |
| Surface quality | Medium | High | High |
| Production similarity | Low to Medium | Medium | Very High |
| Design changes | Very Easy | Easy | More Difficult |
| Complex geometry | Excellent | Limited in some areas | Excellent |
| Functional testing | Medium | Excellent | Excellent |
These methods do not always compete with each other. Instead, they can be used together during product development.
Choose the Process Based on the Project Stage
A practical prototype plan should follow the development stage.
Early Concept Stage
At the start, the design may change often. Therefore, 3D printing is usually a good option.
The main goals may include:
- Checking size
- Reviewing appearance
- Testing ergonomics
- Comparing several designs
At this point, production-level material performance may not be necessary.
Engineering Verification Stage
Once the design becomes more stable, engineers often need better accuracy and stronger materials.
CNC machining can then help test:
- Mechanical strength
- Dimensional accuracy
- Assembly
- Material performance
- Critical dimensions
As a result, CNC parts are useful before the design is frozen.
Pre-Production Stage
When the design is almost complete, prototype injection molding becomes more valuable.
Molded parts can reveal problems that may not appear in CNC or printed parts. For example:
- Sink marks
- Weld lines
- Warpage
- Short shots
- Gate marks
- Ejection marks
- Shrinkage changes
At this stage, DFM review is also important because it can identify mold-related risks before tooling starts.
Material Selection Matters in Medical Device Prototyping
The process is important, but material choice also matters.
For a visual prototype, the final resin may not be necessary. However, for mechanical, heat, chemical, or assembly tests, the prototype material should be close to the final production material.
Common materials may include:
- Polycarbonate
- ABS
- PC/ABS
- Polypropylene
- POM
- Nylon
- PMMA
- PEEK
- PPSU
Each material has different strengths.
For example, PC offers good impact strength and can be transparent. PP has good chemical resistance and low density. PEEK provides high heat resistance, but it costs more and is harder to process.
Therefore, the material should always match the real test requirement.
Consider Tolerances Before Choosing a Prototype Process
Tolerance can strongly affect the process choice.
A simple appearance model may allow more variation. However, a functional medical part may require tighter control.
Important features may include:
- Sealing surfaces
- Connector areas
- Snap fits
- Screw bosses
- Bearing areas
- Tube connections
- Sensor mounting areas
If these areas need tight tolerances, CNC machining or injection molding may be more suitable.
At the same time, engineers should avoid applying very tight tolerances to every dimension. Otherwise, production cost may increase.
A better method is to identify the critical dimensions first.
Prototype Quantity Can Change the Best Process
Quantity is another key factor in Medical Device Prototyping.
For one or two parts, building a mold usually does not make sense. In this case, CNC machining or 3D printing is often more practical.
However, if the project needs hundreds or thousands of parts, CNC machining can become expensive.
A simple guide is:
| Required Quantity | Typical Process |
|---|---|
| 1–10 pcs | 3D Printing or CNC |
| 10–50 pcs | CNC or 3D Printing |
| 50–500 pcs | CNC or Prototype Injection Molding |
| 500–5,000 pcs | Prototype or Low-Volume Injection Molding |
| Higher Volume | Production Injection Molding |
These ranges are only general guides. Part size, shape, material, and mold design can change the final choice.
Do Not Choose Medical Device Prototyping Based Only on Price
Prototype price is important. However, the cheapest option is not always the best option for the whole project.
For example, a low-cost printed part may confirm the shape. Yet it may not show injection molding problems.
If those problems appear after the mold is built, mold changes may be required.
Therefore, the total decision should consider:
- Prototype cost
- Testing value
- Design risk
- Tooling risk
- Modification cost
- Project schedule
- Final quantity
In many cases, spending a little more during prototyping can reduce much larger costs later.
Combining Several Medical Device Prototyping Methods
Many projects benefit from using several processes.
A common path may be:
Stage 1: 3D print the first concept.
Stage 2: CNC machine functional prototypes.
Stage 3: Review the design with DFM.
Stage 4: Build a prototype mold.
Stage 5: Test molded parts.
Stage 6: Finalize the production mold.
This method allows each process to do what it does best.
More importantly, problems can be found earlier, when changes are easier and cheaper.
DFM Is Important Before Prototype Injection Molding
Before building an injection mold, the CAD design should be reviewed.
A DFM review can check:
- Draft angles
- Wall thickness
- Rib thickness
- Boss design
- Undercuts
- Parting lines
- Gate locations
- Ejection
- Mold structure
- Possible sink marks
- Possible weld lines
These areas can affect prototype quality and final production.
At Fentor Mold, we review moldability before tooling starts. For projects moving toward production, our custom injection mold manufacturing service supports mold design, machining, assembly, trial, and improvement.
Moving From Medical Device Prototyping to Production
The move from prototype to production should be planned early.
A successful prototype does not always mean the design is ready for mass production. Therefore, the final review should include:
- Production material
- Annual quantity
- Mold life
- Critical tolerances
- Surface requirements
- Inspection needs
- Assembly needs
- Cycle time
- Quality standards
In addition, the molding process must remain stable over repeated production cycles.
Our injection molding production service can support projects after mold validation and sample approval.
Final Thoughts
There is no single process that fits every Medical Device Prototyping project.
3D printing works well for fast concept testing and design changes. CNC machining offers high accuracy and good material options. Prototype injection molding is better when production-like parts or larger quantities are required.
Therefore, the best choice depends on quantity, material, tolerance, testing needs, geometry, and cost.
By matching the process to the real purpose of the prototype, engineering teams can reduce risk and move toward production more smoothly. In addition, early cooperation with a mold manufacturer can help identify design and tooling issues before they become expensive.