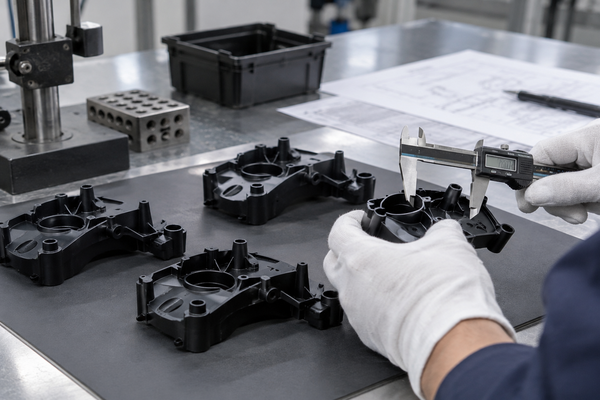
NPI in manufacturing is the process of moving a new product from design to production. For injection molded parts, this process involves more than making a mold. It also covers DFM, material selection, mold design, mold trials, sample approval, and production launch.
A good NPI process can reduce delays and quality problems. In addition, it can lower the risk of costly mold changes.
For plastic parts, early engineering review is important. Problems are much easier to solve before mold machining begins.
At Fentor Mold, we support projects from early part review to mold manufacturing and injection molding production.
What Is NPI in Manufacturing?
NPI in manufacturing means New Product Introduction.
It is a process for moving a new product into stable production.
For injection molded parts, several teams may take part:
- product design;
- engineering;
- tooling;
- quality;
- purchasing;
- production;
- suppliers.
The goal is simple. The product must be easy to manufacture, stable in quality, and suitable for the required production volume.
However, injection molded parts have extra challenges.
The part design and mold design are closely connected. For example, one small design feature may affect the gate, parting line, ejection, cooling, or mold cost.
Therefore, mold review should start early.
Main Stages of NPI in Manufacturing
A typical injection molding NPI project includes several stages.
| NPI Stage | Main Goal |
|---|---|
| Product review | Confirm design requirements |
| Prototype | Check fit and function |
| DFM | Find molding and tooling risks |
| Material selection | Confirm resin performance |
| Mold design | Create a stable mold concept |
| Mold manufacturing | Build the injection mold |
| T0 / T1 trial | Check molded samples |
| Sample approval | Confirm the quality standard |
| Process validation | Stabilize molding conditions |
| Production launch | Start repeat production |
Each stage removes a different type of risk.
Therefore, skipping important steps may save a little time at first but cause larger delays later.
Why NPI in Manufacturing Matters for Injection Molding
Injection molds require a large amount of work before production starts.
Once steel machining begins, product changes become more difficult and more expensive.
Because of this, NPI in manufacturing is especially important for injection molded products.
A good NPI process can help prevent:
- late design changes;
- incorrect material selection;
- weak ribs or bosses;
- sink marks;
- warpage;
- difficult ejection;
- poor gate locations;
- unstable dimensions;
- unnecessary mold complexity.
In addition, NPI helps designers, mold makers, and production teams work toward the same target.
Step 1: Review the Plastic Part Design
First, engineers should review whether the part is suitable for injection molding.
Important areas include:
- wall thickness;
- draft angle;
- ribs;
- bosses;
- undercuts;
- sharp corners;
- holes;
- snap fits;
- threads;
- appearance surfaces.
For example, a thick boss can cause a sink mark on the opposite surface.
Likewise, a deep undercut may require a slider or lifter. As a result, mold cost and lead time may increase.
Early design review can reduce these problems.
Step 2: Build and Test Prototypes
Prototype parts help confirm the design before production tooling begins.
Common prototype methods include:
- CNC machining;
- 3D printing;
- vacuum casting;
- prototype injection molding.
Each method has a different purpose.
For example, 3D printing works well for checking shape and assembly. However, printed materials may not behave like final injection molded plastics.
Prototype injection molding can produce parts closer to final production conditions.
Therefore, it can be useful when material performance and molding behavior need testing.
Our prototype injection molding service supports projects that need molded samples before full production tooling.
Step 3: Use DFM During NPI in Manufacturing
DFM is one of the most important steps in an injection molding NPI project.
DFM means Design for Manufacturability.
It checks whether the part can be molded reliably.
A DFM review may check:
- parting line;
- gate location;
- ejector position;
- draft;
- wall thickness;
- undercuts;
- slider direction;
- sink mark risk;
- weld line risk;
- mold structure.
However, a good DFM should do more than list problems.
It should also provide practical solutions.
For example, engineers may suggest changing a rib, adding draft, moving a gate, or adjusting wall thickness.
As a result, the team can solve problems before mold machining starts.
Step 4: Select the Material Early
Material selection affects both the plastic part and the mold.
Common injection molding materials include:
- ABS;
- PC;
- PC/ABS;
- PP;
- PE;
- PA;
- POM;
- PBT;
- TPE;
- TPU;
- PPS;
- PEEK.
Each material has different properties.
Therefore, engineers should consider:
- strength;
- heat resistance;
- impact resistance;
- chemical resistance;
- flame rating;
- wear resistance;
- moisture absorption;
- appearance;
- cost.
For example, glass-filled nylon offers high stiffness. However, it can increase mold wear and warpage risk.
Because of this, the material should be confirmed before the mold design is finished.
Step 5: Design the Injection Mold
After the part and material are confirmed, mold design can begin.
The mold should match the expected production needs.
Important decisions include:
- cavity quantity;
- mold steel;
- hot runner or cold runner;
- gate type;
- cooling layout;
- ejection system;
- slider design;
- lifter design;
- insert structure;
- mold life.
For example, a low-volume project may not need a complex high-life mold.
In contrast, a high-volume automotive part may need stronger steel and more automation.
Therefore, the tooling concept should match the real project.
Our injection mold manufacturing service covers mold design, precision machining, assembly, and mold trials.
Step 6: Use Moldflow When Needed
Moldflow can help find molding risks before production begins.
The analysis may show:
- filling pattern;
- pressure;
- weld lines;
- air traps;
- temperature;
- cooling;
- shrinkage;
- warpage.
Not every plastic part needs a detailed Moldflow study.
However, it can be useful for large, thin, or complex parts.
It can also help when the part uses several gates or glass-filled material.
As a result, engineers can make changes before the mold reaches the trial stage.
Step 7: Manufacture the Mold
Once the mold design is approved, manufacturing starts.
Typical processes include:
- CNC machining;
- EDM;
- wire cutting;
- grinding;
- drilling;
- polishing;
- fitting;
- assembly.
Accuracy is important during every step.
For example, poor shut-off fitting can cause flash. Incorrect insert positions can affect part dimensions.
Therefore, machining and mold fitting need careful control.
Step 8: Run T0 and T1 Mold Trials
T0 is usually the first mold trial.
The first trial does not always need to produce a perfect part.
Instead, it helps the team check:
- filling;
- ejection;
- flash;
- sink marks;
- weld lines;
- warpage;
- dimensions;
- surface quality;
- mold movement.
After T0, engineers review the samples and mold performance.
Then, they make the required changes.
T1 checks whether those changes worked.
Some projects may also need T2 or another trial before final approval.
Step 9: Approve Samples During NPI in Manufacturing
Sample approval creates a clear quality standard.
Customers may check:
- dimensions;
- appearance;
- color;
- fit;
- function;
- texture;
- assembly;
- critical features.
Once the sample meets the requirements, it can become a reference sample.
In many projects, this is called the golden sample.
Therefore, future production parts can be compared with an agreed standard.
Without a clear reference, quality decisions can become difficult.
Step 10: Validate the Molding Process
A good mold alone does not guarantee good production.
The molding process also needs stable settings.
Important parameters include:
- melt temperature;
- mold temperature;
- injection speed;
- injection pressure;
- holding pressure;
- cooling time;
- screw speed;
- back pressure.
The goal is to create a stable process window.
In other words, small normal changes should not cause large quality problems.
Our injection molding production service includes mold trials, process adjustment, and production support.
Step 11: Start Production
After mold and sample approval, production can begin.
However, the NPI process should continue through the first production runs.
The team should monitor:
- reject rate;
- dimensions;
- cycle time;
- mold performance;
- material stability;
- assembly problems.
Early production data is useful because some problems only appear after longer runs.
Therefore, the first batches can confirm whether the process is truly stable.
Common Problems in NPI in Manufacturing
Several problems can slow down an injection molding NPI project.
| Problem | Possible Result |
|---|---|
| Late design changes | Extra mold modification |
| Late material changes | Shrinkage or process changes |
| Weak DFM review | More changes after T0 |
| Unclear tolerances | Inspection problems |
| No approved sample | Unclear quality standard |
| Slow communication | Longer project lead time |
| Complex mold design | Higher cost |
| Limited trial data | Production instability |
Fortunately, most of these problems can be reduced through early planning.
How to Reduce NPI Lead Time
Fast NPI does not mean skipping important steps.
Instead, the team should make key decisions earlier.
Freeze Important Design Features Early
Major design changes should stop before mold machining begins.
For example, changes to undercuts, bosses, wall thickness, or assembly features may affect the mold structure.
Therefore, these areas should be confirmed first.
Complete DFM Early
Fast DFM feedback helps engineers improve the product before steel cutting.
As a result, the mold maker can start with a more stable design.
Confirm Material Early
Different plastics have different flow and shrinkage.
They also need different molding temperatures.
Therefore, a late material change may affect both mold design and part dimensions.
Define the Approval Standard
Before T0, confirm the important requirements.
These may include:
- key dimensions;
- appearance;
- texture;
- color;
- fit;
- function.
This makes later sample approval easier.
NPI in Manufacturing: Prototype Tooling vs Production Tooling
Not every NPI project should start with a full production mold.
Prototype tooling can make sense when the design is still changing.
| Factor | Prototype Tooling | Production Tooling |
|---|---|---|
| Cost | Lower | Higher |
| Lead time | Shorter | Longer |
| Mold life | Lower | Higher |
| Main use | Testing and early production | Long-term production |
| Design changes | Easier | More expensive |
| Automation | Limited | More available |
For example, a company may first use prototype tooling to test the market.
Later, it can build a production mold after the product design becomes stable.
This approach can reduce early investment risk.
How Fentor Mold Supports NPI Projects
Fentor Mold can support several stages of injection molding NPI.
Depending on the project, this can include:
- DFM review;
- Moldflow analysis;
- mold concept development;
- injection mold manufacturing;
- prototype molding;
- mold trials;
- dimensional inspection;
- mold modification;
- injection molding production.
The main goal is to find problems early.
In addition, clear communication between design, tooling, quality, and production teams can reduce project delays.
Final Thoughts
NPI in manufacturing helps move injection molded parts from design and prototype stages into stable production.
A complete process includes product review, prototyping, DFM, material selection, mold design, mold manufacturing, trials, sample approval, and process validation.
Most importantly, problems should be found before mold machining begins.
As a result, manufacturers can reduce mold changes, control cost, improve part quality, and reach production with fewer delays.