
PMMA is widely used for transparent plastic parts because of its high clarity, good surface appearance, and strong light transmission. However, PMMA injection molding is not always easy.
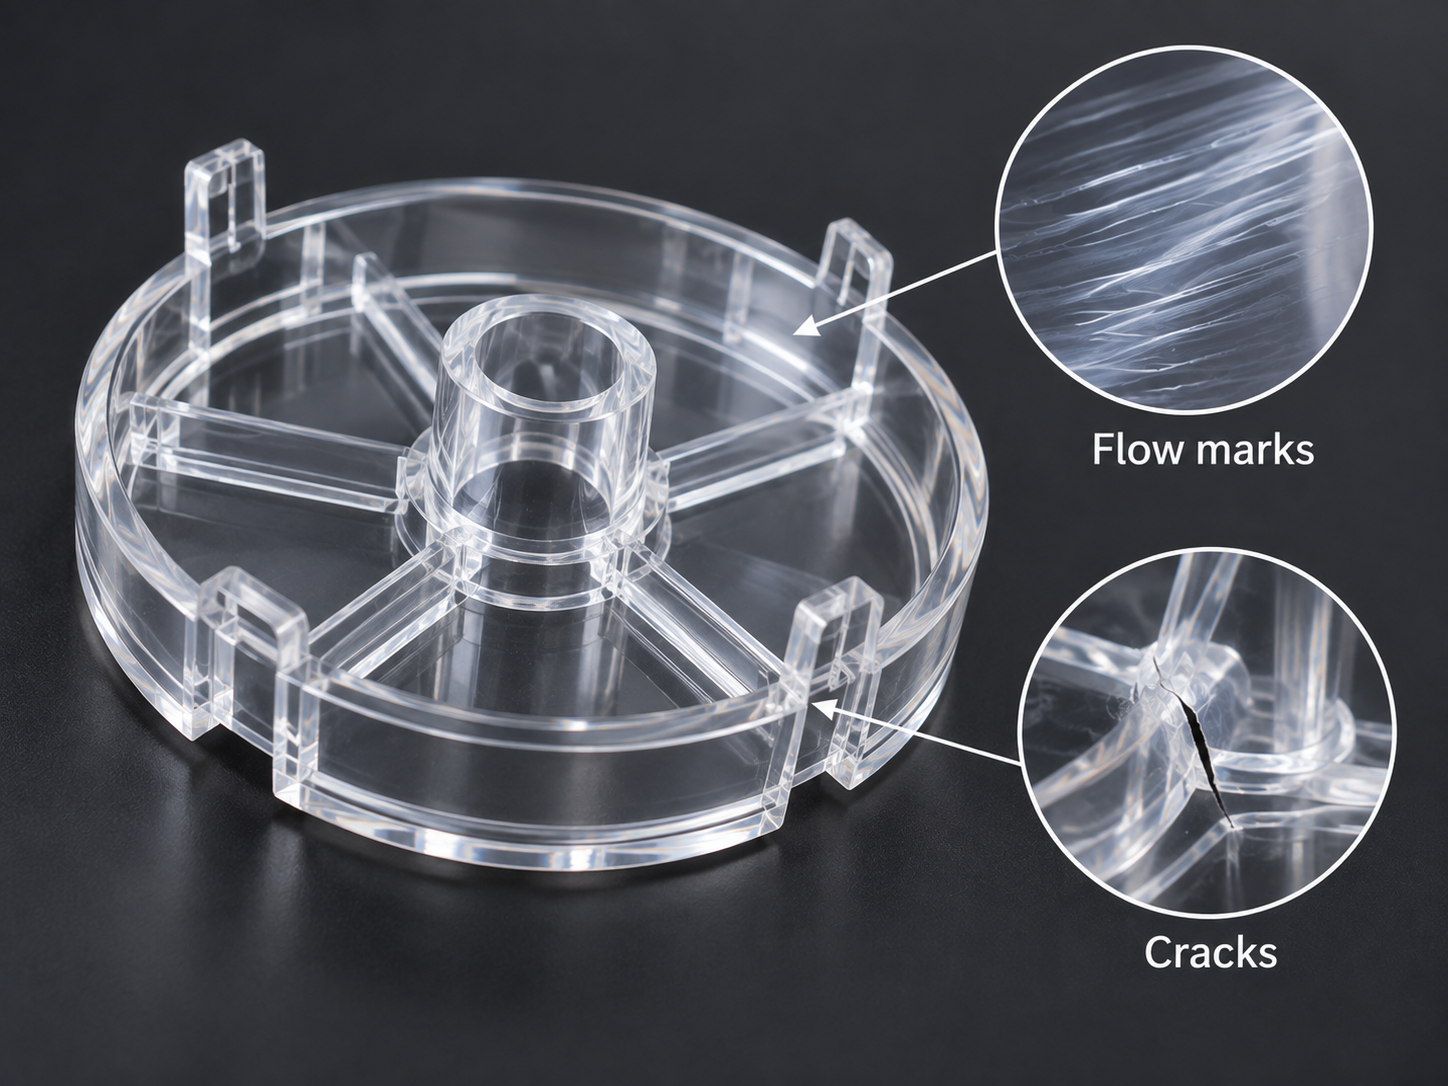
Two common problems are cracks and flow marks. These defects can reduce transparency, weaken the part, and make an otherwise functional product unacceptable.
In most cases, the problem is not caused by one factor alone. Material drying, mold temperature, gate design, injection speed, internal stress, and part structure can all affect the final result.
Therefore, preventing PMMA defects requires control from product design to mold design and molding production.
Why Is PMMA Injection Molding Difficult?
PMMA, also called acrylic, has excellent optical properties, but it is more sensitive to processing conditions than many general-purpose plastics.
Typical challenges include:
- High sensitivity to internal stress
- Limited impact resistance compared with PC
- Visible flow defects on transparent surfaces
- Risk of cracking around corners, holes, and inserts
- High appearance requirements
- Sensitivity to moisture and contamination
- Strong dependence on mold polishing quality
For transparent products, even a small defect can be clearly visible.
As a result, PMMA injection molding requires stable processing and careful mold design.
What Causes Cracks in PMMA Injection Molding?
Cracks can appear immediately after molding or several hours or days later.
In some cases, the part looks acceptable during inspection but develops cracks during assembly, storage, or contact with chemicals.
The main causes are usually related to internal stress and local stress concentration.
| Cause | Typical Result |
|---|---|
| Excessive injection pressure | High internal stress |
| Low mold temperature | Rapid cooling and frozen stress |
| Sharp corners | Local stress concentration |
| Poor gate position | Unbalanced filling |
| Excessive packing pressure | Stress near gate area |
| Improper ejection | Cracks around ribs or bosses |
| Solvent exposure | Stress cracking after molding |
| Insufficient drying | Poor surface and material performance |
1. Control Internal Stress in PMMA Parts
Internal stress is one of the main reasons PMMA parts crack.
If the melt fills the cavity under excessive pressure and cools too quickly, stress can remain locked inside the molded part.
The part may initially look normal. However, once it is exposed to assembly pressure, temperature changes, or cleaning chemicals, cracks may appear.
To reduce internal stress:
- Avoid excessive injection pressure
- Reduce unnecessary holding pressure
- Use a suitable mold temperature
- Avoid extremely fast cooling
- Improve filling balance
- Prevent excessive gate restriction
In some applications, annealing may also be used after molding to reduce residual stress.
However, it is better to reduce stress during the molding process rather than relying only on secondary treatment.
2. Increase Mold Temperature When Necessary
A mold that is too cold can cause the PMMA melt to freeze too quickly.
This creates several problems:
- Higher filling pressure
- Stronger flow marks
- Poor surface replication
- Higher internal stress
- Lower transparency
A higher mold temperature allows the plastic to flow more smoothly and reduces rapid skin formation.
However, mold temperature should not simply be increased without control. Excessive mold temperature can increase cycle time and create other dimensional problems.
Therefore, the correct setting depends on the part thickness, gate design, resin grade, and appearance requirements.
What Causes Flow Marks in PMMA Injection Molding?
Flow marks often appear as visible lines, waves, rings, or uneven gloss on the surface.
On transparent PMMA parts, these defects are especially noticeable.
Common causes include:
- Low melt temperature
- Low mold temperature
- Improper injection speed
- Small gate size
- Long flow length
- Sudden thickness changes
- Poor venting
- Flow hesitation
- Weld line formation
The root cause usually comes from unstable melt flow or uneven cooling.
3. Optimize Injection Speed
Injection speed has a major influence on PMMA appearance.
If the injection speed is too slow, the melt front may cool before the cavity fills completely. This can produce obvious flow marks.
However, if the speed is too high, it can also cause:
- Jetting
- Burn marks
- Excessive shear
- High internal stress
Therefore, multi-stage injection is often more effective.
For example:
- Use controlled speed near the gate
- Increase speed during main cavity filling
- Reduce speed before the end of filling
This approach can help maintain a stable flow front while reducing stress and visible defects.
4. Improve PMMA Injection Mold Gate Design
Gate design is critical for PMMA injection molding.
A gate that is too small increases shear and injection pressure. It can also create visible stress around the gate area.
A poorly positioned gate may cause long flow paths, weld lines, uneven filling, or visible flow marks.
Gate design should consider:
- Part shape
- Wall thickness
- Cosmetic surface
- Flow length
- Weld line location
- Gate mark requirements
- Ejection direction
For transparent housings or optical parts, the gate should usually be positioned away from important appearance areas whenever possible.
Fentor Mold evaluates gate position during the early mold engineering stage to reduce appearance defects before steel cutting.
You can learn more about our injection mold design and manufacturing.
5. Avoid Sudden Wall Thickness Changes
Large changes in wall thickness can cause unstable material flow.
When the PMMA melt moves from a thin section into a thick section, or from a thick section into a thin section, the flow front may slow down or change direction.
This can produce:
- Flow marks
- Sink marks
- Internal stress
- Uneven cooling
- Optical distortion
For better results, wall thickness should remain as uniform as possible.
Transitions between different thicknesses should also be gradual.
If a design change is not possible, mold flow analysis can help evaluate filling behavior before mold manufacturing begins.
6. Improve Venting
Poor venting is another common cause of surface problems.
When air cannot escape from the cavity, it becomes compressed in front of the melt.
This may cause:
- Burn marks
- Short shots
- Flow hesitation
- Poor surface finish
- Visible flow lines
Transparent products make these defects even easier to see.
Vents should be placed near:
- End-of-fill areas
- Deep ribs
- Weld line locations
- Inserts
- Thin sections
However, vent depth must also be controlled carefully because excessive venting can create flash.
7. Dry PMMA Material Correctly
PMMA should be properly dried before molding.
Moisture can affect surface quality and increase the risk of cosmetic defects.
Poor drying may lead to:
- Silver streaks
- Bubbles
- Surface defects
- Reduced transparency
- Unstable molding
The exact drying temperature and time depend on the PMMA grade and resin supplier recommendation.
Therefore, processors should follow the material data sheet instead of using one fixed setting for every PMMA grade.
Material should also be protected from moisture after drying.
8. Reduce Sharp Corners and Stress Concentration
Sharp internal corners are dangerous for PMMA parts.
Stress can concentrate in these areas during molding and assembly.
Typical high-risk areas include:
- Screw bosses
- Holes
- Snap-fit roots
- Thin ribs
- Insert areas
- Sharp internal corners
Adding proper radii can reduce stress concentration.
For example, a smooth radius at the base of a boss is usually safer than a sharp 90-degree transition.
This is especially important when the part will experience assembly load.
9. Pay Attention to Ejection Design
Cracks are not always created during filling.
Sometimes the problem starts during mold ejection.
If the part grips the core too tightly, high ejector force may create cracks around ribs, bosses, or thin walls.
Possible improvements include:
- Increase draft angle
- Optimize ejector pin position
- Add more ejector pins
- Use larger ejector areas
- Improve surface polishing
- Reduce undercut resistance
Transparent PMMA parts can also show ejector marks easily.
Therefore, the ejection system should be designed for both function and appearance.
10. Mold Polishing Is Important for Transparent PMMA
A transparent PMMA part can only reproduce the surface quality of the mold cavity.
Poor polishing may create haze, scratches, or uneven gloss.
For high-gloss parts, the cavity surface must be carefully polished.
However, polishing alone cannot solve every transparency problem.
Good optical appearance also depends on:
- Resin quality
- Material drying
- Injection temperature
- Mold temperature
- Gate position
- Filling stability
- Proper venting
In other words, surface polishing and molding conditions must work together.
Cracks vs Flow Marks: Quick Troubleshooting Guide
| Problem | Possible Cause | Recommended Action |
|---|---|---|
| Cracks near gate | High packing pressure | Reduce holding pressure |
| Cracks near boss | Stress concentration | Add radius and improve ejection |
| Cracks after assembly | Residual stress | Optimize molding and part design |
| Flow marks near gate | Poor gate design | Increase gate size or change position |
| Wave marks | Unstable injection speed | Optimize multi-stage filling |
| Poor transparency | Low mold temperature | Increase mold temperature |
| Silver streaks | Moisture | Improve material drying |
| Burn marks | Poor venting | Improve exhaust system |
PMMA and PC Are Not the Same
PMMA and PC are both used for transparent products, but their molding behavior is different.
PMMA provides excellent clarity and surface appearance. However, it is generally more brittle.
PC has higher impact strength, but it can also suffer from high internal stress, cracking, and optical defects if processed incorrectly.
Therefore, the material should be selected according to the actual product requirements rather than only transparency.
For example, impact-resistant covers may favor PC, while high-clarity decorative parts may favor PMMA.
PMMA Injection Molding Requires Control Before Production
Many PMMA defects cannot be solved efficiently by adjusting machine parameters alone.
The most effective approach starts earlier.
Before mold manufacturing, engineers should review:
- Wall thickness
- Gate location
- Flow length
- Weld lines
- Ejection
- Draft
- Sharp corners
- Cooling layout
- Appearance surfaces
At Fentor Mold, we review these factors during DFM and mold development to reduce tooling and molding risks before production begins.
For projects that require both tooling and part manufacturing, see our injection molding production service.
Final Thoughts
Preventing cracks and flow marks in PMMA injection molding requires a combination of good part design, proper mold design, correct material preparation, and stable processing conditions.
For cracks, the key is to reduce internal stress and stress concentration.
For flow marks, the main focus should be stable melt flow, suitable mold temperature, correct injection speed, and proper gate design.
Because transparent PMMA parts have strict appearance requirements, small molding problems can quickly become visible quality defects.
Therefore, buyers should work with a mold supplier that considers PMMA material behavior from the DFM stage through mold trials and final production.
Fentor Mold supports custom PMMA mold development, mold trials, process optimization, and plastic part production for transparent and appearance-sensitive components.