
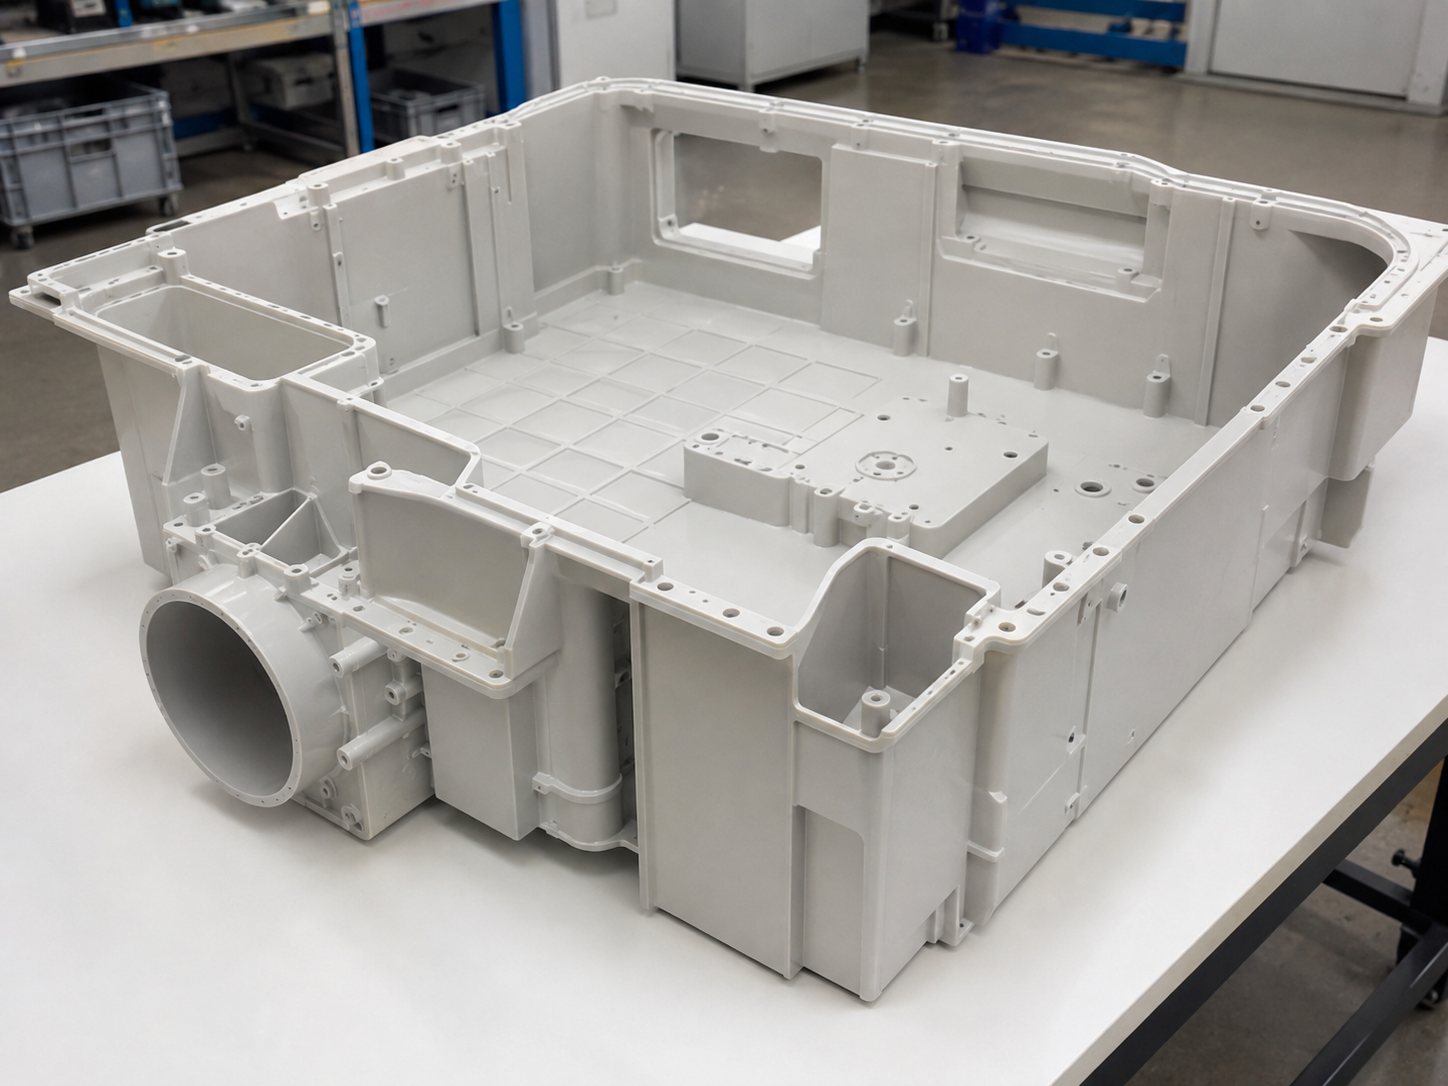
Prototype large plastic parts can be much more difficult to plan than small plastic prototypes.
A dashboard panel, equipment cover, large enclosure or structural plastic component may be too large for some 3D printers, expensive to CNC machine, and not yet ready for a production mold.
For prototype large plastic parts, the right manufacturing method depends on what you actually need to verify.
Do you only need to check the shape?
Do you need a real production material?
Does the prototype need to survive assembly or mechanical testing?
And perhaps most importantly, do you need one part or fifty?
For large plastic components, CNC machining, 3D printing and rapid tooling can all work. But they solve very different problems.
Why Are Prototype Large Plastic Parts More Difficult to Make?
Part size changes almost everything.
As the component becomes larger, you have to consider:
- Machine travel
- Printing volume
- Raw material size
- Material cost
- Machining time
- Warpage
- Assembly accuracy
- Surface finish
- Transportation
- Prototype quantity
A process that works very well for a 50 mm plastic bracket may become expensive or impractical for a 700 mm enclosure.
Large parts also magnify dimensional problems.
A shrinkage difference that is almost invisible on a small component can produce several millimeters of deviation across a large surface.
Flatness and warpage become more important as well.
That is why the first step should not be choosing a manufacturing process.
It should be deciding what the prototype needs to prove.
What Do Prototype Large Plastic Parts Need to Test?
Before comparing CNC, 3D printing and rapid tooling, divide the project into its real requirements.
Appearance
Do you mainly need to see:
- Overall shape
- Styling
- Surface
- Color
- Product proportions
If so, you may not need production material.
Assembly
Do you need to check whether the part fits with:
- Metal brackets
- PCBs
- Other plastic components
- Fasteners
- Clips
- Seals
Dimensional accuracy becomes much more important.
Functional Testing
Will the prototype experience:
- Mechanical load
- Impact
- Heat
- Chemical exposure
- Repeated assembly
- Snap-fit movement
Then the actual material properties matter.
Manufacturing Validation
Sometimes the purpose of the prototype is not simply to test the product.
You need to know whether the design can actually be injection molded.
That requires checking issues such as:
- Draft
- Wall thickness
- Ribs
- Bosses
- Undercuts
- Gate position
- Shrinkage
- Warpage
- Ejection
In this situation, prototype injection molding or rapid tooling becomes much more useful than a simple printed model.
When Is 3D Printing Best for Prototype Large Plastic Parts?
3D printing is usually the fastest option when the design is still changing.
It is particularly useful during the early stages of development.
Large plastic components can sometimes be printed as one piece. When the printer size is limited, the model can also be divided into several sections and joined afterward.
Best Applications
3D printing works well for:
- Appearance verification
- Ergonomic evaluation
- Early assembly checks
- Concept models
- Design presentations
- Low-load testing
- One-off prototypes
One of its biggest advantages is flexibility.
If you discover a problem today, the CAD model can be modified without changing any tooling.
That makes design iteration relatively easy.
Where Does 3D Printing Become Less Suitable?
The limitation appears when the prototype needs to behave like the final injection molded product.
Printed materials and injection molding grades do not always behave in the same way.
Depending on the printing technology, you may also see differences in:
- Strength
- Surface finish
- Directional properties
- Dimensional accuracy
- Heat resistance
- Impact performance
For a large housing that only needs to demonstrate shape and assembly, this may not matter.
But suppose the final product will use glass-filled nylon and needs to support a significant mechanical load.
A printed prototype may tell you whether the geometry is approximately correct.
It may not tell you exactly how the final molded component will perform.
When Is CNC Better for Prototype Large Plastic Parts?
CNC machining is often overlooked for plastic prototypes.
For prototype large plastic parts, however, it can be extremely useful.
The component is machined directly from a plastic block or plate.
This allows manufacturers to use engineering plastics such as:
- ABS
- POM
- PA
- PC
- PMMA
- PE
- PP
depending on the project and raw material availability.
CNC Is Particularly Useful When You Need:
- Better dimensional accuracy
- Actual engineering plastic
- Flat surfaces
- Accurate holes
- Precise mating features
- Functional assembly testing
- Only a few prototypes
A CNC machined prototype can often provide a better indication of mechanical behavior than a basic printed model.
CNC Works Well for Large Flat or Structural Parts
Consider a large equipment housing.
The product may include:
- Mounting holes
- Locating features
- Screw bosses
- Connector openings
- Flat mating surfaces
If the main objective is verifying assembly, CNC machining can be very effective.
The important mating features can be machined accurately.
This can allow engineers to identify assembly problems before committing to tooling.
But CNC Machining Has Its Own Limitations
A machined component is not exactly the same as an injection molded component.
Injection molding creates features that CNC machining may struggle to reproduce economically.
Examples include:
- Deep ribs
- Thin walls
- Complex internal structures
- Multiple undercuts
- Integrated clips
- Hollow geometries
Sometimes a machined prototype needs to be simplified.
Several pieces may also be machined separately and assembled afterward.
For this reason, CNC is excellent for testing certain design features but does not completely replace molded prototypes.
When Does Rapid Tooling Make Sense for Prototype Large Plastic Parts?
At some point, the design becomes stable enough that another 3D printed or CNC prototype provides little additional value.
Now you need real molded parts.
This is where rapid tooling becomes attractive.
A simplified prototype mold can be manufactured using aluminum or softer mold steel instead of building the complete long-life production mold immediately.
The mold is then used to produce actual injection molded components.
This is particularly useful when you need to validate:
- Final resin
- Shrinkage
- Warpage
- Assembly
- Surface appearance
- Mechanical behavior
- Injection molding feasibility
For projects approaching production, prototype injection molding can bridge the gap between prototype development and a full production mold.
Why Does Rapid Tooling Matter More for Large Plastic Parts?
Large injection molded parts can be sensitive to processing conditions.
Common concerns include:
- Uneven filling
- Weld lines
- Sink marks
- Warpage
- Long flow distances
- Pressure loss
- Uneven cooling
You cannot fully reproduce these effects with CNC machining or 3D printing.
For example, imagine a large plastic panel that appears completely flat when CNC machined.
Once injection molded, uneven shrinkage may cause the same part to bend.
The CAD file did not change.
The material may even be similar.
But the manufacturing process changed.
That is why a real molding trial can become important before committing to expensive production tooling.
Prototype Large Plastic Parts: CNC vs 3D Printing vs Rapid Tooling
There is no single best process for every project.
A practical comparison looks like this:
| Requirement | 3D Printing | CNC Machining | Rapid Tooling |
|---|---|---|---|
| Early concept validation | Excellent | Good | Poor |
| Fast design changes | Excellent | Good | Limited |
| One prototype | Excellent | Good | Expensive |
| Dimensional verification | Moderate | Excellent | Excellent |
| Actual production resin | Limited | Good | Excellent |
| Injection molding validation | No | No | Yes |
| Assembly testing | Good | Excellent | Excellent |
| Mechanical testing | Moderate | Good | Excellent |
| Multiple prototypes | Moderate | Moderate | Excellent |
| Production-like surface | Limited | Good | Excellent |
The important point is that these methods should not always compete with each other.
They can also be used at different stages of the same project.
Should You Use More Than One Method for Prototype Large Plastic Parts?
Very often, yes.
A large plastic product might follow this path:
3D Printing → CNC Machining → Rapid Tooling → Production Mold
But not every project needs every stage.
For example:
Early Design
Use 3D printing.
The product dimensions and appearance are still changing.
There is little reason to manufacture expensive tooling.
Design Nearly Final
Use CNC machining.
Now you need more accurate assembly verification.
Design Frozen
Use rapid tooling.
You want real injection molded parts to confirm material behavior and molding performance.
Production Confirmed
Move to the final injection mold.
This staged approach can prevent expensive tooling changes.
Part Size Changes the Best Method for Prototype Large Plastic Parts
One mistake is discussing prototyping without considering the actual dimensions of the product.
Large parts create practical manufacturing limits.
Suppose your product measures:
800 × 500 × 180 mm
You cannot simply ask:
Is CNC or 3D printing cheaper?
First check whether suitable equipment can manufacture the product.
For CNC machining, consider:
- Machine travel
- Material block size
- Fixture method
- Machining depth
For 3D printing, consider:
- Printer build volume
- Whether the part needs splitting
- Joint positions
- Post-processing
For rapid tooling, consider:
- Mold size
- Injection molding machine capacity
- Required clamping force
- Shot weight
A technically possible process is not always the most practical one.
Material Choice Also Affects Prototype Large Plastic Parts
Suppose the production material is ABS.
You may have several reasonable prototype options.
Now consider a component using:
- PA66 GF30
- POM
- Flame-retardant PC
- TPE
- Glass-filled PBT
The prototype requirements become different.
If the purpose is testing appearance, substitute materials may be acceptable.
If the purpose is testing structural performance, using a similar material becomes more important.
If the purpose is confirming injection molding behavior, actual molded material is usually the better choice.
For example, glass fiber orientation and molded shrinkage cannot be accurately reproduced by simply machining the same resin from a block.
The prototype method must match the question you are trying to answer.
Don’t Ignore Wall Thickness in Prototype Large Plastic Parts
Large plastic products often contain large surface areas.
Designers sometimes increase wall thickness because they assume a thicker part will be stronger.
That can create other problems during injection molding:
- Sink marks
- Longer cooling time
- Higher material usage
- Uneven shrinkage
- Warpage
A 3D printed prototype may look perfectly acceptable even though the same wall structure is difficult to injection mold.
Before rapid tooling or production mold manufacturing, a proper DFM review should therefore examine:
- Wall thickness
- Rib thickness
- Boss design
- Draft
- Parting line
- Gate options
- Ejection
Our injection mold design guide discusses these tooling considerations in more detail.
Prototype Large Plastic Parts Need Real Assembly Testing
For larger products, dimensional reports alone do not tell the whole story.
A component may technically meet individual dimensions while still creating problems during assembly.
You should test the prototype together with the actual mating components whenever possible.
Check:
- Hole alignment
- Gap between panels
- Clip engagement
- Screw alignment
- Connector position
- Flatness
- Sealing surfaces
- Overall assembly force
Large assemblies often involve tolerance accumulation.
Several small dimensional deviations can combine into one obvious assembly problem.
Catching this before production tooling can save a significant amount of rework.
When Should You Skip Rapid Tooling?
Rapid tooling is useful, but it should not be added automatically.
You may not need it when:
- The design is simple
- The product geometry is already proven
- The resin is familiar
- The dimensional requirements are not difficult
- Production tooling can be modified easily if necessary
In these cases, going directly from CNC or 3D printed prototypes to a production mold may make more sense.
Rapid tooling should solve a specific risk.
It should not become an extra stage simply because the option exists.
When Is Prototype Injection Molding Worth the Cost?
Prototype injection molding becomes especially valuable when the final product has significant uncertainty around:
- Warpage
- Shrinkage
- Assembly
- Material behavior
- Surface appearance
- Mechanical performance
- Molding feasibility
It is also useful when you need tens or hundreds of functional samples rather than one or two prototypes.
Those parts can then be used for:
- Engineering testing
- Customer evaluation
- Certification work
- Pilot assembly
- Market testing
- Early-stage production
This is one reason prototype molds can be useful between product development and injection molding production.
What Information Should You Send for a Prototype Large Plastic Parts Quote?
Sending only an STL file usually does not give the manufacturer enough information to recommend the best process.
A useful RFQ should include:
3D CAD File
STEP or another editable engineering format is normally more useful than screenshots.
Overall Dimensions
Large part size immediately affects equipment selection.
Quantity
There is a major difference between needing:
- 1 part
- 5 parts
- 50 parts
- 500 parts
Quantity can completely change the most economical manufacturing method.
Material
Specify the final resin if known.
If substitute material is acceptable for prototype testing, mention that as well.
Prototype Purpose
Tell the supplier what you are testing:
- Appearance
- Assembly
- Dimensions
- Load
- Temperature
- Final molding process
This information is often more important than simply saying “I need a prototype.”
Surface Requirements
Specify whether you need:
- As-machined surface
- Painting
- Polishing
- Texture
- Production-like finish
What Is the Best Method for Prototype Large Plastic Parts?
The answer depends on the stage of your project.
Choose 3D printing when the design is still changing and you mainly need to verify shape, appearance or basic assembly.
Choose CNC machining when you need better dimensional accuracy, engineering plastic and reliable assembly testing without investing in tooling.
Choose rapid tooling or prototype injection molding when the design is close to final and you need to validate real injection molded material, shrinkage, warpage and production behavior.
For many prototype large plastic parts, the cheapest method is not necessarily the best method.
The better question is:
Which process can answer the development question you have right now?
Choosing the prototype method around that question avoids spending money on accuracy you do not need—or testing a prototype that cannot tell you whether the final product will actually work.
At Fentormold, we support prototype large plastic parts from prototype injection molding through injection mold manufacturing and production. Reviewing the CAD model, material, dimensions, target quantity and testing purpose first makes it much easier to choose a practical development route.