
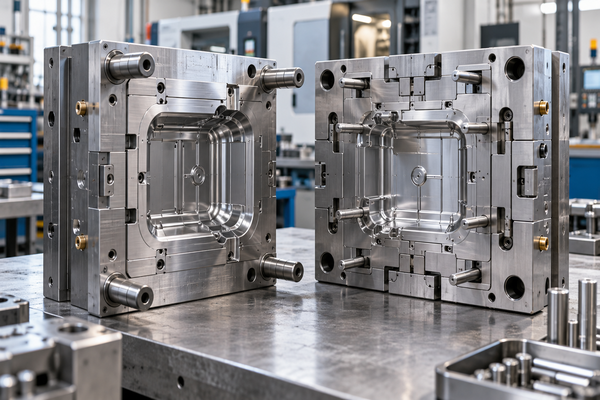
Vacuum venting in injection molding helps remove trapped air and gas from a mold cavity before or during filling. It can reduce burn marks, short shots, and other defects caused by poor air removal. However, not every injection mold needs a vacuum system.
Traditional mold vents work well for many plastic parts. Yet deep ribs, thin walls, blind pockets, and fast filling speeds can make air removal difficult. As a result, trapped gas may stop molten plastic from filling the cavity or damage the part surface.
At Fentor Mold, venting is an important part of DFM analysis and mold design. For automotive and industrial projects, engineers must consider part geometry, material, and production needs before choosing a venting method.
This guide explains how vacuum venting in injection molding works, when you need it, and whether the extra cost makes sense.
What Is Vacuum Venting in Injection Molding?
Vacuum venting in injection molding is a method that actively removes air and gas from a mold cavity through a controlled vacuum system.
Standard mold vents allow air to escape as molten plastic enters the cavity. In contrast, vacuum venting uses negative pressure to draw air out before or during filling.
A typical vacuum system may include:
- Vacuum pump
- Vacuum tank or reservoir
- Vacuum valves
- Mold sealing parts
- Vacuum ports and channels
- Pressure sensors and controls
These parts help reduce the amount of trapped air inside the mold.
However, the mold must have suitable sealing. Otherwise, air leakage can lower the vacuum level and reduce performance.
How Does Vacuum Venting in Injection Molding Work?
Vacuum venting in injection molding removes air from the cavity before molten plastic reaches critical areas.
The process usually includes four main steps.
Step 1: Close and Seal the Mold
First, the injection molding machine closes the mold. The sealing system limits air leakage around the parting line, moving parts, and vacuum connections.
Step 2: Activate the Vacuum System
Next, the vacuum pump or reservoir draws air from the cavity. The system must reach the required vacuum level within the available process time.
Step 3: Inject Molten Plastic
Once the vacuum reaches the target level, injection begins. Depending on the system design, vacuum extraction may continue during part of the filling stage.
As a result, less trapped air remains inside the cavity.
Step 4: Close the Vacuum Path
The vacuum valve closes before molten plastic can enter the vacuum line.
Finally, the molding cycle continues with packing, cooling, and ejection.
Proper timing matters. If vacuum extraction starts too late or stops too early, the system may not provide enough benefit.
When Is Vacuum Venting in Injection Molding Needed?
Vacuum venting in injection molding is most useful when traditional vents cannot remove trapped air effectively.
However, engineers should first identify the cause of the defect. Many air-trap problems can be solved without adding a vacuum system.
Deep Ribs and Blind Pockets
Deep ribs and blind pockets often trap air at the end of filling.
For example, a plastic housing may contain narrow ribs that molten plastic must fill quickly. If air cannot escape, the plastic may fail to fill these features.
In many cases, ejector pin vents or removable inserts can solve the problem. However, vacuum venting may help when these methods are not enough.
Thin-Wall Plastic Parts
Thin-wall parts often require fast injection speeds. As a result, trapped air has less time to escape.
This can lead to burn marks or incomplete filling.
Vacuum venting may improve air removal in suitable thin-wall molds. Still, engineers should first check wall thickness, gate position, injection speed, and material temperature.
Complex Automotive Plastic Components
Automotive parts often contain ribs, clips, mounting holes, and narrow flow paths.
Typical examples include:
- Automotive HVAC housings
- Electrical connector housings
- Automotive control housings
- Precision plastic brackets
- Selected automotive lighting components
- Complex interior plastic parts
These parts may contain difficult end-of-fill areas. Therefore, vacuum venting can help when normal vents cannot provide stable filling.
Parts With Repeated Burn Marks
Burn marks may appear when trapped gas becomes highly compressed during filling.
For example, a brown or black mark may form at the end of a long flow path.
If cleaning and improving standard vents does not solve the problem, vacuum venting may help.
However, burn marks can also result from material damage, excessive temperature, or incorrect processing. Therefore, engineers must confirm the root cause before changing the mold.
What Defects Can Vacuum Venting in Injection Molding Reduce?
Vacuum venting in injection molding can help reduce several defects related to trapped gas.
| Molding Defect | Common Cause | Potential Benefit |
|---|---|---|
| Burn marks | Compressed trapped gas | Less gas accumulation |
| Short shots | Air blocks melt flow | Improved filling |
| Weak weld lines | Gas remains between melt fronts | Better melt-front contact |
| Gas marks | Trapped gas affects the surface | Fewer surface defects |
| Unstable filling | Poor air removal | More stable filling |
| High filling resistance | Compressed cavity air | Reduced gas-related resistance |
However, a vacuum system cannot correct every molding defect.
For example, it cannot solve warpage caused by poor cooling or weak clips caused by incorrect part design.
Therefore, engineers should identify the defect before selecting a solution.
Vacuum Venting in Injection Molding vs Traditional Venting
Traditional venting and vacuum venting share the same purpose. Both remove air from the mold cavity.
However, they use different methods.
| Feature | Traditional Venting | Vacuum Venting |
|---|---|---|
| Air removal | Passive | Active vacuum extraction |
| Equipment | Vent grooves and inserts | Pump, valves, seals, and controls |
| Mold complexity | Lower | Higher |
| Initial cost | Usually lower | Usually higher |
| Maintenance | Relatively simple | More equipment to maintain |
| Best application | Most standard molds | Difficult air-trap applications |
| Process control | Basic vent maintenance | Vacuum level and timing control |
Traditional venting should normally be the first choice.
Parting-line vents, ejector pin vents, and removable inserts can solve many common air-trap problems.
In contrast, vacuum venting is more useful when these methods cannot meet filling or quality requirements.
For more information, read our guide on Injection Mold Venting Design.
Key Design Requirements for Vacuum Venting in Injection Molding
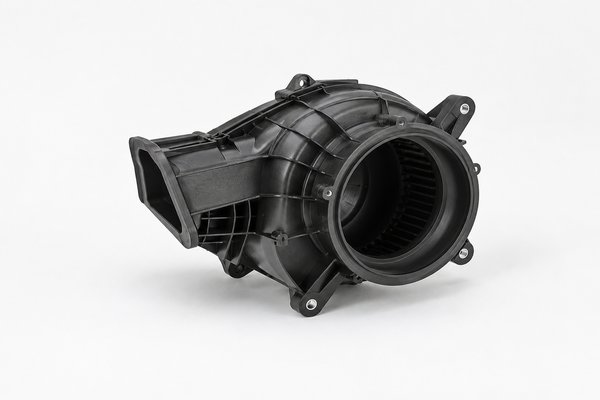
Successful vacuum venting in injection molding requires more than a vacuum pump.
The mold, vacuum equipment, and molding process must work together.
Mold Sealing Design
The mold must maintain enough vacuum during operation.
Common leakage areas include:
- Mold parting surfaces
- Ejector pin holes
- Slider interfaces
- Core-pulling systems
- Vacuum connections
Therefore, engineers must review these areas during mold design.
Also, seals must handle heat, wear, and repeated molding cycles.
Vacuum Channel Location
Vacuum ports should connect to areas where air may become trapped.
These locations often include deep pockets, blind features, and end-of-fill sections.
A vacuum port in the wrong location may provide little benefit. For this reason, engineers should review the filling pattern before choosing port positions.
Vacuum Pressure and Timing
The system must reach its target vacuum level before the critical filling stage.
However, the correct pressure depends on mold volume, leakage, material, and process needs.
Engineers should not use one fixed vacuum setting for every mold. Instead, they should test the system and record stable settings.
Vacuum Valve Protection
Molten plastic must not enter the vacuum lines.
Therefore, the system needs suitable valve control and protection.
Otherwise, blocked channels and damaged equipment can increase maintenance costs.
Cleaning and Maintenance
Vacuum channels may collect material residue and processing deposits.
As a result, regular cleaning is important.
Engineers should also check seals, valves, and vacuum pressure during production.
Can Vacuum Venting in Injection Molding Improve Weld Lines?
Weld lines form when separate melt fronts meet inside the cavity.
If trapped gas remains between the flow fronts, it may prevent proper contact.
Vacuum venting in injection molding may help remove this gas and improve weld line quality.
However, weld line strength also depends on:
- Melt temperature
- Mold temperature
- Gate location
- Injection speed
- Material properties
- Flow-front temperature
Therefore, vacuum venting alone cannot guarantee a strong weld line.
For structural automotive parts, mechanical testing may be necessary to confirm final strength.
Vacuum Venting in Injection Molding for Automotive Parts
Automotive injection molding often requires stable quality and accurate part dimensions.
However, complex shapes may create difficult air-trap locations.
For example, HVAC housings may contain deep ribs and narrow passages. Electrical connector housings may contain small cavities and thin features.
These areas may be difficult to vent through the parting line.
Automotive HVAC Housings
HVAC housings often have complex internal structures.
Proper venting helps improve filling around ribs, mounting features, and narrow sections.
Vacuum venting may be useful when local inserts and traditional vents cannot remove trapped gas effectively.
Automotive Electrical Connectors
Electrical connector housings may contain thin walls and small internal features.
These parts require complete filling and reliable dimensions. Therefore, engineers should pay attention to trapped air near narrow features and core pins.
Automotive Precision Components
Some automotive components require stable molding conditions over long production runs.
If trapped gas causes repeated defects, vacuum venting may improve process consistency.
However, the system should only be selected after a technical and cost review.
Fentor Mold supports automotive projects through custom injection mold manufacturing, including DFM reviews and precision tooling development.
What Does Vacuum Venting in Injection Molding Cost?
Vacuum venting in injection molding usually increases the initial tooling and equipment cost.
The price depends on mold size, cavity volume, sealing requirements, and vacuum system design.
Additional costs may include:
- Vacuum pump or reservoir
- Vacuum valves and controls
- Mold sealing parts
- Vacuum channels
- Pressure monitoring
- Mold modifications
- Maintenance and cleaning
However, the total cost should be compared with possible production savings.
For example, better air removal may reduce scrap caused by burn marks and incomplete filling.
This can improve production yield and reduce waste.
Example: Cost of Poor Mold Venting
Consider a hypothetical production project.
| Item | Value |
|---|---|
| Annual production | 200,000 parts |
| Current defect rate | 4% |
| Improved defect rate | 1% |
| Cost per rejected part | $2 |
| Additional vacuum system investment | $5,000 |
If the defect rate decreases from 4% to 1%, the annual reduction in rejected parts is:
200,000 × (4% − 1%) = 6,000 parts
Estimated annual savings:
6,000 × $2 = $12,000
In this example, the additional vacuum system could recover its investment within the first year.
However, these figures are only illustrative assumptions.
Actual savings depend on the defect cause, scrap reduction, maintenance expenses, and production conditions.
Therefore, engineers should confirm the expected benefit through testing.
How to Evaluate Vacuum Venting Before Mold Manufacturing
Before selecting vacuum venting in injection molding, engineers should review the mold design and identify the filling problem.
Step 1: Identify Air-Trap Locations
First, review the part geometry and expected filling direction.
Moldflow analysis can help predict locations where trapped gas may remain. However, mold trial results are also important.
Step 2: Check Existing Vents
Inspect parting-line vents, ejector vents, and insert vents.
Look for blocked channels, incorrect vent positions, or insufficient venting capacity.
Step 3: Review Molding Parameters
Next, check injection speed, material temperature, and other important settings.
Some defects may improve through process changes without major mold modifications.
Step 4: Consider Additional Standard Vents
Before adding a vacuum system, evaluate removable inserts, overflow areas, and extra conventional vents.
These methods are often simpler and less expensive.
Step 5: Evaluate Vacuum Venting
If trapped gas remains a serious problem, compare vacuum venting with the expected tooling and production costs.
For new projects, this review should take place during DFM and mold design.
Step 6: Verify Through Mold Trials
Finally, compare part quality under controlled test conditions.
Check burn marks, short shots, weld lines, and process stability.
The final decision should depend on actual performance.
For ongoing projects, our injection molding production services support process control and consistent part quality.
Vacuum Venting in Injection Molding Design Checklist
Before approving a vacuum-assisted mold design, engineers should review the following items.
| Design Item | What to Check |
|---|---|
| Air-trap locations | Identify critical end-of-fill areas |
| Standard vents | Confirm whether traditional venting is enough |
| Mold sealing | Check parting lines, ejectors, and sliders |
| Vacuum channels | Place ports near trapped gas areas |
| Vacuum capacity | Match the system to cavity volume and leakage |
| Valve timing | Prevent plastic from entering vacuum lines |
| Material | Check resin behavior and gas generation |
| Maintenance | Allow cleaning and seal replacement |
| Production cost | Compare investment with expected savings |
| Mold trials | Confirm actual defect reduction |
This review helps avoid unnecessary equipment costs while improving mold reliability.
Frequently Asked Questions About Vacuum Venting in Injection Molding
What is vacuum venting in injection molding?
Vacuum venting in injection molding uses negative pressure to remove trapped air and gas from a mold cavity before or during filling. It helps improve filling in molds with difficult air-trap areas.
Does every injection mold need vacuum venting?
No. Most conventional molds can use parting-line vents, ejector pin vents, or insert vents. Vacuum venting is mainly useful when these methods cannot provide stable air removal.
Can vacuum venting prevent burn marks?
It can reduce burn marks caused by compressed trapped air. However, burn marks caused by material degradation or excessive melt temperature require other solutions.
Is vacuum venting expensive?
It usually costs more than traditional venting because it requires additional equipment, sealing, and controls. However, lower scrap rates may justify the investment in some projects.
Is vacuum venting suitable for automotive plastic parts?
Yes. Complex automotive housings, electrical connectors, and thin-wall components may benefit when trapped gas affects filling or part quality.
Conclusion
Vacuum venting in injection molding can help reduce air traps, burn marks, short shots, and unstable filling.
However, it is not necessary for every injection mold.
For most plastic parts, traditional venting remains the most practical and cost-effective option. In contrast, complex molds with repeated gas-related defects may benefit from vacuum-assisted venting.
The best solution starts with understanding the part geometry, filling behavior, material, and existing vent design.
Before adding a vacuum system, engineers should compare technical benefits, tooling costs, and long-term maintenance requirements.
If you need help evaluating air traps or improving mold venting, contact Fentor Mold to discuss your next automotive or industrial injection molding project.