
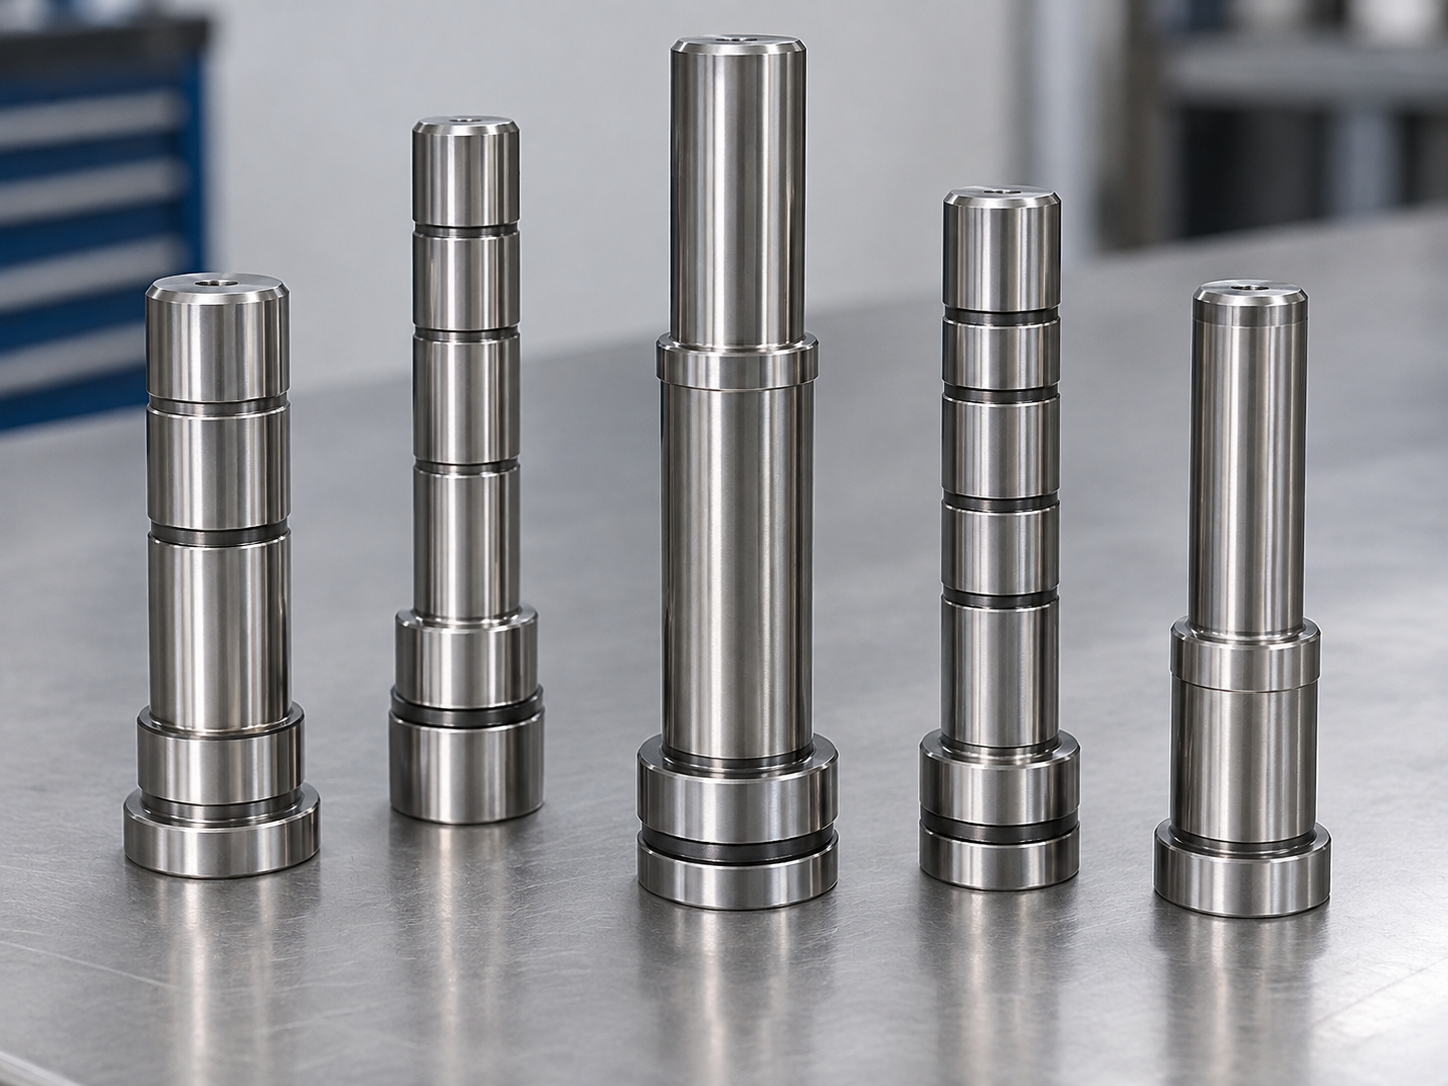
Injection mold support pillars are small components, but they play an important role in mold strength. Their main job is to support the B plate and support plate when high molding pressure acts on the cavity.
Without enough support, the center of the mold can flex backward. As a result, the mold may develop flash, unstable dimensions, insert movement, or poor alignment.
Therefore, support pillar design should not be treated as a standard mold-base detail. The number, position, diameter, height, and contact condition all affect mold stability.
At Fentor Mold, we check support pillar layout together with cavity position, plate thickness, mold size, and expected molding pressure.
What Do Injection Mold Support Pillars Do?
Injection mold support pillars are normally installed between the support plate and the bottom clamping plate.
They help transfer molding force through the mold base.
A typical mold may have:
- Mold feet around the outside
- Support pillars in the center
- B plate above
- Support plate below the core area
- Bottom clamping plate underneath
The mold feet support the outer area. However, the center of the mold may still have a large open space.
Without support pillars, the center section can behave like a bridge.
When cavity pressure increases, the B plate and support plate may bend into this open area.
Therefore, support pillars help reduce unsupported distance and keep the mold structure stable.
Why Injection Mold Support Pillars Are Important
The need for injection mold support pillars becomes greater as mold size and cavity pressure increase.
For example, a small mold with a compact cavity may need only limited central support.
However, a large mold with a wide cavity can create much higher force.
The risk also increases when the mold has:
- Large projected area
- Deep cavity
- Thin mold plates
- Large inserts
- High packing pressure
- Glass-filled material
- Thin-wall products
- Large unsupported center area
In these situations, proper support can reduce mold plate movement and help maintain cavity alignment.
What Happens When Injection Mold Support Pillars Are Missing?
Poor support does not always break the mold immediately.
Instead, the first signs may appear as production defects.
| Support Problem | Possible Result |
|---|---|
| Too few support pillars | Plate deflection |
| Pillars too far from cavity | Weak central support |
| Pillars too small | High local load |
| Incorrect pillar height | Poor load transfer |
| Uneven pillar contact | Uneven mold deformation |
| No support under large insert | Insert movement |
| Large unsupported area | Flash or parting-line opening |
For example, a mold may close normally during mold assembly.
However, once injection and packing pressure increase, the center of the mold may move slightly backward.
As a result, flash can appear near the cavity even when the parting surface has been fitted correctly.
Where Should Injection Mold Support Pillars Be Placed?
The position of injection mold support pillars is more important than simply adding more pillars.
In general, pillars should support areas that receive high load.
Place Pillars Under Large Cavity Areas
Large cavity areas create high pressure during filling and packing.
Therefore, support pillars should be located below or close to these areas whenever the mold structure allows it.
This helps transfer force directly into the bottom plate.
Support the Center of the Mold
The middle of a mold is often the weakest area because the mold feet are normally located near the outside.
As a result, the center may have a long unsupported span.
Adding support pillars in this area can greatly reduce plate bending.
Support Large Inserts
Large core inserts can also create concentrated load.
If the area below an insert has weak support, the insert and surrounding plate may move under pressure.
Therefore, the support layout should follow the actual cavity and insert structure.
Avoid Interference With the Ejector System
Support pillars cannot be placed anywhere.
The ejector system occupies much of the same space.
For example, the mold may contain:
- Ejector pins
- Ejector sleeves
- Lifters
- Ejector guide pins
- Return pins
- Ejector rods
- Springs
Therefore, injection mold support pillars must be positioned without blocking ejector movement.
This can become difficult in molds with many ejector components.
In such cases, the designer must balance support strength and available space.
At Fentor Mold, we normally review the support and ejector layouts together instead of designing them separately.
How Many Injection Mold Support Pillars Are Needed?
There is no single correct number.
The required quantity depends on:
- Mold size
- Cavity size
- Plate thickness
- Cavity pressure
- Support pillar diameter
- Mold foot spacing
- Core insert layout
- Ejector component layout
A small mold may need only two or four central supports.
However, a large mold may require many more.
The goal is not to fill every available space with pillars.
Instead, the goal is to reduce unsupported areas and provide enough load capacity where the mold needs it most.
Support Pillar Diameter Matters
A very small support pillar may fit easily into the mold layout.
However, it also carries less load.
If the pillar diameter is too small, local stress increases.
This can create:
- Pillar indentation
- Poor contact
- Uneven loading
- Local plate deformation
Therefore, larger molds often need larger-diameter pillars.
The diameter should match the expected mold load and available installation space.
In addition, the contact surface at both ends should be flat and stable.
Injection Mold Support Pillar Height Must Be Accurate
Height is one of the most important details in injection mold support pillars.
A pillar only works if it actually contacts both supporting surfaces.
If a pillar is too short, even by a small amount, it may carry little or no load.
The surrounding mold structure will deform first before the pillar begins to support it.
On the other hand, if one pillar is too high, it can create uneven contact during assembly.
Therefore, support pillar height should be carefully machined and checked.
For molds with several pillars, their heights should be consistent.
Why Full Contact Is Important
A support pillar should not contact the plate at only one small point.
Good flat contact helps distribute force.
Before mold assembly, technicians should check:
- Pillar end flatness
- Plate contact surface
- Pillar height
- Burrs
- Dirt
- Assembly clearance
Even a small burr can affect the real contact condition.
Therefore, surfaces should be clean before final assembly.
Relationship Between Plate Thickness and Support Pillars
Support pillars cannot completely replace proper mold plate thickness.
A plate that is much too thin may still bend between support points.
Likewise, a very thick plate may still move if the unsupported span is too large.
Therefore, injection mold support pillars and mold plate thickness should be designed together.
A strong mold normally combines:
Proper plate thickness + correct support pillar layout + strong support plate + reasonable mold foot spacing
This creates a more stable structure than relying on only one factor.
For new mold projects, these structural items should be reviewed during injection mold design.
Large Molds Need More Attention
Large molds are more sensitive to support problems.
As mold width increases, the distance between the mold feet may also increase.
This creates a larger unsupported center area.
As a result, plate bending becomes easier.
Large plastic parts may also have a large projected area. Therefore, the total force acting on the mold can be high.
For these molds, designers should pay close attention to:
- Central support
- Support plate thickness
- Pillar quantity
- Pillar diameter
- Mold foot spacing
- Cavity position
Adding support after the mold has already been manufactured is possible in some cases. However, it is usually easier and cheaper to plan it correctly during design.
Injection Mold Support Pillars and Ejector Plate Movement
Poor support can also affect the ejection system.
If the B plate or support structure moves under pressure, guide components may wear unevenly.
Over time, this can contribute to:
- Ejector pin wear
- Ejector plate tilting
- Return pin side loading
- Lifter misalignment
If the ejection system begins to return unevenly, technicians should also inspect related injection mold return pin problems.
However, support pillars should never interfere with ejector plate travel.
The pillar arrangement must leave enough space for all moving components.
How to Check Injection Mold Support Pillars
Support pillars should be checked during assembly and maintenance.
A simple inspection can include:
| Inspection Item | What to Check |
|---|---|
| Pillar position | Close to high-load areas |
| Pillar quantity | Enough for mold size |
| Pillar diameter | Suitable for expected load |
| Pillar height | Full contact |
| End surface | Flat and clean |
| Plate surface | No burrs or damage |
| Ejector clearance | No interference |
| Wear marks | Uneven load or movement |
In addition, unusual wear on one pillar can indicate uneven force distribution.
If one pillar carries much more load than the others, the overall support layout should be reviewed.
Do More Support Pillars Always Mean a Better Mold?
Not necessarily.
Adding many pillars can reduce available space for ejector components.
It can also make assembly more difficult.
Therefore, the goal is not maximum quantity.
Instead, designers should use enough pillars in the correct places.
For example, four correctly positioned pillars near the high-load area may provide better support than eight pillars placed far from the cavity.
This is why layout matters more than quantity alone.
How to Prevent Mold Deflection With Support Pillars
To reduce mold deflection, follow several basic rules:
- Identify high-pressure cavity areas.
- Reduce long unsupported distances.
- Add support pillars near the mold center.
- Support large core inserts.
- Select enough pillar diameter.
- Keep pillar heights consistent.
- Ensure full contact at both ends.
- Avoid ejector system interference.
- Check support together with plate thickness.
- Inspect support condition during mold maintenance.
These steps are simple. However, they can prevent many structural problems later.
When Should the Support Layout Be Reviewed?
The support layout should be reviewed if the mold shows:
- Flash that appears only at high pressure
- Unstable parting lines
- Repeated insert movement
- Abnormal plate wear
- Ejector alignment problems
- Unexpected mold deflection
- Uneven support pillar wear
Do not immediately increase machine clamping force.
Higher clamping force may reduce visible flash, but it does not correct a weak mold structure.
Instead, check the mold plate and support condition first.
For molds with complex moving components, additional protection such as an injection mold limit switch may help prevent secondary collision damage. However, a sensor cannot replace proper mechanical support.
Final Thoughts
Injection mold support pillars are a simple but important part of mold base design.
Their job is to reduce unsupported plate areas and transfer cavity load through the mold structure.
However, good support depends on more than pillar quantity.
Position, diameter, height, contact, mold plate thickness, and ejector clearance must all work together.
For large molds and high-pressure applications, this becomes even more important.
At Fentor Mold, we review support pillar layout as part of the complete mold structure. Correct support at the design stage can reduce mold deflection, protect component alignment, and avoid expensive changes after production begins.