
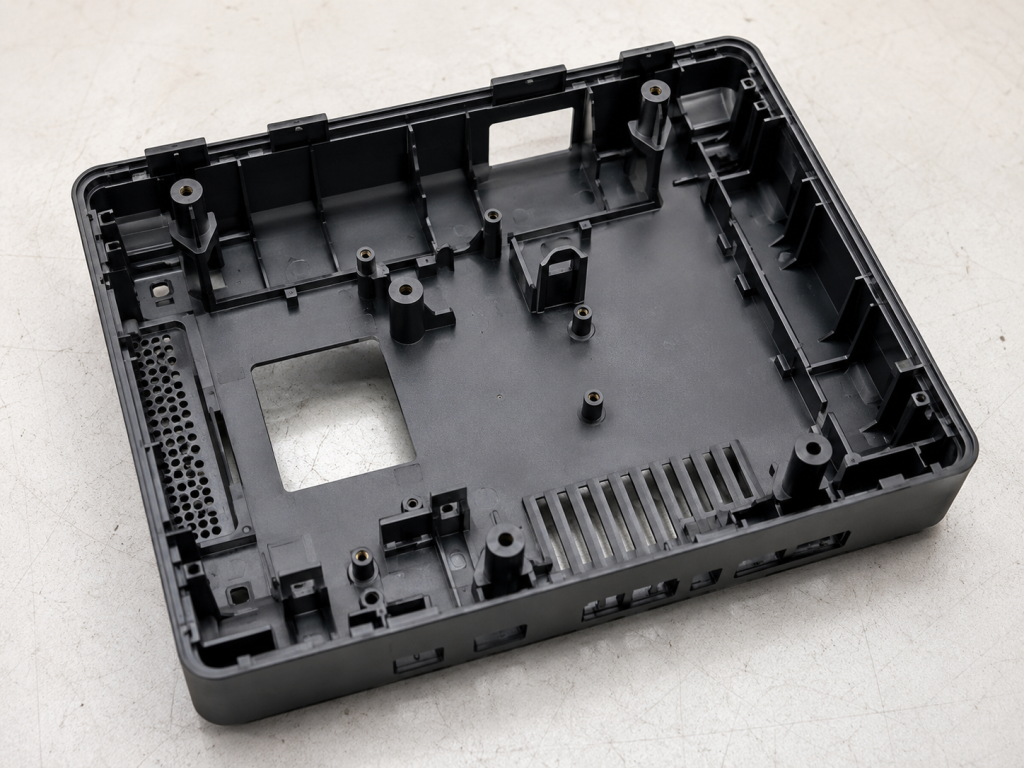
Plastic housing injection molding is widely used for electronic devices, industrial controls, medical equipment, appliances, automotive electronics, instruments, and consumer products.
Plastic housings often look simple from the outside. From a mold-making point of view, they are not.
A housing may have a large cosmetic surface on one side and a dense structure of ribs, bosses, clips, screw posts, connector openings, and locating features on the other. If these features are not considered together, the first mold trial can quickly reveal sink marks, warpage, uneven gaps, weak bosses, visible weld lines, or difficult ejection.
For a plastic housing injection molding project, the important decisions therefore start well before the mold is machined.
This guide looks at the areas we normally pay attention to when reviewing a housing project: part structure, material, mold design, appearance requirements, molding stability, and supplier capability.
What Is Plastic Housing Injection Molding?
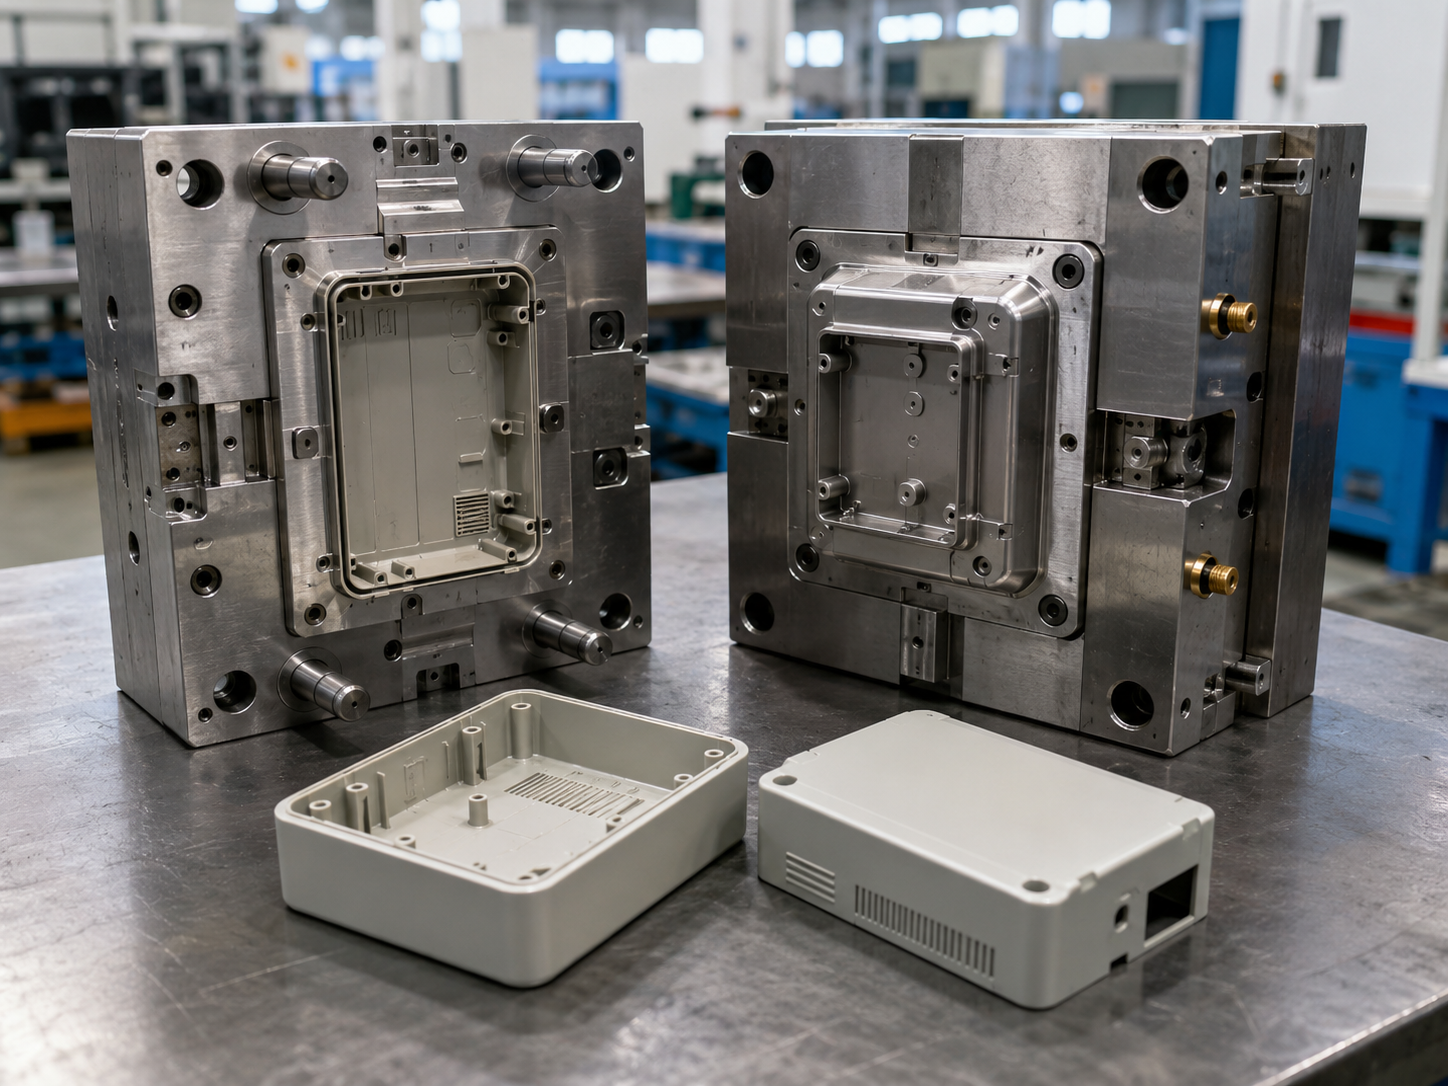
Plastic housing injection molding uses a custom mold to produce plastic shells, covers, cases, and enclosures repeatedly from thermoplastic resin.
Typical molded housing features include:
- Internal ribs
- Screw bosses
- Snap fits
- PCB mounting points
- Ventilation slots
- Connector openings
- Display windows
- Button openings
- Locating pins
- Textured or polished outer surfaces
For a simple housing, tooling may be relatively straightforward.
For a large enclosure with deep walls, side holes, multiple undercuts, tight assembly gaps, and a Class-A cosmetic surface, mold design becomes much more important.
Before cutting steel, the product should be reviewed together with the planned molding process.
For projects that require custom tooling, our Injection Mold service covers mold engineering, mold manufacturing, trial molding, and tooling support for production parts.
Plastic Housing Injection Molding Starts With Good Part Design
One of the most expensive mistakes in housing projects is approving the CAD model for tooling before checking whether the structure is suitable for injection molding.
Small changes made before tooling may take only a few minutes in CAD.
The same changes after T1 may require welding, machining, polishing, texturing again, and another mold trial.
A DFM review should therefore focus on the areas most likely to affect molded-part quality.
Keep Wall Thickness Reasonably Uniform
Large changes in wall thickness create different cooling and shrinkage rates.
For example, imagine a housing with a 2 mm outer wall and a thick solid area behind it for mounting a component. The thick section will cool more slowly, which may leave a visible depression on the exterior.
Typical problems include:
- Sink marks
- Voids
- Warpage
- Longer cooling time
- Dimensional variation
When extra strength is required, adding properly designed ribs is usually better than simply increasing the entire wall thickness.
For plastic housing injection molding, the best wall thickness depends on the resin, part size, flow length, structural requirements, and appearance standard.
Rib Design in Plastic Housing Injection Molding
Plastic housings commonly use ribs to improve stiffness.
The issue is that the customer sees the outside of the part, while most ribs sit directly behind that cosmetic surface.
If a rib is too thick, the extra material shrinks during cooling and can pull the outer surface inward.
This is why a housing can be dimensionally correct but still fail cosmetic inspection.
Rib thickness, height, spacing, and intersections all need to be reviewed.
We pay particular attention to areas where:
- Several ribs meet
- A rib joins a boss
- A rib terminates under a glossy surface
- A thick rib runs behind a large flat wall
These areas are common locations for visible sink.
Screw Bosses Need More Than Enough Plastic
Screw bosses are another frequent trouble spot.
Making a boss thicker does not automatically make it stronger.
An oversized boss may actually create more problems:
- Sink marks on the opposite face
- Cracking during screw installation
- Poor cooling
- Excessive shrinkage
- Local deformation
- Longer cycle time
The boss needs to match the screw type, resin, required torque, wall structure, and assembly load.
In many cases, a cored boss supported by ribs is better than a large solid boss.
The outside appearance also matters. If a screw post sits directly behind a polished front surface, its structure should be checked carefully before tooling.
In plastic housing injection molding, boss design is especially important because a small internal feature can create a visible defect on the opposite cosmetic surface.
Draft Angle Should Be Decided Before Texture
A deep housing wall without enough draft can stick to the mold during ejection.
The result may be:
- Drag marks
- Scratches
- White stress marks
- Deformation
- Excessive ejector marks
This becomes even more important when the housing has a molded texture.
A deeper or heavier texture generally needs more draft than a polished surface.
For that reason, texture selection and draft-angle review should happen together. Adding texture after the mold is finished without checking draft can create unnecessary ejection problems.
Parting Lines Should Follow the Product
On visible products, the parting line is not just a mold-making decision.
It affects appearance.
Where possible, the parting line should follow a natural edge, corner, step, or transition in the housing.
A poor location may leave a line across a visible surface or make flash harder to control.
The mold designer also needs to consider how the cavity and core will shut off around openings, side features, and irregular edges.
If you want a broader explanation of these mold decisions, see our Injection Mold Design Guide.
Undercuts Add Cost and Maintenance
Side openings, hooks, clips, and internal locking features often create undercuts.
These may require:
- Sliders
- Lifters
- Angle pins
- Hydraulic cylinders
- Special inserts
Sometimes the undercut is necessary.
Sometimes a small product-design change can remove it completely.
That is worth checking because every additional mold mechanism adds components, fitting work, maintenance requirements, and another possible source of wear.
For high-volume plastic housings, simplifying an unnecessary side action can make the mold more reliable over its production life.
Material Selection for Plastic Housing Injection Molding
Material choice should come from the application, not from habit.
Two housings with almost the same shape may require completely different resins because one sits on a desk and the other is installed near heat, chemicals, or electrical components.
Material selection also affects shrinkage, warpage, surface quality, mold temperature, drying requirements, and processing stability during plastic housing injection molding.
Here are several common options.
ABS
ABS is widely used for general-purpose housings because it provides a useful balance of:
- Surface appearance
- Impact strength
- Dimensional stability
- Processing performance
- Cost
It is common in instruments, appliances, consumer products, and electronic housings.
ABS is also suitable for many painted or decorated parts.
PC
Polycarbonate is often chosen when higher impact resistance, heat resistance, or transparency is required.
It can work well for:
- Protective covers
- Durable equipment housings
- Electronic products
- Transparent components
PC does, however, require careful drying and molding control.
Residual moisture or excessive processing stress can quickly create appearance or cracking problems.
PC/ABS
PC/ABS is a common choice for electronic and industrial housings.
It combines some of the processing advantages of ABS with improved heat and impact performance from PC.
Flame-retardant grades are also available where electrical applications require them.
PP
PP is useful when low density, chemical resistance, flexibility, or cost is important.
Its shrinkage is higher than ABS or PC, so part geometry and dimensional requirements need more attention.
Living-hinge applications may also make PP attractive.
PA and Glass-Filled Materials
Nylon is often selected for more functional or structural housings.
Glass-filled grades can increase stiffness and strength, but they also change molding behavior.
Possible considerations include:
- Higher mold wear
- Directional shrinkage
- Greater warpage sensitivity
- Visible fiber patterns
- Rougher cosmetic appearance
For highly cosmetic housings, glass-filled resin should be evaluated carefully before the mold finish is finalized.
Surface Finish Requirements in Plastic Housing Injection Molding
A matte industrial cover and a high-gloss consumer enclosure may come from similar CAD geometry, but the tooling requirements are not the same.
Common finishes include:
- High polish
- Fine matte texture
- Leather grain
- EDM finish
- Molded patterns
- Laser texture
A glossy surface can make minor defects much more visible.
Flow marks, weld lines, sink, scratches, and uneven gloss may all become obvious under reflected light.
A texture can hide some visual variation, but it introduces its own requirements for draft and consistent surface treatment.
For plastic housing injection molding, cosmetic requirements should be defined directly on the drawing or DFM report rather than simply writing “good appearance.”
Gate Location in Plastic Housing Injection Molding
The gate determines where material enters the cavity and how the melt flows across the part.
For housing molds, gate position affects:
- Flow length
- Filling pressure
- Weld-line location
- Air traps
- Orientation
- Warpage
- Gate marks
- Surface appearance
If a gate is placed in the wrong area, the mold may still fill, but the result may not be acceptable.
For example, two flow fronts may meet directly across a visible window or around a screw boss.
That weld line may later become both a cosmetic issue and a weak area.
Large housings may require multiple gates or a hot runner system to achieve balanced filling.
Gate location is one of the most important decisions in plastic housing injection molding, especially when the exterior surface has strict appearance requirements.
The decision should be based on part geometry and resin behavior, not simply on the easiest place to machine a gate.
Cooling and Warpage in Plastic Housing Injection Molding
Large housings are especially sensitive to uneven cooling.
If one side of the mold removes heat faster than another, different areas of the part shrink at different rates.
The part may leave the mold looking acceptable and then distort later.
Typical symptoms include:
- Corners lifting
- Long walls bowing
- Twisting
- Uneven top-to-bottom assembly gaps
- Flatness changing after several hours
This is why warpage cannot always be corrected by changing injection pressure or holding time.
The root cause may be part design, gate position, mold temperature, cooling-channel layout, or material orientation.
For larger parts, cooling balance should be reviewed early because warpage problems in plastic housing injection molding can be difficult to correct only through process adjustments.
We have a separate article explaining this problem in more detail: Why Injection Molding Parts Warp After Cooling.
Venting Matters More Than It Looks
When molten plastic enters the mold, the air already inside the cavity needs somewhere to go.
Deep ribs, blind pockets, thin sections, and end-of-fill areas are common places for trapped air.
Poor venting may cause:
- Burn marks
- Short shots
- Weak weld lines
- Gloss differences
- Unstable filling
Simply increasing injection pressure can sometimes make the problem worse because the trapped air becomes compressed more severely.
Good vent locations should be considered during mold design and then checked again during the first mold trials.
Define Cosmetic Standards Before T1
“Surface must look good” is not a useful acceptance standard.
For a plastic housing project, the buyer and supplier should agree on what actually matters.
Useful questions include:
- Which surfaces are cosmetic?
- Is a weld line allowed?
- Where can the gate mark appear?
- Are ejector marks visible?
- What texture is required?
- How much sink is acceptable?
- Are flow marks acceptable?
- Which areas must be free from scratches?
- What assembly gap is acceptable?
This becomes especially important for front covers, handheld products, display housings, and parts seen under strong lighting.
The clearer these requirements are before tooling, the fewer arguments there will be after T1.
Mold Steel for Plastic Housing Injection Molding
Not every housing mold needs the same steel.
A mold for several thousand parts a year has different requirements from one expected to run hundreds of thousands of cycles.
Steel selection depends on factors such as:
- Expected mold life
- Resin type
- Glass-fiber content
- Surface finish
- Mold size
- Wear areas
- Maintenance expectations
Using a cheaper steel may reduce the initial tool price, but it can increase polishing, wear, repair, and downtime later.
For a long-term plastic housing injection molding program, the correct steel choice should be based on total production requirements rather than only the initial tooling quotation.
Hot Runner or Cold Runner?
Both can work well.
A cold-runner mold is generally simpler and less expensive to build and maintain.
The trade-off is additional runner material.
A hot runner can reduce material waste and may improve filling on large or multi-cavity housings.
It also increases tooling cost and requires more specialized maintenance.
Before deciding, compare:
- Part weight
- Runner weight
- Resin price
- Annual volume
- Number of cavities
- Gate requirements
- Production cycle
- Mold maintenance capability
There is no reason to specify a hot runner simply because it sounds more advanced.
What Should a Plastic Housing Manufacturer Check Before Quoting?
A useful quotation should be based on more than a 3D file.
At minimum, the supplier should understand:
- Part size
- Plastic material
- Surface finish
- Annual volume
- Mold-life target
- Dimensional tolerances
- Cosmetic requirements
- Assembly relationship
- Expected molding location
- Special testing requirements
The supplier should also identify anything that is still assumed.
For example, if the resin grade or surface texture has not been confirmed, that should be stated clearly in the quotation.
A supplier that understands plastic housing injection molding should also be able to identify likely tooling and molding risks before the project reaches the mold-building stage.
DFM for Plastic Housing Injection Molding
For housing molds, we normally expect a DFM review to cover:
- Draft
- Wall thickness
- Ribs
- Bosses
- Parting line
- Gate position
- Ejection
- Undercuts
- Slider or lifter requirements
- Weld-line risk
- Sink-mark risk
- Cosmetic surfaces
The DFM does not need to be a 50-page report.
What matters is whether it identifies decisions that could cause trouble after tooling.
A useful DFM for plastic housing injection molding should focus on decisions that affect both mold construction and the final appearance, dimensions, assembly, and production stability of the housing.
Do Not Judge T1 Only by Whether the Part Fills
A mold trial is not successful simply because a complete part comes out.
Housing samples should be checked for:
- Critical dimensions
- Warpage
- Flatness
- Assembly gap
- Screw fit
- Boss strength
- Snap-fit function
- Surface defects
- Gate appearance
- Weld lines
- Sink marks
- Ejector marks
- Texture consistency
It is also important to understand the cause of each problem before changing the mold.
A dimensional issue can come from the steel condition, material shrinkage, cooling, holding pressure, or even the way the part is measured.
Changing steel before confirming the cause can make correction more difficult.
During T1 for a plastic housing injection molding project, the supplier should evaluate both dimensions and appearance instead of only checking whether the cavity fills completely.
Mold Making and Production Should Be Considered Together
A mold that produces five good samples during a trial is not automatically ready for mass production.
Production stability matters.
The mold has to run repeatedly while maintaining:
- Dimensions
- Surface quality
- Ejection stability
- Cooling balance
- Cycle time
- Mold-component reliability
This is one reason some buyers prefer one supplier to handle both tooling and molding.
The team running the mold can provide feedback on cooling, venting, wear, ejection, and process stability instead of treating tooling as a separate one-time project.
Fentormold’s Injection Molding Production service supports projects from mold validation through ongoing plastic-part production.
How to Choose a Plastic Housing Injection Molding Supplier
When comparing suppliers, look beyond the mold price.
A capable supplier should be able to discuss your actual part.
Ask questions such as:
- Where would you place the gate?
- Which areas are likely to sink?
- Do the bosses need redesign?
- Is the housing likely to warp?
- Where will the weld lines appear?
- Is the selected resin suitable for the appearance requirement?
- How will the mold be cooled?
- Which dimensions should be controlled most closely?
- How will the two housing halves be checked after assembly?
The quality of those answers usually tells you more than a generic company presentation.
A supplier that identifies real risks before receiving the order is often more useful than one that simply returns the lowest quotation.
A good plastic housing injection molding supplier should be able to connect part design, mold design, processing, appearance, and assembly requirements rather than treating each issue separately.
Conclusion
Plastic housings combine cosmetic requirements with structural features, which is why they often become more difficult than they first appear.
Wall thickness, ribs, bosses, draft, material, gates, cooling, venting, surface finish, and assembly requirements all influence the final result.
The most effective time to solve these problems is before mold manufacturing begins.
A proper DFM review can identify areas that are likely to sink, warp, stick, crack, or create assembly problems while changes are still inexpensive.
For a new plastic housing injection molding project, provide the supplier with the 3D file, 2D drawing, resin requirement, expected production volume, surface specification, and critical assembly requirements. That gives the mold maker enough information to review the part properly before quoting and starting tooling.