
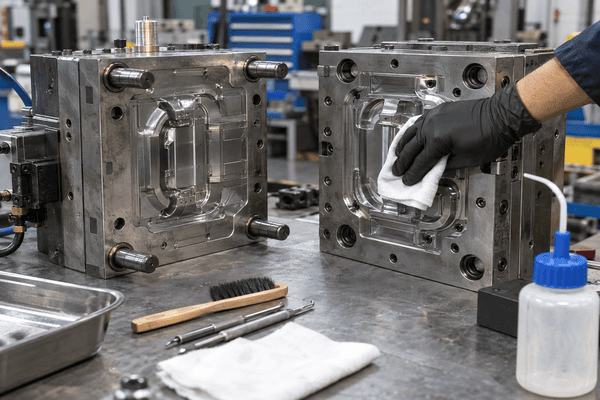
Injection mold cleaning procedures help keep a mold stable during long-term production. During molding, resin residue, gas deposits, oil, dust, and moisture can collect on the cavity, vents, ejector pins, and parting surfaces. If these deposits remain, they may cause burn marks, flash, poor ejection, rust, or unstable part quality. For mold engineers and buyers, cleaning is therefore part of preventive maintenance. A good process removes contamination without damaging precision surfaces. It also keeps vents open, reduces wear, and prepares the mold for the next production run.
When Should Injection Mold Cleaning Procedures Be Performed?
Good injection mold cleaning procedures should start before contamination causes serious molding defects. If a factory waits until the mold becomes heavily dirty, cleaning takes longer. More importantly, deposits may already have affected vents, parting surfaces, or moving parts.
The correct cleaning time depends on several factors. These include resin type, mold temperature, production cycles, mold structure, and surface requirements.
For example, a simple PP housing mold may run for a long time before deep cleaning. However, a high-gloss ABS mold may need more frequent inspection because even small deposits can affect the surface.
Production teams should therefore combine regular inspection with a planned cleaning schedule.
What Production Signs Show That a Mold Needs Cleaning?
Several changes can show that the mold needs attention:
- burn marks appear near the end of fill;
- gloss becomes uneven;
- small flash develops on the parting line;
- parts become harder to eject;
- injection pressure starts to rise;
- residue appears around vents or gates;
- oil and dust collect around ejector areas.
Vent condition deserves special attention.
Very small vent grooves can collect resin residue, additives, oil, and dust. When these deposits reduce vent depth, trapped gas cannot escape easily. As a result, the part may develop burn marks or short shots.
Our guide to injection mold venting design explains how vent size and position affect mold filling.
However, operators should not wait for defects before cleaning the tool. They should also set cleaning points based on cycles or production hours.
Should a Mold Be Cleaned After Every Production Run?
Not every mold needs deep cleaning after each run.
A short production run with clean resin may only need a visual check, light cleaning, lubrication, and rust protection.
A long production run may need several checks before production ends.
Therefore, mold cleaning frequency should depend on real production conditions instead of one fixed rule.
For example, glass-filled materials can increase wear around sliders and ejector parts. Cosmetic molds may need more frequent cleaning because small deposits can affect appearance.
For this reason, cleaning should form part of a wider injection mold maintenance program.
What Are the Correct Injection Mold Cleaning Procedures?
Correct injection mold cleaning procedures should remove contamination while protecting the mold surface. Technicians should always start with inspection. They should not begin with strong chemicals or hard tools.
First, check the cavity, core, vents, gate area, parting surface, ejector system, and moving parts. Look for residue, rust, scratches, leakage, and unusual wear.
A practical cleaning process can follow these steps:
- Stop production and make the machine safe.
- Let the mold reach a safe cleaning temperature.
- Remove loose resin, dust, and oil.
- Clean the cavity and core.
- Check vents, gates, runners, and parting surfaces.
- Inspect ejector pins, sliders, and lifters.
- Dry all cleaned areas.
- Lubricate moving parts where needed.
- Add rust protection before storage.
- Record the cleaning result.
This simple process helps teams avoid missed areas.
How Should the Core and Cavity Be Cleaned?
Use the least aggressive cleaning method first.
Soft lint-free cloths, suitable mold cleaners, and soft brushes are usually safer than metal scrapers. Technicians should use extra care on polished or textured surfaces.
A small scratch on a cosmetic cavity may appear on every molded part. For that reason, the cleaning method must match the mold steel, coating, polishing grade, and texture.
Maintenance should also be considered during injection mold manufacturing. Good tooling design makes important areas easier to inspect and service.
Avoid using hard metal tools directly on a precision cavity unless repair work requires them.
Why Must the Mold Be Completely Dry?
Moisture can cause rust during mold storage.
Water and cleaner may remain in deep pockets, screw holes, insert areas, and around ejector components. Therefore, technicians should inspect these areas carefully.
Clean, dry compressed air can help remove remaining moisture.
Before closing the mold, confirm that all areas are dry. If the mold will stay in storage, apply a suitable rust preventive.
This step is simple, but it can prevent expensive polishing and repair work later.
Which Areas Do Injection Mold Cleaning Procedures Often Miss?
Complete injection mold cleaning procedures must cover more than the visible cavity. Some of the most important areas are small and easy to miss.
A cavity can look clean while vents, ejector pins, sliders, or shut-off areas still contain residue.
These hidden deposits can slowly change mold performance.
Why Are Vents and Parting Lines So Important?
Vent grooves are shallow. Even a small amount of residue can reduce their working depth.
Technicians should check:
- end-of-fill vents;
- parting-line vents;
- venting inserts;
- ejector pin vents;
- deep rib areas;
- locations where gas marks often appear.
If the same vent blocks again after a short run, the team should investigate why. Simply cleaning it again may not solve the root problem.
Parting surfaces also need careful cleaning.
Plastic flakes, grease, dust, or damaged steel can prevent the mold from closing correctly. This may lead to flash.
Do not grind a parting surface simply because dirt is difficult to remove. Grinding can change the shut-off condition and create a larger mold problem.
What Should Be Checked Around Ejector Pins and Moving Parts?
Ejector pins, sliders, lifters, guide parts, and wear plates move during almost every molding cycle.
Old grease can mix with dust and metal particles. Over time, this mixture can increase wear.
During cleaning, check for:
- scratches;
- metal powder;
- hardened grease;
- loose parts;
- bent ejector pins;
- dry sliding surfaces;
- unusual wear marks.
Clean the old lubricant before adding new grease.
Do not simply put fresh lubricant over contaminated grease.
This becomes especially important when a mold moves from T1 testing into regular production. During that stage, tool condition and molding stability need to work together. Our injection molding production service covers the transition from mold testing to stable production.
How Should Injection Mold Cleaning Procedures Set the Cleaning Frequency?
Effective injection mold cleaning procedures should use a cleaning interval based on risk and production history. There is no single cycle number that works for every mold.
The best starting point is usually a conservative schedule.
After several production runs, the team can review real data and adjust the interval.
Four factors matter most:
| Factor | Why It Matters |
|---|---|
| Resin | Some materials create more gas, dust, or wear |
| Mold structure | Complex sliders, lifters, and vents need more checks |
| Part appearance | Cosmetic parts show contamination faster |
| Production volume | Long runs increase deposit and wear risk |
A transparent or high-gloss part usually needs shorter inspection intervals.
A hidden structural component may allow longer intervals if filling and ejection remain stable.
Can T1 Trials Help Define the First Cleaning Schedule?
Yes.
T1 gives engineers useful information about more than dimensions and appearance. It can also show where deposits first appear.
For example, suppose an ABS housing has deep ribs. During an extended T1 trial, a small burn mark appears near one rib.
The team should first inspect the end-of-fill vent.
If residue has reduced the vent depth, cleaning injection mold vents may restore stable filling. In that case, the mold may not need an immediate steel change.
This is an important engineering decision.
The team compares:
- cleaning condition;
- vent size;
- process settings;
- mold temperature;
- filling speed;
- actual defect position.
Only after this review should engineers decide whether mold modification is necessary.
The maintenance record should then note that area for future production.
What Information Should Be Recorded After Cleaning?
A useful record can include:
- cycle count;
- cleaning date;
- dirty areas;
- rust condition;
- vent condition;
- replaced parts;
- lubrication work;
- abnormal wear;
- production problems before cleaning;
- part quality after cleaning.
These records help engineers decide whether the cleaning interval is too long or too short.
They also become valuable when a mold moves to another factory.
For that reason, buyers should request maintenance records together with drawings, steel information, spare parts, and other injection mold documentation.
This becomes even more important for molds that must run hundreds of thousands of cycles.
What Should Buyers Ask About Injection Mold Cleaning Procedures?
Buyers should review injection mold cleaning procedures before the mold enters mass production. They should not wait until the first serious maintenance problem appears.
A mold supplier should explain which areas need regular cleaning, which parts may wear, and how the tool should be stored.
This is especially important for molds with:
- sliders;
- lifters;
- hot runners;
- removable inserts;
- high-gloss surfaces;
- textures;
- tight tolerances;
- complex venting.
For these tools, good maintenance access can reduce downtime over the mold life.
Should Cleaning Requirements Be Discussed During the RFQ?
For a very simple mold, detailed cleaning requirements may not change tooling cost much.
However, high-volume or complex tools are different.
During RFQ review, engineering and purchasing teams can ask:
- Which areas need regular cleaning?
- Can technicians reach the critical vents easily?
- Can important inserts be removed without major disassembly?
- Which moving parts need lubrication?
- Which spare parts do you recommend?
- How should the mold be protected during storage?
- Do polished or textured surfaces need special care?
These questions help buyers look beyond the initial mold price.
A mold that is easier to maintain can save many hours of production downtime.
How Does Mold Cleaning Affect Total Tooling Cost?
Routine cleaning usually costs much less than mold repair.
The larger cost comes when poor maintenance leads to:
- blocked vents;
- corrosion;
- damaged polishing;
- worn sliders;
- ejector failure;
- damaged shut-off surfaces;
- unexpected production stops.
Therefore, engineers should compare maintenance cost with production risk.
For example, a removable insert may increase initial mold cost slightly. However, if it gives fast access to a critical vent area, it may reduce future maintenance time.
For a high-volume mold, that can make sense.
For a simple low-volume mold, the extra structure may not be necessary.
The correct decision depends on mold complexity, expected cycles, resin, maintenance access, and the cost of downtime.
FAQ About Injection Mold Cleaning
Can an Injection Mold Be Cleaned While It Is Still in the Machine?
Sometimes.
Operators may perform light surface cleaning while the mold remains in the machine if factory safety rules allow it.
However, deep cleaning may require mold removal or partial disassembly.
Technicians cannot always inspect vents, ejector systems, sliders, lifters, or hidden inserts correctly while the mold remains installed.
Saving a few minutes during cleaning is not useful if an important area gets missed.
Can Compressed Air Be Used for Mold Cleaning?
Yes, but compressed air should only support the cleaning process.
It can remove loose dust and help dry the mold.
However, the air must be clean and dry. Dirty compressed air can add oil or moisture to the tool.
Compressed air also cannot remove hardened deposits, burned resin, corrosion, or old grease.
Those problems need the correct cleaner or maintenance method.
What Is the Difference Between Mold Cleaning and Mold Repair?
Cleaning removes contamination from parts that are still mechanically correct.
Repair fixes worn or damaged mold components.
For example, removing residue from a vent is cleaning. Re-machining a damaged vent is repair.
Cleaning old grease from an ejector system is maintenance. Replacing a bent ejector pin is repair.
This difference matters because repeated cleaning cannot solve mechanical damage.
How Can Rust Be Prevented After Mold Cleaning?
First, remove all moisture.
Then inspect deep pockets, insert areas, ejector locations, and parting surfaces.
If the mold will remain out of production, apply a suitable rust preventive to exposed steel surfaces.
The mold should also stay in a dry storage area.
For long-term storage, regular inspection is still useful because temperature and humidity changes can affect steel surfaces.
Can Poor Cleaning Cause Molding Defects?
Yes.
Blocked vents can cause burns or short shots. Dirt on the parting surface may cause flash. Old grease and contamination around ejector parts can increase wear. Rust can damage cosmetic surfaces.
For this reason, technicians should treat cleaning as part of process control rather than simple housekeeping.
Conclusion
Good injection mold cleaning procedures protect mold surfaces, keep vents open, reduce wear, and lower the risk of unexpected production stops. The correct cleaning interval depends on resin type, mold design, production volume, part appearance, and real maintenance history.
Engineers should also use T1 trials and production records to identify areas that need extra attention. For high-volume tooling, buyers should review cleaning access and maintenance needs during the RFQ stage instead of waiting until the mold enters mass production.
If you are developing a new production mold and want maintenance, mold life, and production reliability considered from the start, contact us today to discuss your tooling and molding requirements.